- GraphQL Tutorial
- GraphQL - Home
- GraphQL - Introduction
- GraphQL - Environment Setup
- GraphQL - Architecture
- GraphQL - Application Components
- GraphQL - Example
- GraphQL - Type System
- GraphQL - Schema
- GraphQL - Resolver
- GraphQL - Query
- GraphQL - Mutation
- GraphQL - Validation
- GraphQL - JQuery Integration
- GraphQL - React Integration
- GraphQL - Apollo Client
- GraphQL - Authenticating Client
- GraphQL - Caching
- GraphQL Useful Resources
- GraphQL - Quick Guide
- GraphQL - Useful Resources
- GraphQL - Discussion
GraphQL - Example
In this chapter, we will create a simple API that returns a greeting message, HelloWorld, and access it using GraphiQL.
Example
This example is based on NodeJS, Express and Apollo server. We will learn to put all the concepts together with the following steps −
Step 1 − Setting up Express
ExpressJS is a web application framework that helps to build websites and web applications. In this example, we will build a GraphQL API on top of the Express framework.
Next step is to create a folder hello-world-server and navigate to the same folder from the terminal. Add package.json, and give a name to the package. Since this package is only used internally, we can declare it private.
{
   "name":"hello-world-server",
   "private":true
}
Install the dependencies for Express server as shown below −
C:\Users\Admin\hello-world-server>npm install express body-parser cors
body-parser is a middleware package which helps Express to handle HTTP Post requests efficiently. cors is another middleware package that handles cross-origin resource sharing.
Create a server.js file within the project folder and type the following in it −
const bodyParser = require('body-parser')
   const cors = require('cors')
   const express = require('express')
   const port = process.env.PORT|| 9000
   const app = express()

   //register middleware
   app.use(bodyParser.json() , cors())
   app.listen(port, () =>  console.log(`server is up and running at ${port}`)
To verify if the Express server is up and running, execute the following code in the terminal window −
C:\Users\Admin\hello-world-server>node server.js
The following output is displayed in the server console. This shows that the express server is running on port 9000.
server is up and running at 9000
If you open the browser and type http://localhost:9000, you will get the following screen −
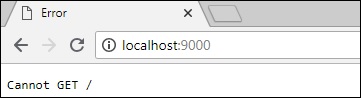
To stop the server, press Ctrl + C.
Step 2 − Install GraphQL and Apollo Server
Now that Express is configured, the next step is to download the following GraphQL dependencies −
- graphql
- graphql-tools
- apollo-server-express@1
We shall use Apollo server v1.0 as it is a stable release. Type the following commands to install these dependencies −
C:\Users\Admin\hello-world-server>npm install graphql graphql-tools apollo-server-express@1
We can verify if these dependencies are installed successfully by checking the package.json file that we created previously.
{
   "name": "hello-world-server",
   "private": true,

   "dependencies": {
      "apollo-server-express": "^1.4.0",
      "body-parser": "^1.18.3",
      "cors": "^2.8.4",
      "express": "^4.16.3",
      "graphql": "^0.13.2",
      "graphql-tools": "^3.1.1"
   }
}
Step 3 − Define the Schema
A GraphQL schema defines what kind of object can be fetched from a service, and what fields it has. The schema can be defined using GraphQL Schema Definition Language. Now, add the following code snippet in the server.js file −
// Adding Type Definitions
const typeDefinition = `
   type Query  {
      greeting: String
   }
Here, the query contains a greeting attribute that returns a string value.
Step 4 − Create a Resolver
The first step in creating a resolver is to add some code to process the request for greeting field. This is specified in a resolver. The structure of the resolver function must match the schema. Add the following code snippet in the server.js file.
// Adding resolver
const  resolverObject = {
   Query : {
      greeting: () => 'Hello GraphQL  From TutorialsPoint !!'
   }
}
The second step is to bind the schema and resolver using makeExecutableSchema. This function is pre-defined in the graphql-tools module. Add the following code snippet in the server.js file.
const {makeExecutableSchema} = require('graphql-tools')
const schema = makeExecutableSchema({typeDefs:typeDefinition, resolvers:resolverObject})
Step 5 − Define Routes to Fetch Data from ReactJS/GraphiQL Application
Add the following code snippet in the server.js file −
const {graphqlExpress, graphiqlExpress} = require('apollo-server-express')

   //create routes for graphql and graphiql
   app.use('/graphql',graphqlExpress({schema}))

   app.use('/graphiql',graphiqlExpress({endpointURL:'/graphql'}))
The graphqlExpress function helps to register the route http://localhost:9000/graphql. The ReactJS application can use this endpoint to query data. Similarly, the graphqliExpress function helps to register the route http://localhost:9000/graphiql. This will be used by the GraphiQL browser client to test the API.
The complete server.js code is as given below −
const bodyParser = require('body-parser')
const cors = require('cors')
const express = require('express')
const port = process.env.PORT||9000
const app = express()

app.use(bodyParser.json() , cors())
const typeDefinition = `
type Query  {
   greeting: String
}`
const  resolverObject = {
   Query : {
      greeting: () => 'Hello GraphQL  From TutorialsPoint !!'
   }
}
const {makeExecutableSchema} = require('graphql-tools')

const schema = makeExecutableSchema({typeDefs:typeDefinition, resolvers:resolverObject})

const {graphqlExpress,graphiqlExpress} = require('apollo-server-express')

app.use('/graphql',graphqlExpress({schema}))
app.use('/graphiql',graphiqlExpress({endpointURL:'/graphql'}))
app.listen(port, () =>  console.log(`server is up and running ${port}`))
Step 6 − Start the Application
Execute server.js using Node.js as follows −
C:\Users\Admin\hello-world-server>node server.js
Step 7 − Test the GraphQL API
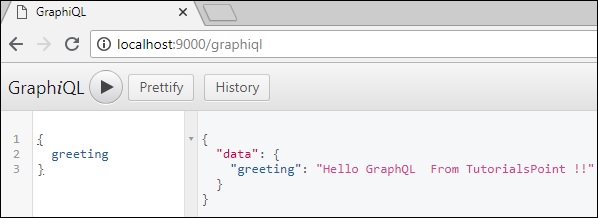
Open the browser and type http://localhost:9000/graphiql. In the query tab of GraphiQL, enter the following −
{
   greeting
}
The response from the server is given below −
{
   "data": {
      "greeting": "Hello GraphQL From TutorialsPoint !!"
   }
}
The following image illustrates the response −
Note − Please ensure that Apollo Server Version 1.0 is used.