- Windows Server 2012 - Home
- Overview
- Installation
- Server Roles
- PowerShell
- Remote Management
- Windows Firewall
- Remote Desktop Management
- Resource Monitor
- Active Directory
- DC Accounts
- File System
- Group Managed Service Accounts
- Group Policy Overview
- DHCP Role
- DNS Role
- Primary Zones
- Manage Records
- IIS Overview
- IIS Security
- Hyper-V
- Advanced Configuration
- Configure WSUS Role
- WSUS Policies & Tuning
- Sharing of Files
- File Manager
- Print Server
- Easy Printing
- Configure Print Drivers
- Network Services
- Backup Management
Remote Desktop Management
In this chapter, we will see how to enable remote desktop application. It is important because this enables us to work remotely on the server. To do this, we have the following two options. For the first option, we have to follow the steps given below.
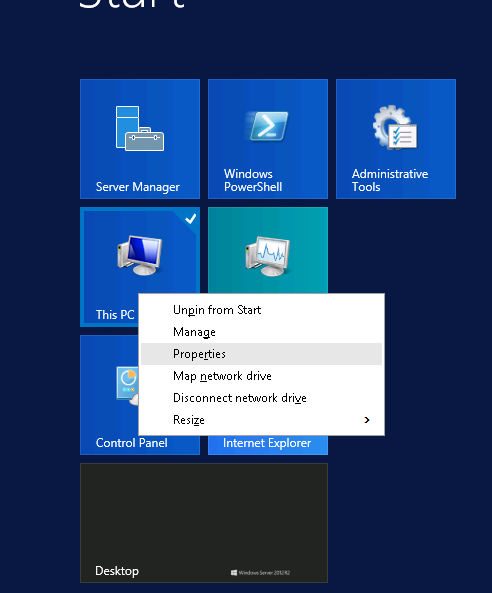
Step 1 − Go to Start → right click This PC → Properties.
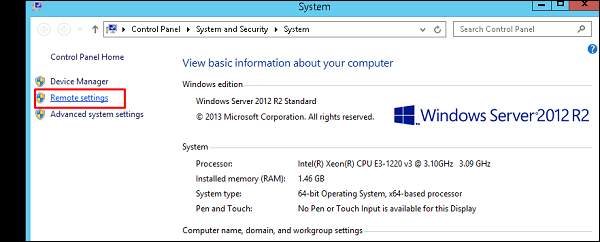
Step 2 − On Left side click Remote Setting.
Step 3 − Check radio button Allow Remote connection to this computer and Check box Allow connection only from computers running Remote Desktop with Network Level Authentication (recommended) → click Select Users.
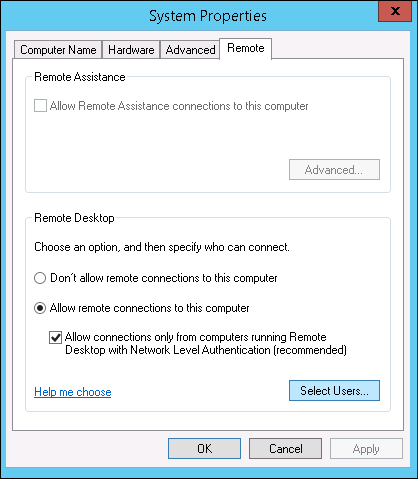
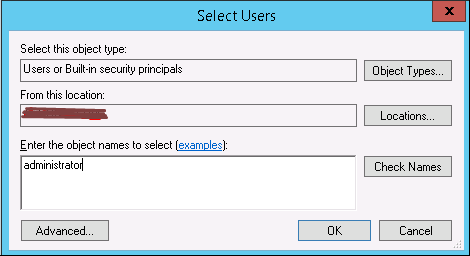
Step 4 − Click Add.
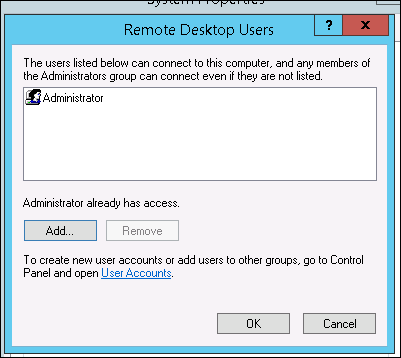
Step 5 − Type user that you want to allow access. In my case, it is administrator → click OK.
For the second option, we need to follow the steps given below.
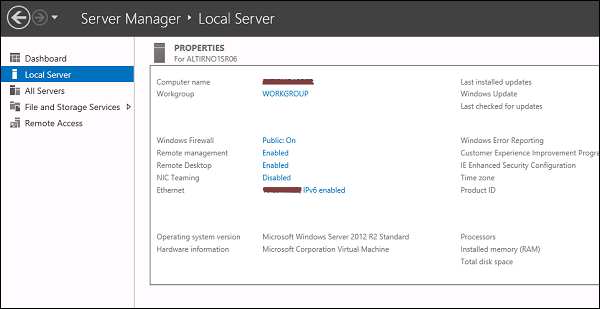
Step 1 − Click on Server Manage → Local Server → click on Enable or Disable, if it is Disabled.