 Data Structure
 Networking
 RDBMS
RDBMS Operating System
 Java
Java MS Excel
 iOS
iOS HTML
HTML CSS
CSS Android
 Python
 C Programming
 C++
C++ C#
C# MongoDB
 MySQL
MySQL Javascript
 PHP
PHP
- Selected Reading
- UPSC IAS Exams Notes
- Developer's Best Practices
- Questions and Answers
- Effective Resume Writing
- HR Interview Questions
- Computer Glossary
- Who is Who
Table of widgets in Python with Tkinter
Tkinter is a popular library in Python for creating graphical user interfaces (GUIs). It provides a wide range of widgets that can be used to build interactive and visually appealing applications. One of the key features of Tkinter is the ability to create tables or grids of widgets. In this article, we will explore how to create a table of widgets using Tkinter and demonstrate some useful techniques.
Tkinter provides a widget called Frame that serves as a container for other widgets. We can use frames to create a table-like structure by arranging multiple frames in rows and columns. Each frame can contain different widgets such as labels, buttons, entry fields, or even other frames. Let's start by creating a basic table structure with labels as the cells. Here is the code
Example
import tkinter as tk
root = tk.Tk()
root.title("Table-like structure by arranging multiple frames in rows and columns")
root.geometry("700x250")
# Create a frame to hold the table
table_frame = tk.Frame(root)
table_frame.pack()

labels = []
for i in range(3):
   row_labels = []
   for j in range(3):
   # Create a label for each cell in the table
      label = tk.Label(table_frame, text=f"Cell {i}-{j}")
      label.grid(row=i, column=j, padx=10, pady=10) # Position the label in the table
      row_labels.append(label)
   labels.append(row_labels)

root.mainloop()
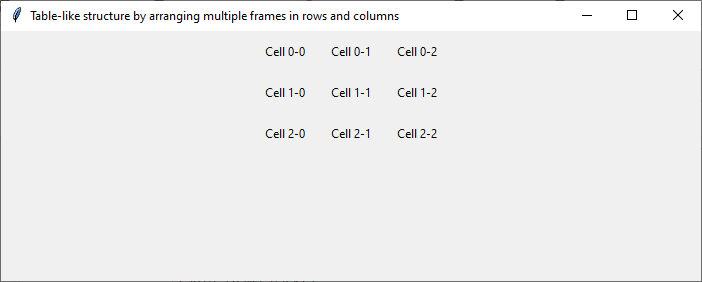
In the code above, we create a Tk instance and a frame called table_frame to hold our table. We iterate over the rows and columns of the table and create labels for each cell. The grid method is used to position the labels in the respective rows and columns. We also add some padding (10 pixels) around each label using the padx and pady parameters.
Output
After running the above code, we will get a Tkinter window using frames to create a table-like structure by arranging multiple frames in rows and columns.

Now let's enhance our table by adding buttons to the cells. We can associate a function with each button to perform some action when it is clicked. Here is the code:
Example
import tkinter as tk

def button_click(row, col):
   print(f"Button clicked: {row}-{col}")

root = tk.Tk()
root.title("Enhancing our table by adding buttons to the cells")
root.geometry("700x250")

table_frame = tk.Frame(root)
table_frame.pack()

buttons = []
for i in range(3):
   row_buttons = []
   for j in range(3):
   # Create a button for each cell in the table
      button = tk.Button(table_frame, text=f"Button {i}-{j}", command=lambda r=i, c=j: button_click(r, c))
      button.grid(row=i, column=j, padx=10, pady=10) # Position the button in the table
      row_buttons.append(button)
   buttons.append(row_buttons)

root.mainloop()
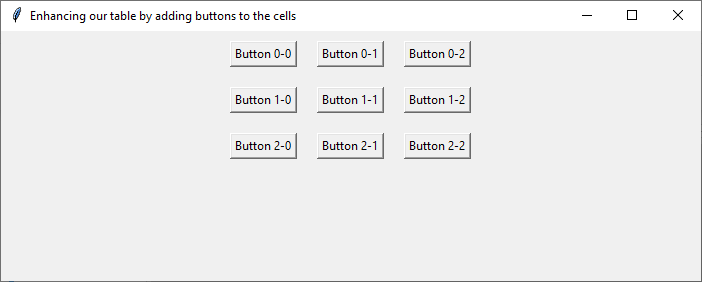
In the code above, we define a button_click function that takes the row and column indices as arguments and prints a message indicating which button was clicked. We create buttons instead of labels and associate the button_click function with each button using the command parameter. We use a lambda function to pass the current row and column indices to the button_click function.
Output
After running the above code, we will get a Tkinter window with an enhanced table having buttons to the cells.

So far, we have seen how to create a static table of widgets. However, in many applications, we may need to update the table dynamically based on user input or data changes. Tkinter provides methods to modify the properties of widgets, allowing us to update the table on the fly.
Let's consider an example where we want to update the text of a label when a button is clicked.
Example
import tkinter as tk

root = tk.Tk()
root.title("Updating the text of a label when a button is clicked.")
root.geometry("700x250")


table_frame = tk.Frame(root)
table_frame.pack()

label = tk.Label(table_frame, text="Original text")
label.grid(row=0, column=0, padx=10, pady=10) # Position the label in the table


def update_label():
   label.config(text="New text") # Update the label's text property

button = tk.Button(root, text="Update", command=update_label)
button.pack()

root.mainloop()
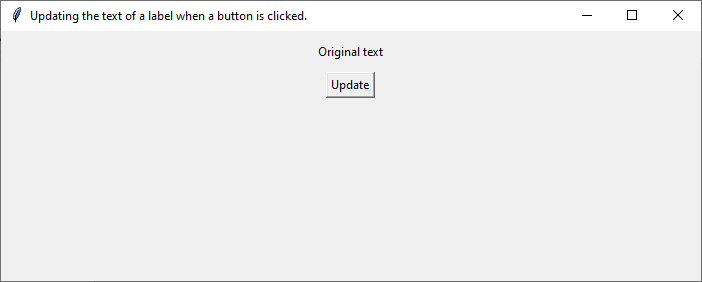
In the code above, we create a label with an initial text and a button labeled "Update". The update_label function modifies the text property of the label using the config method. When the button is clicked, the update_label function is called, and the label's text is changed.
Output
After running the above code, we will get a Tkinter window with an initial tex and a button. When you click the button, the text written on the label will be changed.

You can apply similar techniques to update other widget properties such as the background color, font, or size. By combining these concepts, you can create dynamic tables that respond to user actions or external events.
Conclusion
In conclusion, Tkinter provides a versatile set of widgets that can be arranged in a table-like structure using frames. You can create tables with labels, buttons, entry fields, or any other widget supported by Tkinter. By utilizing the grid system, you can easily position and align the widgets within the table. Additionally, Tkinter allows you to update widget properties dynamically, enabling you to create interactive tables that respond to user input or data changes. With these capabilities, you can build powerful GUI applications with Python and Tkinter.

