- Silverlight - Home
- Silverlight - Overview
- Silverlight - Environment Setup
- Silverlight - Getting Started
- Silverlight - XAML Overview
- Silverlight - Project Types
- Silverlight - Fixed Layouts
- Silverlight - Dynamic Layout
- Constrained vs. Unconstrained
- Silverlight - CSS
- Silverlight - Controls
- Silverlight - Buttons
- Silverlight - Content Model
- Silverlight - ListBox
- Silverlight - Templates
- Silverlight - Visual State
- Silverlight - Data Binding
- Silverlight - Browser Integration
- Silverlight - Out-of-Browser
- Silverlight - Applications, Resources
- Silverlight - File Access
- Silverlight - View Model
- Silverlight - Input Handling
- Silverlight - Isolated Storage
- Silverlight - Text
- Silverlight - Animation
- Silverlight - Video and Audio
- Silverlight - Printing
Silverlight - Project Types
If you create a new project in Visual Studio, you will see four types of project in the right pane of the dialog box. They are −
- Silverlight Application
- Silverlight Class Library
- Class Library (Portable)
- Silverlight Navigation Application
The first two, Silverlight Application and Silverlight Class Library, are straightforward enough. These are analogous to executables in DLLs in the world of classic Windows applications. Both build DLLs because of how Silverlight applications are deployed.
Conceptually, a Silverlight Application project builds a program, which can be run, while the Class Library project builds a library designed to be incorporated into other applications.
You can build a class library if you are planning to build multiple applications, and want to reuse the common code. If you are planning to sell the controls that other people will use in their applications, again a library is the thing to build.
The other project types are a little less obvious, so we will look at those in detail later in this chapter.
Silverlight Web Applications
Silverlight applications are downloaded from the web, so you will normally have a web project associated with the Silverlight project. There are a couple of features of Visual Studio, designed to manage the relationship between these projects.
Let us have a look at a simple example of Silverlight Application project again.
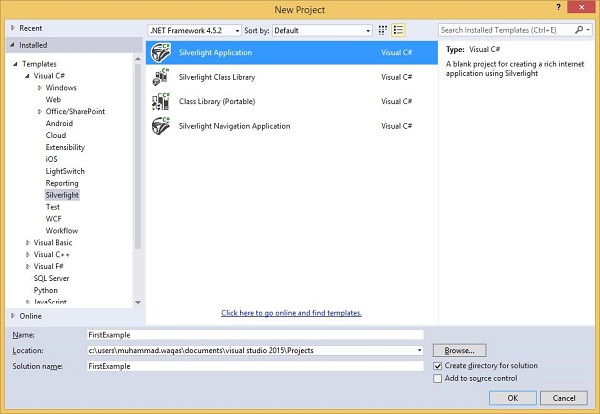
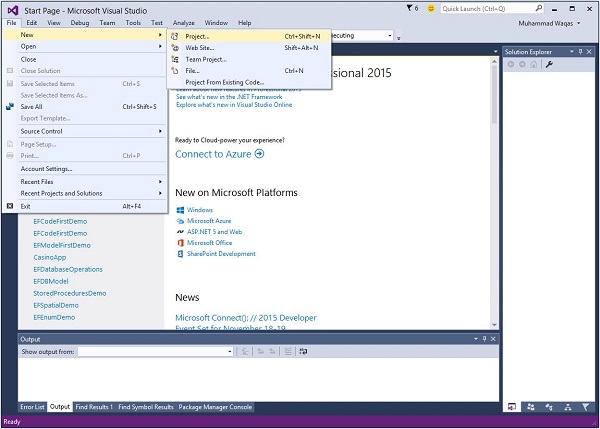
Step 1 − Open Visual Studio. Click the File menu, point to New and then click Project.
Step 2 − A New Project dialog box will open. Under Templates, select Visual C# and then click Silverlight. In the right pane, choose Silverlight Application.
Enter a project name and a location on your hard drive to save your project.
The Silverlight project itself is just going to build the Silverlight content, and that content is just one asset amongst many that are going to make up the whole web application.
Click OK.
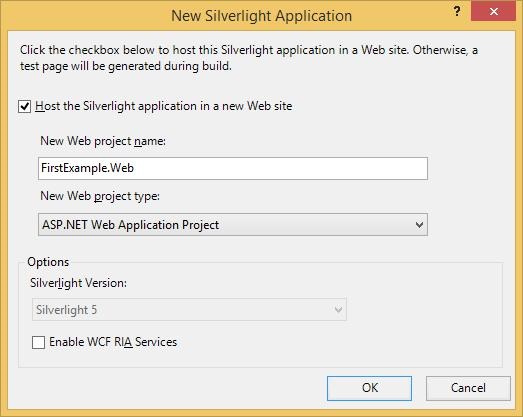
Step 3 − Check the Host the Silverlight application checkbox. The default is an ASP.NET Web Application Project.
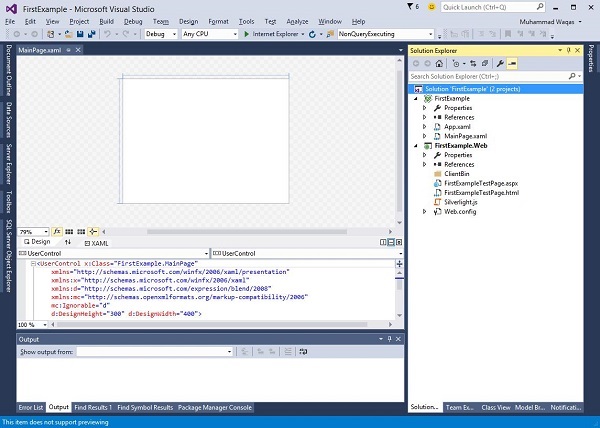
Step 4 − MS-Visual Studio has created two projects, the Silverlight project and an ASP.NET web application. Now, we need an ASP.NET web application. You can see this in the Solution Explorer window as shown below.
Anything that can serve up the content via HTTP will do but this is Visual Studio, and it understands the ASP.NET web technology, so that is what it gives us.
To demonstrate that Silverlight does not depend on any particular server-side technology, let us delete this .aspx file, leaving just the plain static HTML file.
Step 5 − Right-click FirstExampleTestpage.aspx. From the list of options, click Delete.
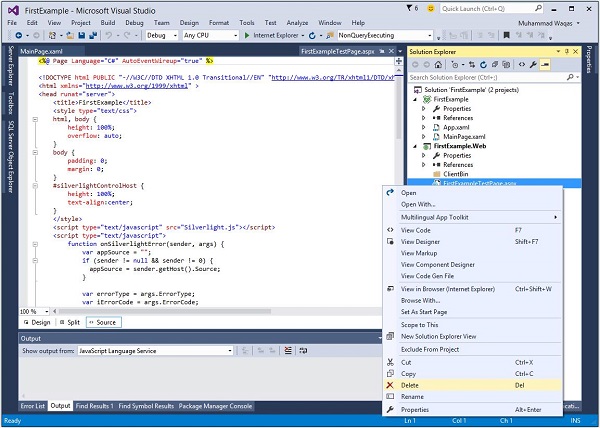
Step 6 − Set FirstExampleTestPage.html as the Start page.

The MainPage.xaml file defines the user interface for Silverlight content. Either you can write XAML code directly or you can also use Toolbox to drag and drop different UI elements.
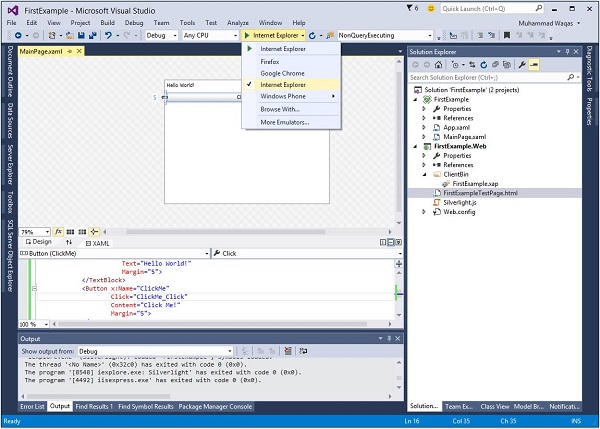
Step 7 − Given below is a simple code in MainPage.xaml in which a Button and a TextBlock are defined inside the StackPanel.
<UserControl x:Class = "FirstExample.MainPage"
   xmlns = "http://schemas.microsoft.com/winfx/2006/xaml/presentation"
   xmlns:x = "http://schemas.microsoft.com/winfx/2006/xaml"
   xmlns:d = "http://schemas.microsoft.com/expression/blend/2008"
   xmlns:mc = "http://schemas.openxmlformats.org/markup-compatibility/2006"
   mc:Ignorable = "d"
   d:DesignHeight = "300" d:DesignWidth = "400">

   <Grid x:Name = "LayoutRoot" Background = "White">
      <StackPanel>
         <TextBlock x:Name = "TextMessage" Text = "Hello World!"
            Margin = "5"> </TextBlock>
         <Button x:Name = "ClickMe" Click = "ClickMe_Click" Content = "Click
            Me!"  Margin = "5"> </Button>
      </StackPanel>
   </Grid>

</UserControl>
Step 8 − This example assumes that you have created an event-handling method named ClickMe_Click. Here is what it looks like in the MainPage.xaml.cs file.
using System.Windows;
using System.Windows.Controls;
namespace FirstExample {
public partial class MainPage : UserControl {
public MainPage() {
InitializeComponent();
}
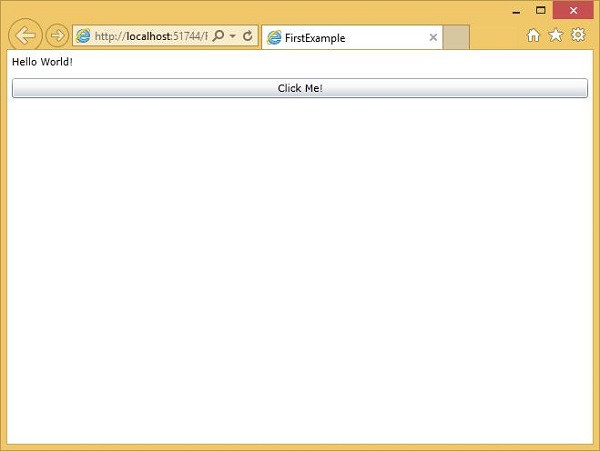
private void ClickMe_Click(object sender, RoutedEventArgs e) {
TextMessage.Text = "Congratulations! you have created your
first Silverlight Applicatoin";
}
}
}
Step 9 − A Silverlight application can be run on any installed browsers.
Step 10 − When the above code is compiled and executed, you will see the following webpage.
Silverlight Navigation Application
The Silverlight Navigation Application template builds a project similar to an ordinary Silverlight app. There is nothing fundamentally different about the two project types. The Navigation template just includes some additional code you could easily add yourself. As the name suggests, it supports web-like navigation within the Silverlight application.
Let us create a Navigation application.
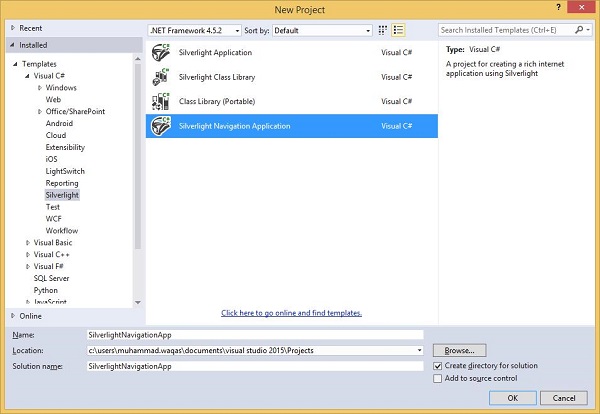
Step 1 − Select Silverlight Navigation Application from the right pane in the New Project dialog box.
Step 2 − Follow the settings as you have done for the Silverlight Web Application.
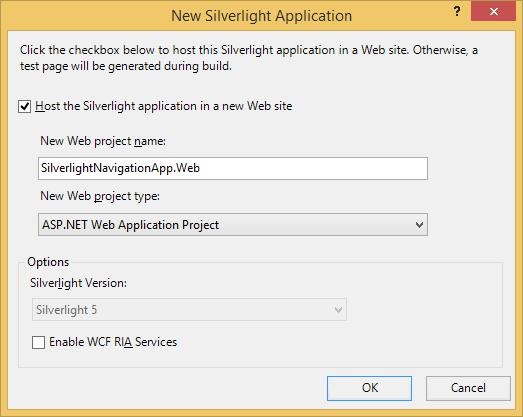
Step 3 − Click the OK button. A window will open as shown below.
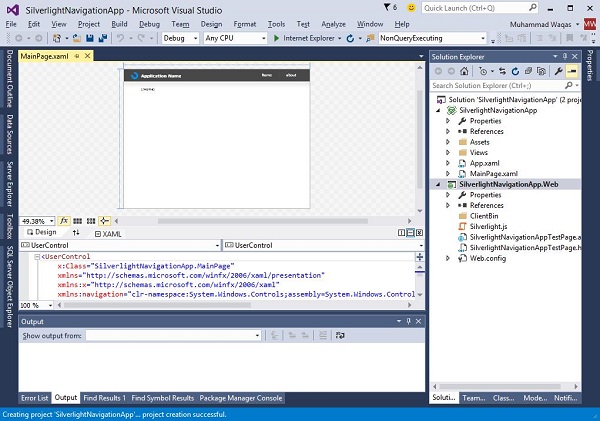
These usually have an associated web project, so we will have one of those. It creates two projects as described before, but as you can see, the default user interface looks a bit less blank.
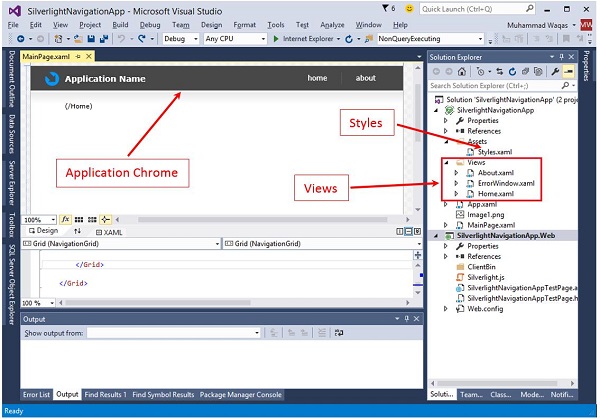
Step 4 − It provides an Application Chrome, including a Navigation bar. The solution contains a few extra files. This Styles file defines the look and feel for the Navigation bar. In this Views folder, we see a couple of pages, and also a window for showing errors.
As you can see, when you run the application, it shows a Home page with some placeholder content.
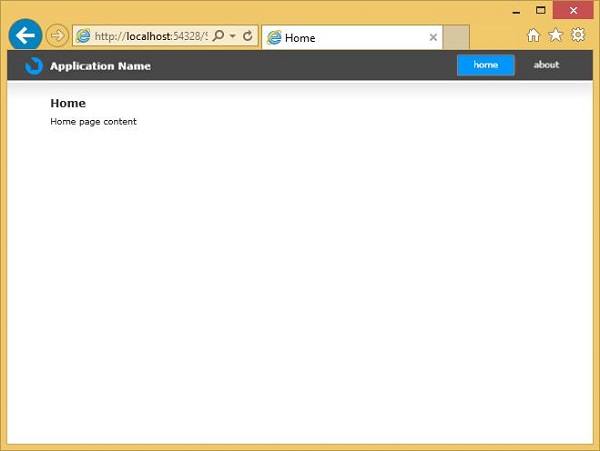
Step 5 − When you click the About button, it will navigate to the About page.
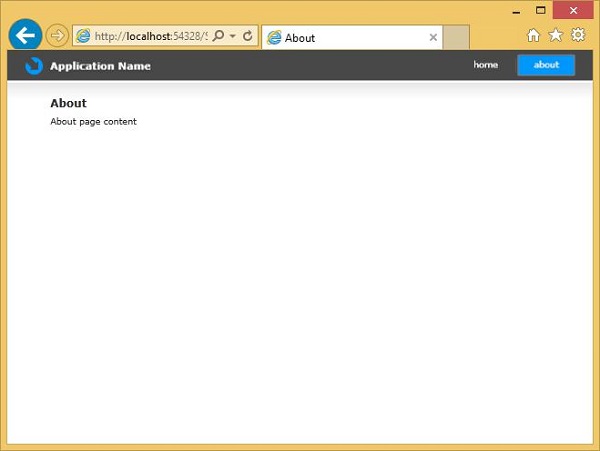
The important part is that you can then use the browser Back and Forward buttons to retrace the steps.
Normally when you do that, the web browser goes from one web page to another, but here it does not. The Silverlight application does not actually unload; it stays running, and just shows different content.
Therefore, from the browser's point of view, it is actually all on one web page. Silverlight plays some tricks with the navigation buttons to ensure that the web page does not unload as we navigate.
