- Silverlight - Home
- Silverlight - Overview
- Silverlight - Environment Setup
- Silverlight - Getting Started
- Silverlight - XAML Overview
- Silverlight - Project Types
- Silverlight - Fixed Layouts
- Silverlight - Dynamic Layout
- Constrained vs. Unconstrained
- Silverlight - CSS
- Silverlight - Controls
- Silverlight - Buttons
- Silverlight - Content Model
- Silverlight - ListBox
- Silverlight - Templates
- Silverlight - Visual State
- Silverlight - Data Binding
- Silverlight - Browser Integration
- Silverlight - Out-of-Browser
- Silverlight - Applications, Resources
- Silverlight - File Access
- Silverlight - View Model
- Silverlight - Input Handling
- Silverlight - Isolated Storage
- Silverlight - Text
- Silverlight - Animation
- Silverlight - Video and Audio
- Silverlight - Printing
Silverlight - Printing
Printing is an important capability for certain kinds of applications. In this chapter, we will look at the relevant facilities in Silverlight.
Printing APIs, and the basic steps that all Silverlight applications must perform if they want to print. Various options for choosing water print.
The simplest is to print a copy of user interface elements that are already on the screen.
Most applications will want to get a bit more advanced than this, and generate content adapted specifically for printing, and in some cases, it will be necessary to split the content across multiple pages.
Steps for Printing
Whether you are printing a snapshot or something already on screen, or going for a fully customized multi-page print output, the same basic steps are required.
At the heart of the printing API is the PrintDocument class.
You begin by constructing one of these, and when you call its Print method, it shows the standard user interface for starting a print job.
The user can select a printer and configure the settings as usual. If the user then decides to go ahead by clicking Print, the PrintDocument will immediately raise its PrintPage event, and your handler for that event supplies the contents to be printed.
The event argument offers a PageVisual property for this purpose.
You can set it to any Silverlight user interface element, either one already visible on screen, or a new one you created especially for printing.
Printing Existing Elements
Elements The simplest option is to print the content that is already on screen in your Silverlight application. Since the PrintPage event arguments PageVisual, accepts any user interface elements, you can pick anything in your user interface, and print it.
It is only a small step up from using the PrintScreen key to grab a screenshot. It is marginally better than that because the user does not have to manually paste the screenshot into some other program to crop it and print it. It is still only a slight improvement.
Printing content that is already on screen is problematic.
First of all, there is no guarantee that a layout that works on screen will work well for paper.
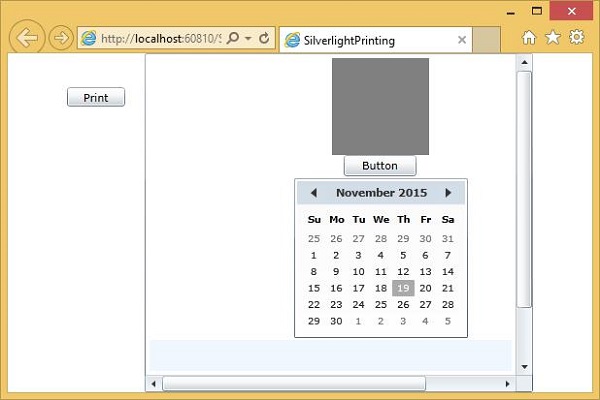
Let us have a look at a simple example in which the ScrollViewer contains some UI elements and its layout adapted for the screen. It resizes based on the browser window size, and it offers scroll bars to ensure that everything is accessible even if it does not fit.
Given below is the XAML code.
<UserControl
   xmlns = "http://schemas.microsoft.com/winfx/2006/xaml/presentation"
   xmlns:x = "http://schemas.microsoft.com/winfx/2006/xaml"
   xmlns:d = "http://schemas.microsoft.com/expression/blend/2008"
   xmlns:mc = "http://schemas.openxmlformats.org/markup-compatibility/2006"
   xmlns:sdk = "http://schemas.microsoft.com/winfx/2006/xaml/presentation/sdk"
   x:Class = "SilverlightPrinting.MainPage"
   mc:Ignorable = "d"
   d:DesignHeight = "300" d:DesignWidth = "500">

   <Grid x:Name = "LayoutRoot" Background = "White">

      <Button x:Name = "print" Content = "Print" Click = "print_Click" Width = "60"
         Height = "20" Margin = "10,10,430,270"/>

      <ScrollViewer x:Name = "myScrollViewer"
         HorizontalScrollBarVisibility = "Auto"
         VerticalScrollBarVisibility = "Auto"
         Width = "400" Margin = "90,0,10,0">

         <StackPanel>
            <Rectangle Fill = "Gray" Width = "100" Height = "100" />
            <Button x:Name = "button" Content = "Button" Width = "75"/>
            <sdk:Calendar Height = "169" Width = "230"/>
            <Rectangle Fill = "AliceBlue" Width = "475" Height = "100" />
         </StackPanel>

      </ScrollViewer>

   </Grid>

</UserControl>
Here is the Print button click-event implementation, which will print the ScrollViewer and its visible data.
using System;
using System.Windows;
using System.Windows.Controls;
using System.Windows.Printing;

namespace SilverlightPrinting {

   public partial class MainPage : UserControl {

      public MainPage() {
         InitializeComponent();
      }

      private void print_Click(object sender, RoutedEventArgs e) {
         PrintDocument pd = new PrintDocument();
         pd.PrintPage += new System.EventHandler<PrintPageEventArgs>(pd_PrintPage);
         pd.Print("Print Screen Content");
      }

      private void pd_PrintPage(object sender, PrintPageEventArgs e) {
         e.PageVisual = myScrollViewer;
      }
   }
}
As you can see, in Print button click event that PrintDocument object is created, we attach a handler to its PrintPage event.
You can set the PageVisual property to refer to ScrollViewer.
Then Print method is called. This takes a string, which will show up as the job name in the print queue.
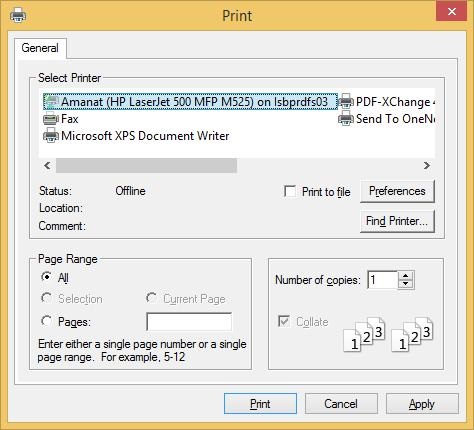
When the above code is compiled and executed, you will see the following output.
When you click the Print button, you will see the standard Print dialog.
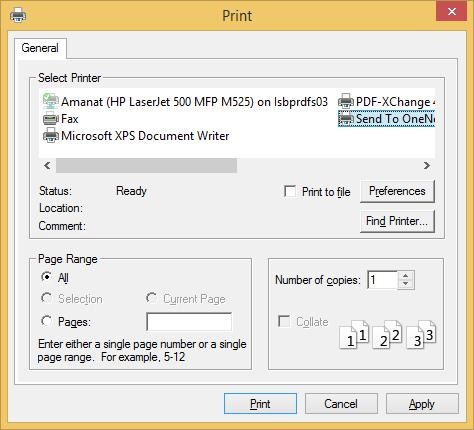
Now, select the default printer. For the purpose of demonstration, let us select OneNote and click the Print button. You will see that ScrollViewer is printed.

Notice that the scroll bars are still visible on the ScrollViewer.
Custom UI Tree
Instead of printing content that is already onscreen, it usually makes more sense to build a tree of user interface elements specifically for printing. That way, you can ensure that you use only non-interactive elements on paper, and you can create a specialized layout that is better suited to the paper shape and size. You could create a UserControl just for printing.
Let us have a look at a simple example by creating a Silverlight project and add a UserControl called PrintLayout.
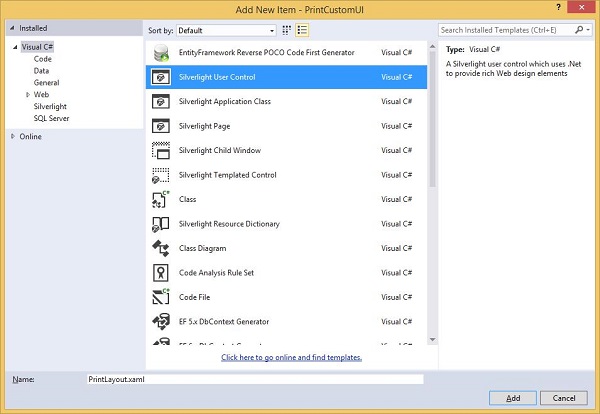
Set the design time width and height to be approximately paper shaped. Given below is the XAML code of PrintLayout.xaml file.
<UserControl x:Class = "PrintCustomUI.PrintLayout"
   xmlns = "http://schemas.microsoft.com/winfx/2006/xaml/presentation"
   xmlns:x = "http://schemas.microsoft.com/winfx/2006/xaml"
   xmlns:d = "http://schemas.microsoft.com/expression/blend/2008"
   xmlns:mc = "http://schemas.openxmlformats.org/markup-compatibility/2006"
   mc:Ignorable = "d"
   d:DesignHeight = "768" d:DesignWidth = "960">

   <Grid x:Name = "LayoutRoot" Background = "White">

      <Grid.RowDefinitions>
         <RowDefinition Height = "Auto" />
         <RowDefinition />
         <RowDefinition Height = "Auto" />
      </Grid.RowDefinitions>

      <TextBlock Text = "Silverlight" HorizontalAlignment = "Center"
         FontSize = "60" FontWeight = "Bold" FontFamily = "Georgia" />

      <TextBlock Grid.Row = "2" Text = "Print Testing"
         HorizontalAlignment = "Center" FontFamily = "Georgia"
         FontSize = "24" Margin = "0,10"/>

      <Rectangle Grid.Row = "2" Height = "1" Fill = "Black"
         VerticalAlignment = "Top"/>

      <Ellipse Grid.Row = "1" Stroke = "Black" StrokeThickness = "10" Margin = "10">

         <Ellipse.Fill>

            <RadialGradientBrush
               GradientOrigin = "0.2,0.2"
               Center = "0.4,0.4">
               <GradientStop Color = "Aqua" Offset = "0.006" />
               <GradientStop Color = "AntiqueWhite" Offset = "1" />
            </RadialGradientBrush>

         </Ellipse.Fill>

      </Ellipse>

   </Grid>

</UserControl>
Given below is the code in the MainPage.xaml file, which contains a Print button only.
<UserControl x:Class = "PrintCustomUI.MainPage"
   xmlns = "http://schemas.microsoft.com/winfx/2006/xaml/presentation"
   xmlns:x = "http://schemas.microsoft.com/winfx/2006/xaml"
   xmlns:d = "http://schemas.microsoft.com/expression/blend/2008"
   xmlns:mc = "http://schemas.openxmlformats.org/markup-compatibility/2006"
   mc:Ignorable = "d"
   d:DesignHeight = "300" d:DesignWidth = "400">

   <Grid x:Name = "LayoutRoot" Background = "White">

      <Button Content = "Print..." Height = "23" HorizontalAlignment = "Left"
         Margin = "12,28,0,0" Name = "printButton"
         VerticalAlignment = "Top" Width = "75"
         Click = "printButton_Click" />

   </Grid>

</UserControl>
Here is the Click event implementation for print button.
using System;
using System.Collections.Generic;
using System;

using System.Windows;
using System.Windows.Controls;
using System.Windows.Printing;

namespace PrintCustomUI {

   public partial class MainPage : UserControl {

      public MainPage() {
         InitializeComponent();
      }

      private void printButton_Click(object sender, RoutedEventArgs e) {
         PrintDocument pd = new PrintDocument();
         pd.PrintPage += new EventHandler<PrintPageEventArgs>(pd_PrintPage);
         pd.Print("Custom");
      }

      void pd_PrintPage(object sender, PrintPageEventArgs e) {
         var pl = new PrintLayout();
         pl.Width = e.PrintableArea.Width;
         pl.Height = e.PrintableArea.Height;
         e.PageVisual = pl;
      }
   }
}
When the above code is compiled and executed, you will see the following output on web page.
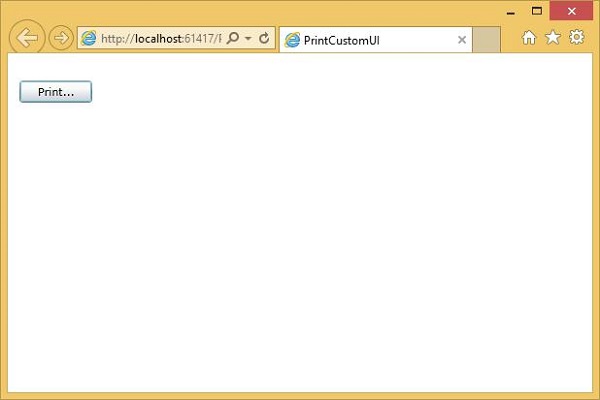
Click Print and select OneNote to print the layout. You will see that the layout is printed.
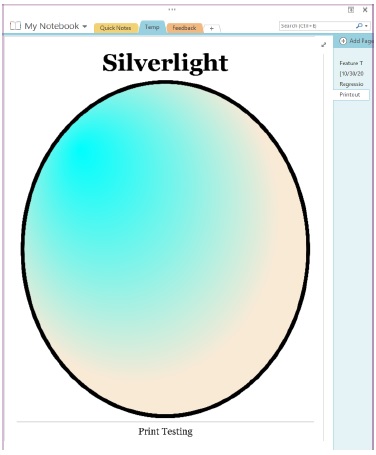
You can see that it has filled the available space. We recommend you to execute the above examples for better understanding.
