- Copilot Studio - Home
- Build Your First Copilot
- Copilot Studio - Free Trial
- Power CAT Copilot Studio Kit
- Copilot Studio - Custom Entities
- Copilot Studio - Trigger Phrases
- Copilot Studio - Adaptive Cards
- Classic Bot vs Modern Copilot
- Copilot Studio - Power Automate Flow
- Share Your Copilot-built
Power CAT Copilot Studio Kit
For Microsoft Copilot users, the Power CAT Copilot Studio Kit is an essential tool that provides a set of resources, templates and guides to accelerate the development of custom Copilots. In this tutorial, we will see what Power CAT Copilot Studio Kit is and the steps to integrate it with your Copilot Studio.
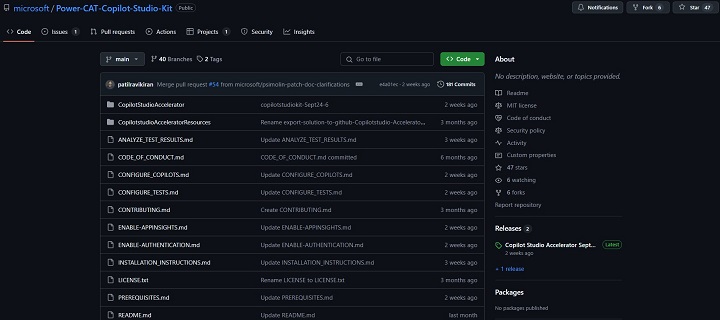
The Power CAT Copilot Studio Kit, available on GitHub, is a vital resource designed by Microsoft to empower developers and citizen developers in building custom Copilots using the Power Platform. The kit provides tools, templates, and connectors, allowing users to accelerate the development process by leveraging AI capabilities within the Microsoft ecosystem.

Source: https://github.com/microsoft/Power-CAT-Copilot-Studio-Kit?tab=readme-ov-file
What is the Power CAT Studio Kit?
The Power CAT (Customer Advisory Team) Studio Kit is a set of open-source resources that help Power Platform users integrate AI and Copilot features into their applications. You can access the kit here. The kit includes −
- Sample Projects − There are many sample projects and pre-built templates available for you to make custom Copilots.
- Connectors − Also there are many tools available for integrating Power Apps, Power Automate, Power Virtual Agents, and other services with your Copilot Studio.
- AI Models − Templates use AI models for many use cases in order to integrate with your project.
- Automation Workflows − Custom automation is also there, which saves you a lot of time by preparing automation for repetitive tasks.
By integrating this kit, you can build more intelligent and responsive applications and AI-driven smart Copilots.
Prerequisites for Using the Power CAT Studio Kit
- Microsoft 365 Subscription − Essential for accessing Power Apps, Power Automate, and other platform services.
- Power Platform Environment − Ensure that your Power Platform environment is set up and configured.
- Azure Subscription − Required for hosting any external services and connecting to AI models or data.
- Access to Copilot Studio − You need access to Microsoft Copilot Studio to develop and manage your custom Copilots.
- Git Installed − To clone and manage the Power CAT Studio Kit repository.
Steps to Integrating Power CAT Studio Kit
Here's a streamlined process to guide you through −
Step 1: Clone the Power CAT Studio Kit Repository
First, you need to clone the repository to your local machine to access all the templates and tools −
- Open a terminal or Git Bash on your system.
- Run the following command to clone the repository.
git clone https://github.com/microsoft/Power-CAT-Copilot-Studio-Kit.git
After cloning, navigate to the cloned directory.
cd Power-CAT-Copilot-Studio-Kit
Step 2: Understanding the Structure of the Kit
Once you have the repository, familiarise yourself with its core components −
- /Samples − This folder contains several pre-built sample projects, such as custom AI-driven Copilots for specific tasks.
- /Connectors − Includes API connectors for services like Power BI, SharePoint, and Azure.
- /Workflows − Pre-configured workflows that can be imported into Power Automate.
- /AI Models − This folder includes templates for integrating with machine learning models hosted on Azure.
Here, each of the folders has a README file that explains the purpose of the resources and how to use them effectively.
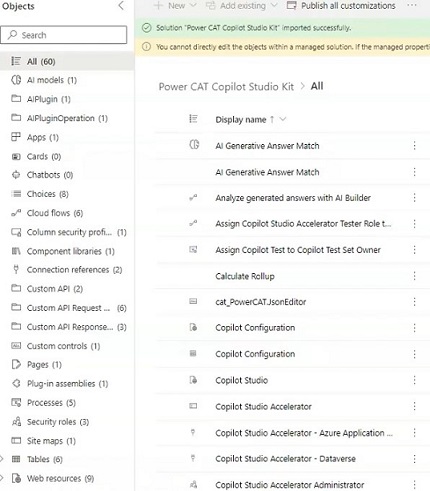
Step 3: Importing Sample Projects into Power Platform
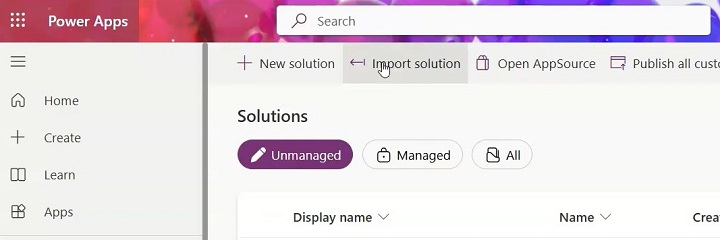
- Log in to Power Apps − Login with your Microsoft 365 credentials by navigating to the Power Apps option in Copilot Studio.
- Create a New App − Select Create > Canvas App from the Power Apps dashboard.
- Import Sample Files − You can directly Import the .msapp or .zip files from the /Samples folder of the Studio Kit to Power Apps. For example, if you're using the Expense Tracking Copilot sample, upload the files corresponding to this project.
- Customise the App − Once the app is uploaded, you can modify it according to your needs. You can integrate AI capabilities, like predictive analytics, using the connectors and workflows provided in the Studio Kit.
Step 4: Setting Up Environment Variables and API Connectors
The sample projects may require environment variables for API connections or credentials. To set these up −
- Navigate to Settings − In Power Apps, go to the app settings and locate the Environment Variables section.
- Set API Credentials − For example, if you're integrating a Power BI dashboard, set your Power BI Workspace ID and API Key in the environment variables.
- Configure API Connectors − Use the connectors provided in the Studio Kit for Power Automate, SharePoint, or external APIs (e.g., Azure Cognitive Services) by following the instructions in the /Connectors folder.
Step 5: Creating Workflows with Power Automate
The Power CAT Studio Kit also includes pre-built workflows designed for Power Automate. To integrate these −
- Open Power Automate
- Upload the .zip files from the /Workflows.
- Here, you can modify the workflows to automate processes in your Copilot. For example, you could automate approval requests or notifications triggered by Copilot interactions.
- Once you customise the workflow, link it with your Power Apps or Power Virtual Agents.
Step 6: Integrating AI Models
To integrate AI capabilities into your Copilots, the Studio Kit provides templates for connecting to AI models.
- Use the connectors provided to link your Copilot to Azure Cognitive Services for AI-driven power tools, such as text analytics or predictive analysis.
- If you have custom models, follow the instructions in the /AI Models folder to integrate them with Power Platform tools. Set up Azure Machine Learning and link it with Power BI or Power Apps to create intelligent insights within your apps.
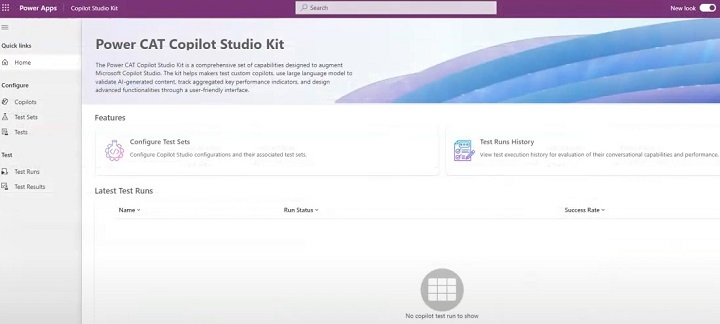
Step 7: Testing and Validating the Copilot
After completing the integration of sample projects, connectors, workflows, and AI models, it's essential to test the Copilot −
- Run the App − In Power Apps, run the Copilot to ensure that it functions as expected.
- Check API Connections − Validate that all API calls (e.g., Power BI, SharePoint) are successful.
- Test Automation − Ensure that workflows in Power Automate trigger as intended and that tasks are being automated efficiently.
- AI Predictions − If you're using AI models, verify the accuracy of predictions and insights generated by the Copilot.
Step 8: Deploying the Copilot
Once testing is complete, you can deploy the app to your production environment −
- Publish the App − In Power Apps, select Publish to make the Copilot available to end-users.
- Deploy Connectors and Workflows − Ensure that all API connectors and workflows are also deployed to the appropriate environments in Power Automate.
- Monitor Performance − Use Power Platform's built-in analytics tools or Azure Monitor to track the performance and usage of your custom Copilot.
The Power CAT Copilot Studio Kit offers a robust foundation for developing and integrating AI-driven Copilots within the Power Platform. By following the steps outlined above, you can quickly integrate sample projects, API connectors, and workflows, into your Power Apps and automate complex processes using Power Automate.
