- Copilot Studio - Home
- Build Your First Copilot
- Copilot Studio - Free Trial
- Power CAT Copilot Studio Kit
- Copilot Studio - Custom Entities
- Copilot Studio - Trigger Phrases
- Copilot Studio - Adaptive Cards
- Classic Bot vs Modern Copilot
- Copilot Studio - Power Automate Flow
- Share Your Copilot-built
Power Automate Flow
Power Automate has become a highly powerful tool in automating several tasks across all Microsoft platforms available. How about connecting those automations with your Microsoft Copilot Studio? You can have access to all your automation flows to collaborate with your chatbot framework and your whole working environment just levels up fantastically. But how to integrate Power Automate with your Copilot Studio?
Here, we will be exploring two different methods to integrate Power Automate within Copilot Studio, and comparing which method will be the best for your environment.
What is Power Automate?
Power Automate is a key tool that automates repetitive workflows by linking various applications and services. It is a cloud-based service by Microsoft that allows users to automate workflows between apps, enabling easier automation of routine tasks.
Whether it's sending automatic notifications, syncing data, or managing approvals, Power Automate enhances productivity by connecting different services like Outlook, SharePoint, Teams, and third-party apps.
You can see the Power Automate documentation here.
Method 1: Connecting Power Automate Flow from Inside Copilot Studio
This older method allows users to create and connect Power Automate Flows directly within Copilot Flows. What you need to do is directly accessing Power Automate from within Microsoft Copilot Studios interface. You may not get all the features of Power Automate but you can easily generate a flow for the beginning. Here's a step-by-step guide on how to do it −
Steps to Integrate Power Automate
- Open Microsoft Copilot Studio.
- Open your pre-build Copilot or you can make one.
- Inside the Copilot, navigate to the Flows section.
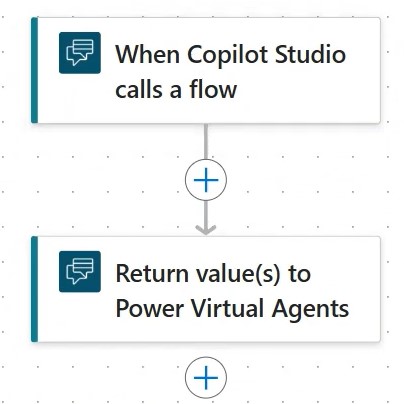
- Create a New Copilot Flow: Select the option to create a new flow within Copilot Studio.
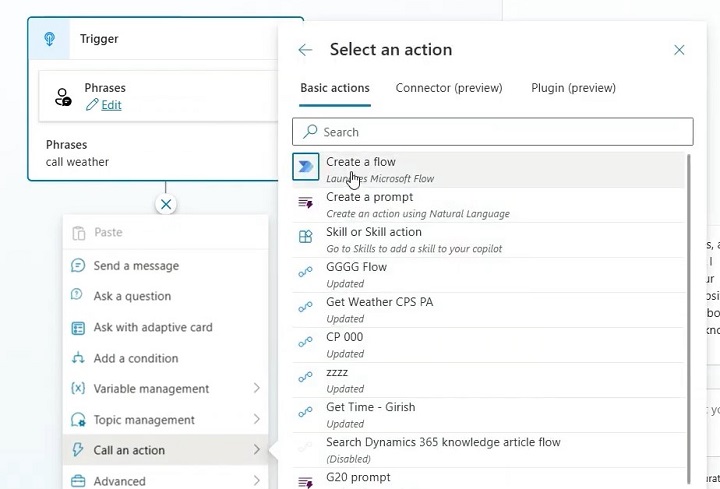
- Click Add a Power Automate Flow.
- Once inside the flow editor, choose Power Automate from the list of available automation tools.
- Define triggers and actions inside Copilot Studio using Power Automate's built-in connectors.
- Select a trigger (e.g., an event in Microsoft Teams or SharePoint) and configure the action (e.g., send an approval request or sync data).
- Test the flow directly within Copilot Studio by simulating user inputs and responses.
- Validate that the automation performs as expected and make any necessary adjustments.
Limitations of the This Method
- Restricted design capabilities compared to building the flow directly in Power Automate.
- Limited flexibility and UI options.
- Example: Automating approval workflows directly in Copilot without much customisation beyond built-in templates.
Method 2: Create a Flow Separately in Power Automate, Then Import to Copilot Studio
This modern method is more flexible and allows you to leverage Power Automates full feature set, creating a flow externally and then importing it into Microsoft Copilot Studio. This method provides a modernised UI and greater customisation options.
Steps for Creating a Flow in Power Automate (Separately)
- Log into your Power Automate portal with your Microsoft account
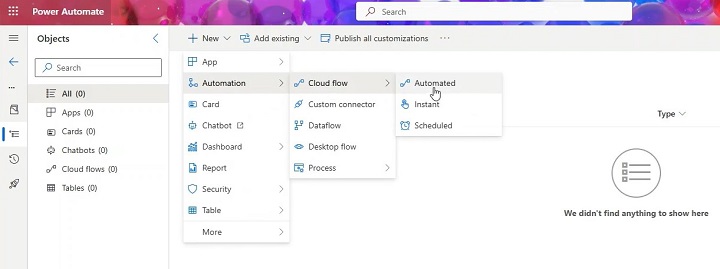
- Inside it, create a New Flow:
- Choose the type of flow based on your requirement (e.g., automated, instant, scheduled). Let's choose an Automated Flow for now.
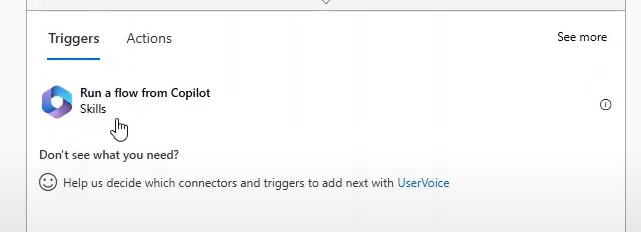
- You must select a trigger that starts the flow. This can be receiving an email in Outlook or a new file added to SharePoint, you must select the trigger accordingly.
- Once a trigger is selected, configure actions like sending an email, updating a record, or generating a notification.
- You can use conditions, loops, and approvals to enhance the flow.
- Before integrating it with Microsoft Copilot Studio, test the flow inside Power Automate to ensure it functions correctly.
- Go to the Test section and run the flow using sample data.

Steps for Importing the Built Flow to Copilot Studio
- Open Copilot Studio
- Go to your Copilot where you want to integrate Power Flow
- Open Copilot and navigate to the Flows section.
- Select the option to Import an Existing Power Automate Flow.
- In Copilot Studio, find the Import Flow button.
- Now select the Power Automate Flow you created earlier.
- Configure it by linking it to the Copilot inputs and outputs. For instance, you can have a customer query trigger the flow or a chatbot response initiate an action.
- Run a live test of the imported Power Automate Flow to ensure it operates as expected within Copilot Studio.
- Verify that Copilot can trigger the flow and process the automation seamlessly.

Advantages of This Approach
- Allows for more flexibility and customisation.
- Leverages Power Automates full range of connectors, including custom-built flows.
- Provides a modern UI and a more user-friendly design for managing automation.
- Example: An advanced data-syncing workflow between SharePoint and Dynamics 365 that triggers automatic notifications and records updates inside Copilot Studio.
Comparison Between Both the Methods
The following table highlights the major differences between these methods −
| Feature | Create Flow in Copilot Studio | Import Flow from Power Automate |
|---|---|---|
| Design Flexibility | Limited to In-Copilot connectors | Full access to Power Automate features |
| UI | Basic and restricted | Modern and highly customisable |
| Integration | Direct but limited | Advanced and flexible |
| Triggers & Actions | Standard actions available | Full range of Power Automate triggers |
| Customisation | Minimal customisation | Fully customisable with conditional logic |
| Testing & Debugging | Basic testing within Copilot | Advanced testing within Power Automate |
Use Cases of Power Automate Flows in Copilot Studio
Integrating Power Automate with Copilot Studio opens up a range of automation possibilities. Some examples include −
- Automated Approvals − A user submits a request via Copilot, and Power Automate sends approval requests to the manager.
- Notifications − Automatically notify teams of key events triggered within Copilot, such as new customer queries.
- Data Syncing − Sync user input from Copilot into SharePoint or Dynamics 365, ensuring seamless data consistency.
Connecting Power Automate with Microsoft Copilot Studio brings immense power to your workflows, allowing the automation of complex processes with minimal effort. The second method offers greater flexibility, customisation, and a better UI experience, making it the recommended approach for most users. Whichever method you choose, Power Automate helps streamline processes, saving time and effort across the board.
