- Magento - Product Overview
- Magento - Setup Languages
- Magento - Setup Contact
- Magento - Setup Categories
- Magento - Setup Products
- Magento - Setup Inventory
- Magento - Setup Taxes
- Magento - Setup Shipping Rates
- Magento - Setup Payment Plans
- Magento - Setup Payment Gateway
- Magento - Setup Payment Methods
- Magento - Setup Currencies
- Magento - Setup Check Out Options
- Magento - Setup Paypal Payment
- Magento - Setup Google Checkout
- Magento - Setup Store Live
- Magento Order Processing
- Magento - Orders Life Cycle
- Magento - Setup Order Options
- Magento - Setup Order Emails
- Magento - Create Orders
- Magento - Manage Orders
- Magento System Setup
- Magento - Setup Customers
- Magento - Setup Google Analytics
- Magento - Setup Pretty URLs
- Magento - Setup Youtube Video
- Magento - Setup Facebook Likes
- Magento - Setup Translation
- Magento - Setup System Theme
- Magento - Setup Page Title
- Magento - Setup Page Layout
- Magento - Setup New Pages
- Magento - Setup CMS
- Magento - Setup Newsletter
- Magento Optimization
- Magento - Site Optimization
- Magento - Profiling
- Magento - Database Performance
- Search Engine Optimization
- Magento Useful Resources
- Magento - Questions and Answers
- Magento - Quick Guide
- Magento - Useful Resources
- Magento - Discussion
Selected Reading
Magento - Setup Store Live
This chapter shows how to setup the live store on your Magento website.
Step 1 − Login to your Magento Admin Panel.
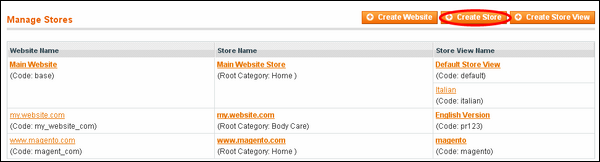
Step 2 − Go to System menu and click on the Manage Stores option.

Step 3 − Under Manage Stores section, you will get website names, store names and Store View Name columns. Click on the Create Store button to begin with setting up the Magento live store.
Step 4 − The store information includes some options such as −
Website which allows selecting the website name which you created before.
Name option specifies name of your second website name.
Root Category option specifies the root category that will be used for store.

After done with the settings, click on the Save Store button.

Advertisements