- Jenkins - Home
- Jenkins - Overview
- Jenkins - Installation
- Jenkins - Tomcat Setup
- Jenkins - Git Setup
- Jenkins - Maven Setup
- Jenkins - Configuration
- Jenkins - Management
- Jenkins - Setup Build Jobs
- Jenkins - Unit Testing
- Jenkins - Automated Testing
- Jenkins - Notification
- Jenkins - Reporting
- Jenkins - Code Analysis
- Jenkins - Distributed Builds
- Jenkins - Automated Deployment
- Jenkins - Metrics and Trends
- Jenkins - Server Maintenance
- Jenkins - Continuous Deployment
- Jenkins - Managing Plugins
- Jenkins - Security
- Jenkins - Backup Plugin
- Jenkins - Remote Testing
Jenkins - Security
In Jenkins you have the ability to setup users and their relevant permissions on the Jenkins instance. By default you will not want everyone to be able to define jobs or other administrative tasks in Jenkins. So Jenkins has the ability to have a security configuration in place.
To configure Security in Jenkins, follow the steps given below.
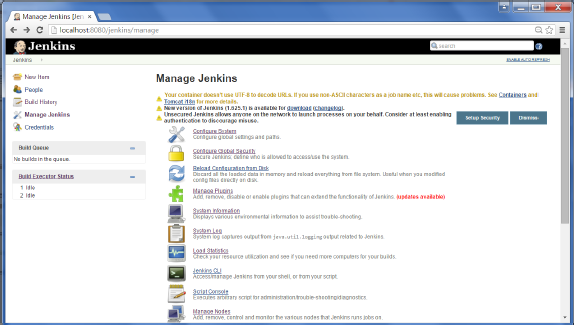
Step 1 − Click on Manage Jenkins and choose the Configure Global Security option.
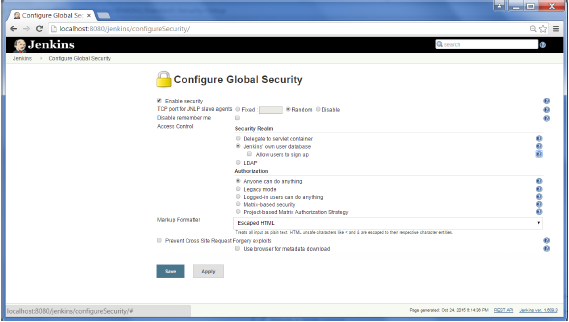
Step 2 − Click on Enable Security option. As an example, lets assume that we want Jenkins to maintain its own database of users, so in the Security Realm, choose the option of Jenkins own user database.
By default you would want a central administrator to define users in the system, hence ensure the Allow users to sign up option is unselected. You can leave the rest as it is for now and click the Save button.
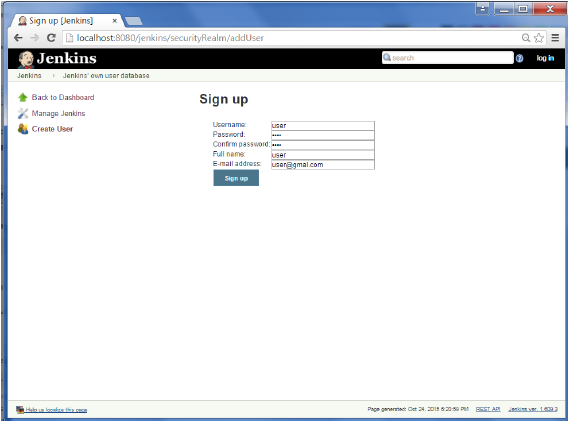
Step 3 − You will be prompted to add your first user. As an example, we are setting up an admin users for the system.

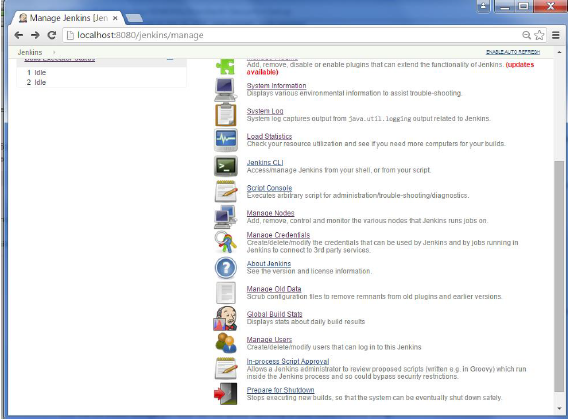
Step 4 − Its now time to setup your users in the system. Now when you go to Manage Jenkins, and scroll down, you will see a Manage Users option. Click this option.
Step 5 − Just like you defined your admin user, start creating other users for the system. As an example, we are just creating another user called user.
Step 6 − Now its time to setup your authorizations, basically who has access to what. Go to Manage Jenkins → Configure Global Security.
Now in the Authorization section, click on Matrix based security
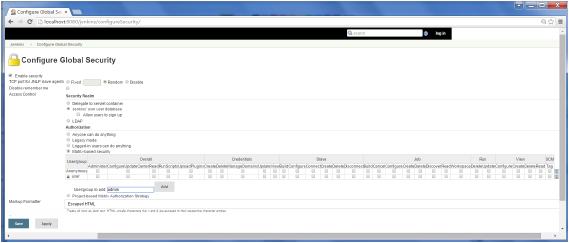
Step 7 − If you dont see the user in the user group list, enter the user name and add it to the list. Then give the appropriate permissions to the user.
Click on the Save button once you have defined the relevant authorizations.
Your Jenkins security is now setup.
Note − For Windows AD authentication, one has to add the Active Directory plugin to Jenkins.
