- Jenkins - Home
- Jenkins - Overview
- Jenkins - Installation
- Jenkins - Tomcat Setup
- Jenkins - Git Setup
- Jenkins - Maven Setup
- Jenkins - Configuration
- Jenkins - Management
- Jenkins - Setup Build Jobs
- Jenkins - Unit Testing
- Jenkins - Automated Testing
- Jenkins - Notification
- Jenkins - Reporting
- Jenkins - Code Analysis
- Jenkins - Distributed Builds
- Jenkins - Automated Deployment
- Jenkins - Metrics and Trends
- Jenkins - Server Maintenance
- Jenkins - Continuous Deployment
- Jenkins - Managing Plugins
- Jenkins - Security
- Jenkins - Backup Plugin
- Jenkins - Remote Testing
Jenkins - Remote Testing
Web tests such as selenium tests can be run on remote slave machines via the master slave and selenium suite plugin installation. The following steps show how to run remote tests using this configuration.
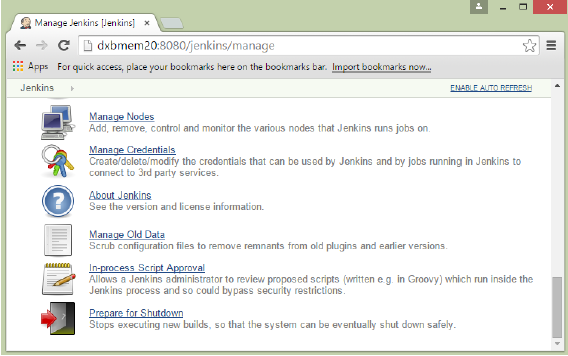
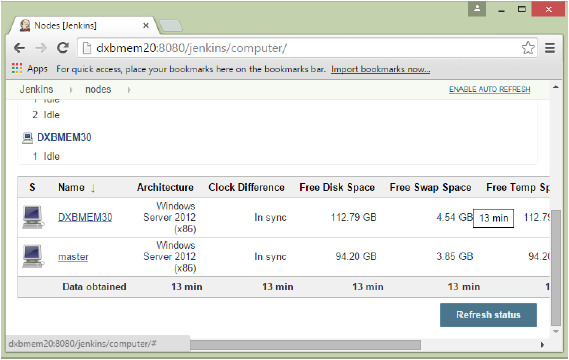
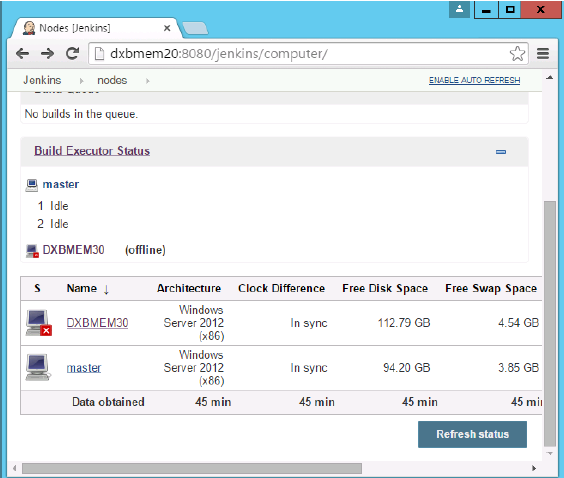
Step 1 − Ensure your master slave configuration is in place. Go to your master Jenkins server. Go to Manage Jenkins → Manage Nodes.
In our node list, the DXBMEM30 label is the slave machine. In this example, both the master and slave machines are windows machines.
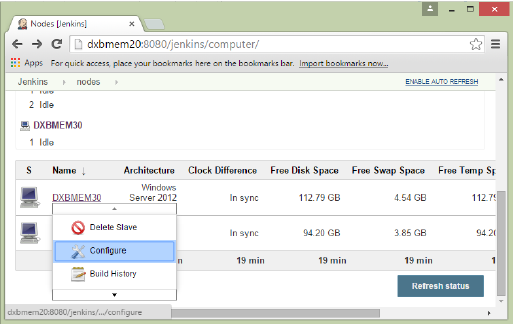
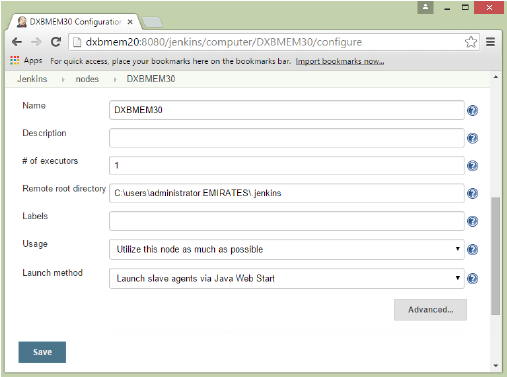
Step 2 − Click on configure for the DXBMEM30 slave machine.
Step 3 − Ensure the launch method is put as Launch slave agents via Java Web Start
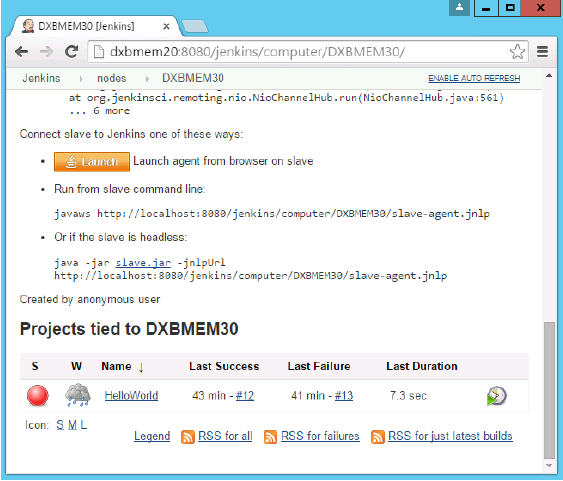
Step 4 − Now go to your slave machine and from there, open a browser instance to your Jenkins master instance. Then go to Manage Jenkins → Manage Nodes. Go to DXBMEM30 and click on
Step 5 − Click on the DXBMEM30 instance.
Step 6 − Scroll down and you will see the Launch option which is the option to Start Java Web Start
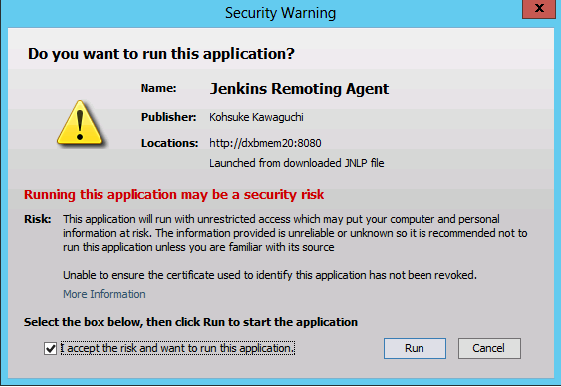
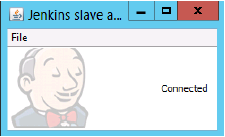
Step 7 − You will be presented with a Security Warning. Click on the Acceptance checkbox and click on run.
You will now see a Jenkins Slave window opened and now connected.
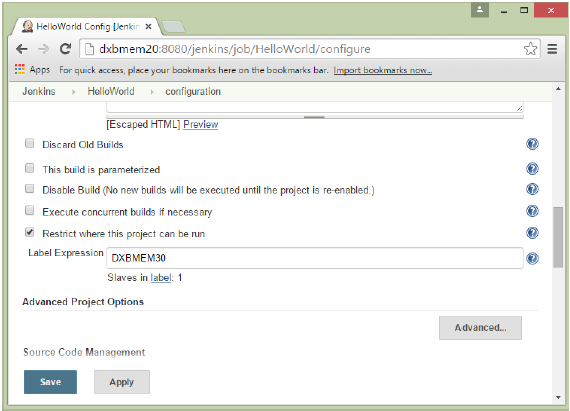
Step 8 − Configuring your tests to run on the slave. Here, you have to ensure that the job being created is meant specifically to only run the selenium tests.
In the job configuration, ensure the option Restrict where this project can be run is selected and in the Label expression put the name of the slave node.
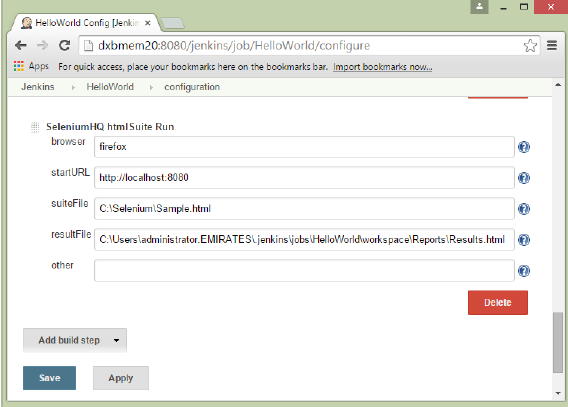
Step 9 − Ensure the selenium part of your job is configured. You have to ensure that the Sample.html file and the selenium-server.jar file is also present on the slave machine.
Once you have followed all of the above steps, and click on Build, this project will run the Selenium test on the slave machine as expected.
