- Jenkins - Home
- Jenkins - Overview
- Jenkins - Installation
- Jenkins - Tomcat Setup
- Jenkins - Git Setup
- Jenkins - Maven Setup
- Jenkins - Configuration
- Jenkins - Management
- Jenkins - Setup Build Jobs
- Jenkins - Unit Testing
- Jenkins - Automated Testing
- Jenkins - Notification
- Jenkins - Reporting
- Jenkins - Code Analysis
- Jenkins - Distributed Builds
- Jenkins - Automated Deployment
- Jenkins - Metrics and Trends
- Jenkins - Server Maintenance
- Jenkins - Continuous Deployment
- Jenkins - Managing Plugins
- Jenkins - Security
- Jenkins - Backup Plugin
- Jenkins - Remote Testing
Jenkins - Automated Testing
One of the basic principles of Continuous Integration is that a build should be verifiable. You have to be able to objectively determine whether a particular build is ready to proceed to the next stage of the build process, and the most convenient way to do this is to use automated tests. Without proper automated testing, you find yourself having to retain many build artifacts and test them by hand, which is hardly in the spirit of Continuous Integration. The following example shows how to use Selenium to run automated web tests.
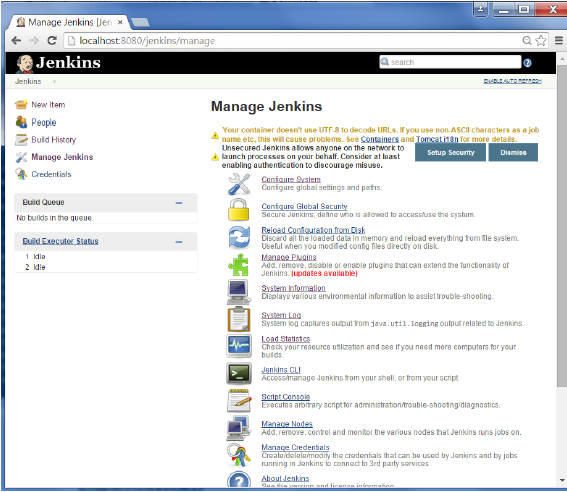
Step 1 − Go to Manage Plugins.
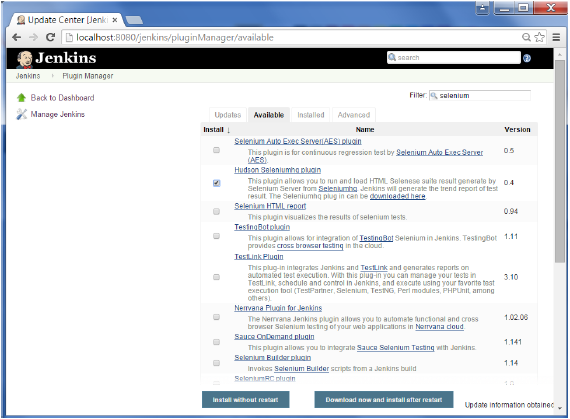
Step 2 − Find the Hudson Selenium Plugin and choose to install. Restart the Jenkins instance.
Step 3 − Go to Configure system.
Step 4 − Configure the selenium server jar and click on the Save button.
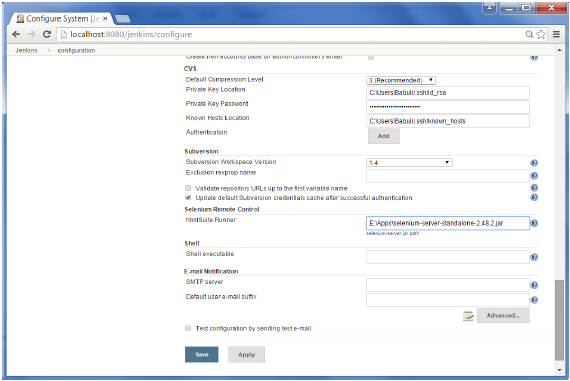
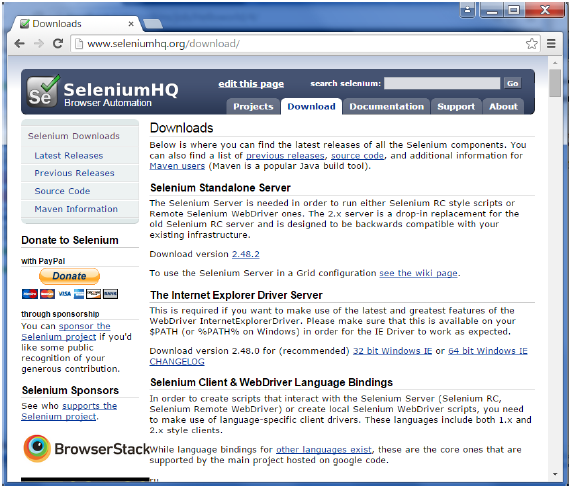
Note − The selenium jar file can be downloaded from the location SeleniumHQ
Click on the download for the Selenium standalone server.
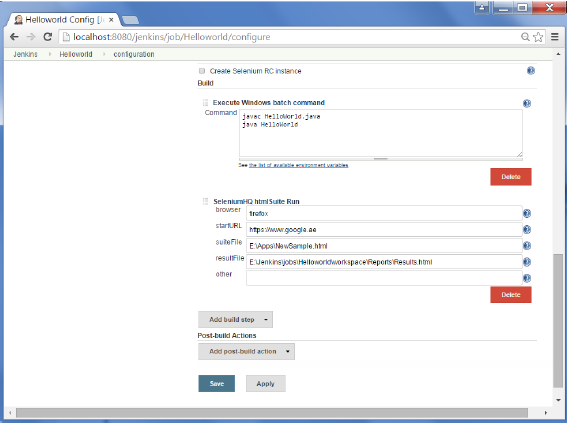
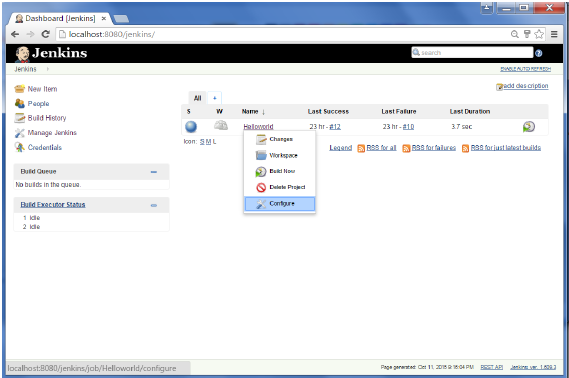
Step 5 − Go back to your dashboard and click on the Configure option for the HelloWorld project.
Step 6 − Click on Add build step and choose the optin of SeleniumHQ htmlSuite Run
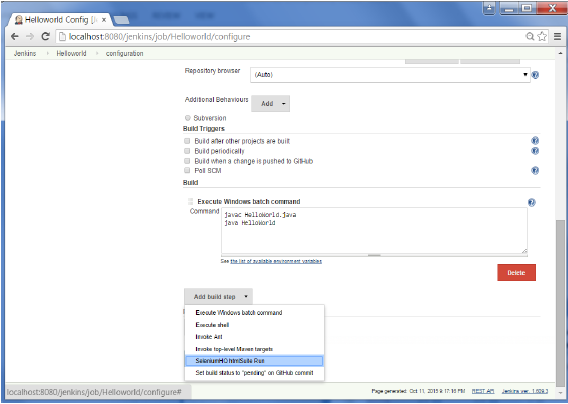
Step 7 − Add the necessary details for the selenium test. Here the suiteFile is the TestSuite generated by using the Selenium IDE. Click on Save and execute a build. Now the post build will launch the selenium driver, and execute the html test.