- Jenkins - Home
- Jenkins - Overview
- Jenkins - Installation
- Jenkins - Tomcat Setup
- Jenkins - Git Setup
- Jenkins - Maven Setup
- Jenkins - Configuration
- Jenkins - Management
- Jenkins - Setup Build Jobs
- Jenkins - Unit Testing
- Jenkins - Automated Testing
- Jenkins - Notification
- Jenkins - Reporting
- Jenkins - Code Analysis
- Jenkins - Distributed Builds
- Jenkins - Automated Deployment
- Jenkins - Metrics and Trends
- Jenkins - Server Maintenance
- Jenkins - Continuous Deployment
- Jenkins - Managing Plugins
- Jenkins - Security
- Jenkins - Backup Plugin
- Jenkins - Remote Testing
Jenkins - Automated Deployment
There are many plugins available which can be used to transfer the build files after a successful build to the respective application/web server. On example is the Deploy to container Plugin. To use this follow the steps given below.
Step 1 − Go to Manage Jenkins → Manage Plugins. Go to the Available section and find the plugin Deploy to container Plugin and install the plugin. Restart the Jenkins server.
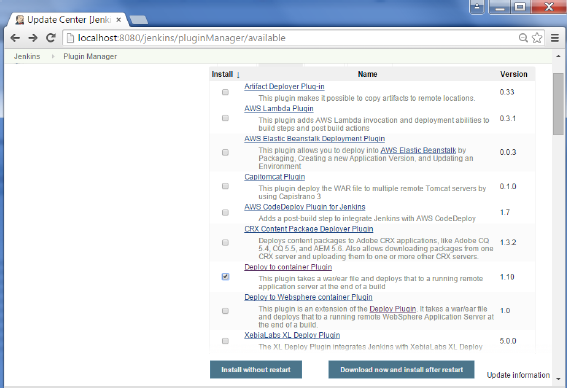
This plugin takes a war/ear file and deploys that to a running remote application server at the end of a build.
Tomcat 4.x/5.x/6.x/7.x
JBoss 3.x/4.x
Glassfish 2.x/3.x
Step 2 − Go to your Build project and click the Configure option. Choose the option Deploy war/ear to a container
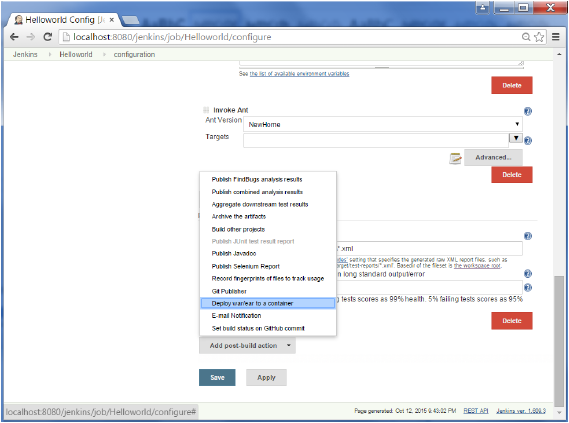
Step 3 − In the Deploy war/ear to a container section, enter the required details of the server on which the files need to be deployed and click on the Save button. These steps will now ensure that the necessary files get deployed to the necessary container after a successful build.

