- Google Colab - Home
- Google Colab - Introduction
- What is Google Colab?
- Your First Colab Notebook
- Documenting Your Code
- Google Colab - Saving Your Work
- Google Colab - Sharing Notebook
- Invoking System Commands
- Executing External Python Files
- Google Colab - Graphical Outputs
- Google Colab - Code Editing Help
- Google Colab - Magics
- Google Colab - Adding Forms
- Google Colab - Installing ML Libraries
- Google Colab - Using Free GPU
- Google Colab - Conclusion
- Google Colab Useful Resources
- Google Colab - Quick Guide
- Google Colab - Useful Resources
- Google Colab - Discussion
Google Colab - Saving Your Work
Colab allows you to save your work to Google Drive or even directly to your GitHub repository.
Saving to Google Drive
Colab allows you to save your work to your Google Drive. To save your notebook, select the following menu options −
File / Save a copy in Drive
You will see the following screen −

The action will create a copy of your notebook and save it to your drive. Later on you may rename the copy to your choice of name.
Saving to GitHub
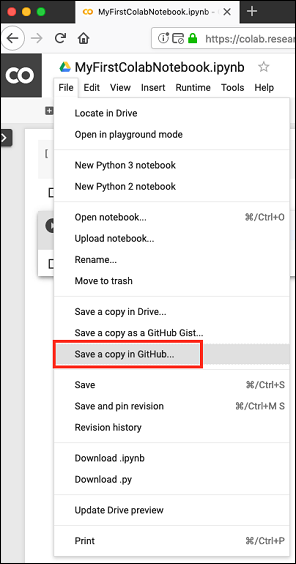
You may also save your work to your GitHub repository by selecting the following menu options −
File / Save a copy in GitHub...
The menu selection is shown in the following screenshot for your quick reference −
You will have to wait until you see the login screen to GitHub.
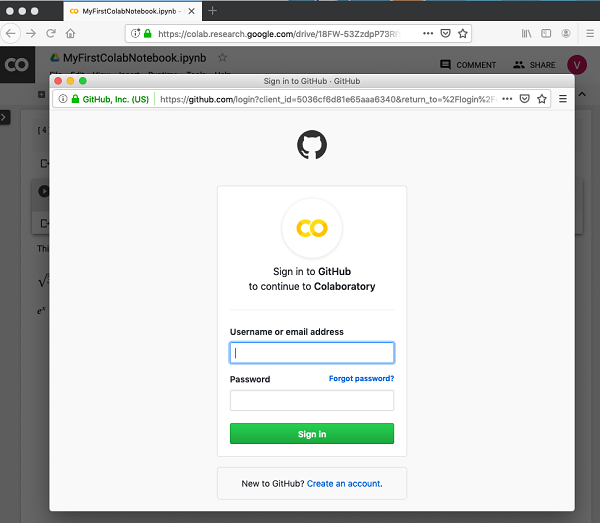
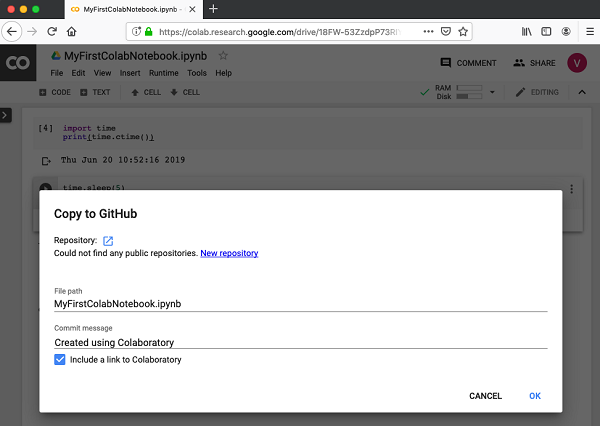
Now, enter your credentials. If you do not have a repository, create a new one and save your project as shown in the screenshot below −
In the next chapter, we will learn how to share your work with others.