
Article Categories
- All Categories
-
 Data Structure
-
 Networking
-
 RDBMS
RDBMS
-
 Operating System
-
 Java
Java
-
 MS Excel
-
 iOS
iOS
-
 HTML
HTML
-
 CSS
CSS
-
 Android
-
 Python
-
 C Programming
-
 C++
C++
-
 C#
C#
-
 MongoDB
-
 MySQL
MySQL
-
 Javascript
-
 PHP
PHP
-
 Economics & Finance
How to create a GitHub repository
A GitHub account is a pre-requisite for creating a GitHub repository. Follow the below steps after registering with GitHub.
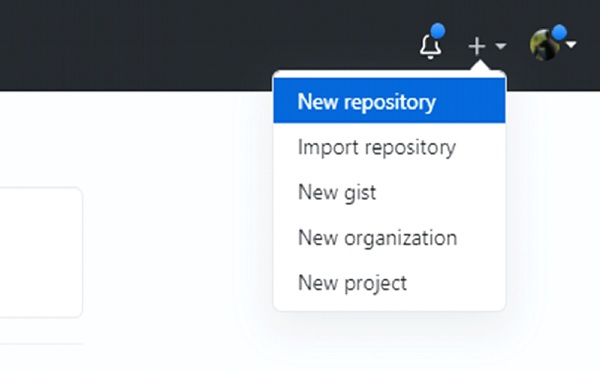
Step 1 − Login to the GitHub account. Once you login to your account you will see a ‘+’ button on the right. Click on the button and select "New repository" option to create a new repository.
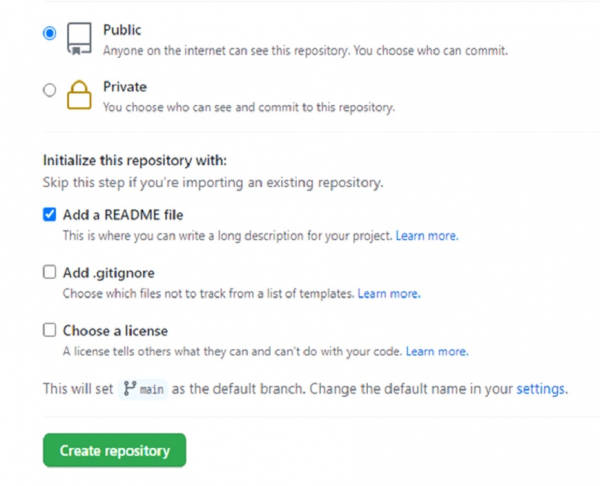
Configure the following in the create a new repository page.
Repository name: GitHub will validate the repository name that you have entered.
-
Type of the repository: GitHub lets you create the following types of repositories −
Private repository − Private Repository is the one that can be accessed only by the repository owner and individuals with whom the repository has been shared. Anyone who is not explicitly granted access to the repository cannot view the source code. Private repositories can be used for programs that are proprietary for you at the moment and you don't want to share.
Public repository − Public Repository is the one which is open and available for everyone. Public Repositories can be used for open-source projects.
We will create a public repository for the purpose of demonstration. You can keep the default settings. We have selected the option to add a README.txt. This file is used to provide repo description.
You will find the URL of your first project in the format shown below. In the below URL sample_repo is the name of the repository and author_name will be your GitHub account name.
https://github.com/{author_name}/sample_repo
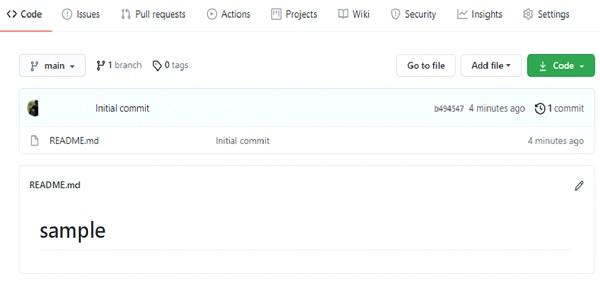
Once you refresh the URL, you will be able to see the sample README.md file and all commits as shown below.

2K+ Views
