
Article Categories
- All Categories
-
 Data Structure
-
 Networking
-
 RDBMS
RDBMS
-
 Operating System
-
 Java
Java
-
 MS Excel
-
 iOS
iOS
-
 HTML
HTML
-
 CSS
CSS
-
 Android
-
 Python
-
 C Programming
-
 C++
C++
-
 C#
C#
-
 MongoDB
-
 MySQL
MySQL
-
 Javascript
-
 PHP
PHP
-
 Economics & Finance
How to Remove or Hide Borders From Group Boxes in Excel?
If you've ever used group boxes in Excel, you may have noticed that they have built-in borders that can occasionally get in the way of your layout and design. Learning how to remove or hide these borders is a crucial skill whether you want to give your Excel sheet a cleaner, more professional appearance or simply customise its design. We'll show you how to remove or hide borders from group boxes in Excel in this step-by-step tutorial. By the time you finish this video, you'll be equipped with the skills and confidence necessary to design slick Excel sheets that smoothly combine group boxes.
So let's get started and learn how to remove or hide borders from group boxes in Excel so you can advance your spreadsheet formatting abilities. This article will help you improve the visual attractiveness and organisation of your data whether you use Excel for personal or professional purposes. Let's get going!
Remove or Hide Borders From Group Boxes
Here, we will first create a VBA module and then run it to complete the task. So let us see a simple process to know how to remove or hide borders from group boxes in Excel.
Step 1
Consider an Excel sheet where you have group boxes similar to the below image.
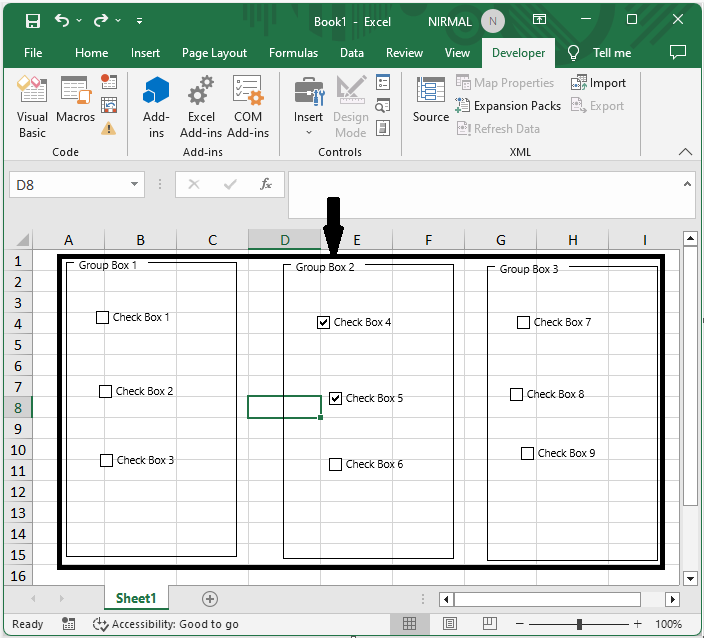
First, right-click on the sheet name and click on View Code to open the VBA.
Step 2
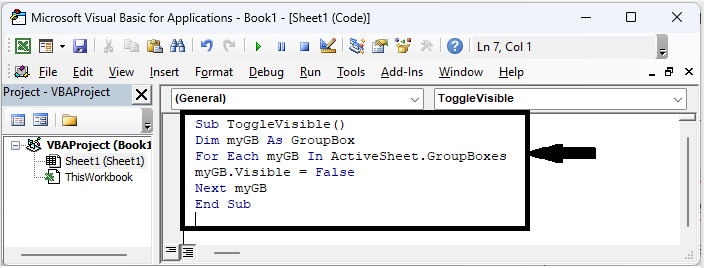
Then click on Insert and select Module, then copy the below code into the text box.
Code
Sub ToggleVisible()
Dim myGB As GroupBox
For Each myGB In ActiveSheet.GroupBoxes
myGB.Visible = False
Next myGB
End Sub
Step 3
Then click F5 to complete the task. You will see that borders will be removed for the group box.
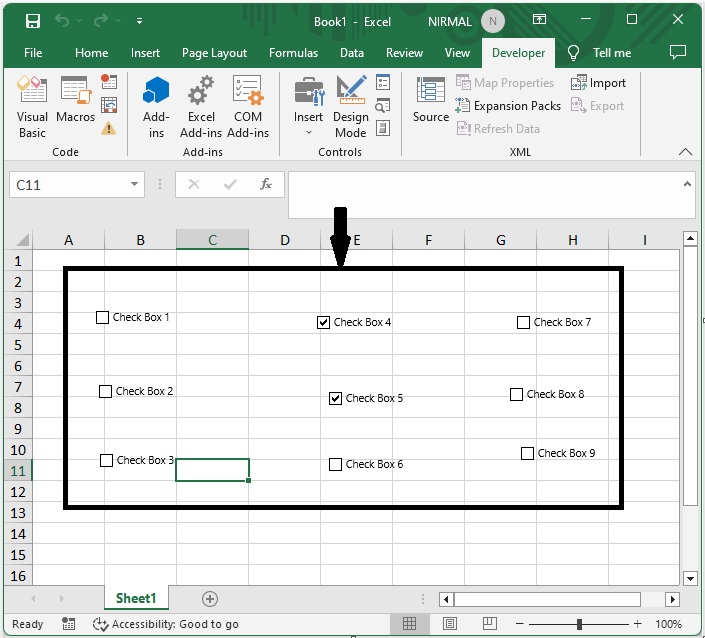
This is how you can remove borders for group boxes in Excel.
Conclusion
In this tutorial, we have used a simple example to demonstrate how you can remove or hide borders from group boxes in Excel to highlight a particular set of data.

877 Views
