
Article Categories
- All Categories
-
 Data Structure
-
 Networking
-
 RDBMS
RDBMS
-
 Operating System
-
 Java
Java
-
 MS Excel
-
 iOS
iOS
-
 HTML
HTML
-
 CSS
CSS
-
 Android
-
 Python
-
 C Programming
-
 C++
C++
-
 C#
C#
-
 MongoDB
-
 MySQL
MySQL
-
 Javascript
-
 PHP
PHP
-
 Economics & Finance
How to Print Each Sheet on Separate Page?
If you need to print a document that has a number of sheets or pages, having the option to print each one on a separate page might be useful. Because of this functionality, you can be certain that each sheet will be printed on its own separate page. It is a straightforward technique that can be carried out in any word processor, including Google Docs and Microsoft Word, among others. In the print options, you may choose to select the option that will allow individual sheets to be printed on separate pages. We'll walk you through the process of formatting your document for printing so that it comes out looking precisely the way you envisioned it when it was done. You will be able to print multiple?page documents fast and simply with this knowledge, which will also help you save paper and ink.
Why does it Happen?
Most word processors let you print each sheet separately, providing you additional options for how your documents are laid up on paper. Papers containing a lot of pages may be read, organized, and referred to with ease because to this.
This feature is necessary due to the fact that several types of papers have different requirements in terms of layout. Multiple pages may make up a document, such as an essay packet or a workbook. Having each page printed separately assures that it will be shown accurately and with the care it deserves. A book or a long report, on the other hand, are pieces of writing that are designed to be read from beginning to end. It's not always necessary or even preferable to print each sheet on its own page.
The flexibility and personalization of word processing software includes features like the option to print several sheets on different pages.
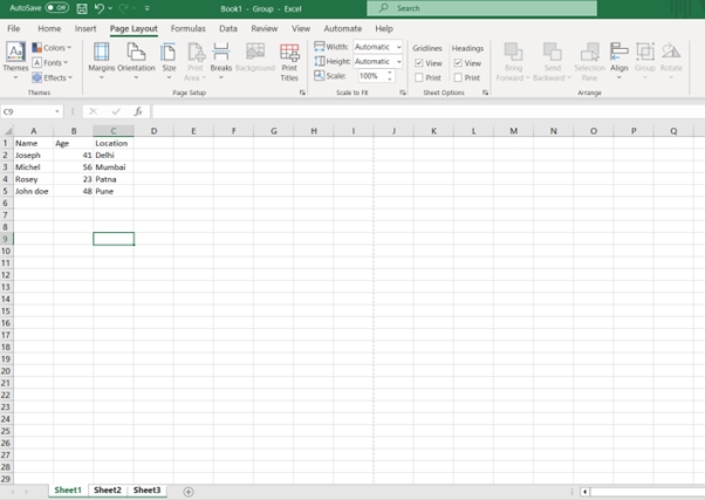
In Microsoft Excel, there are a few different ways to print each sheet on a separate page. Here are three common methods:
-
In Excel, page breaks may be previewed by following these steps:
Bring up Excel.
Choose the workbook that prints each section on a single page.
To do this, open Excel and go to the "View" menu item.
To get a preview of your page breaks, click the "Page Break Preview" button.
If the sheets don't start on new pages, you may need to adjust the page breaks.
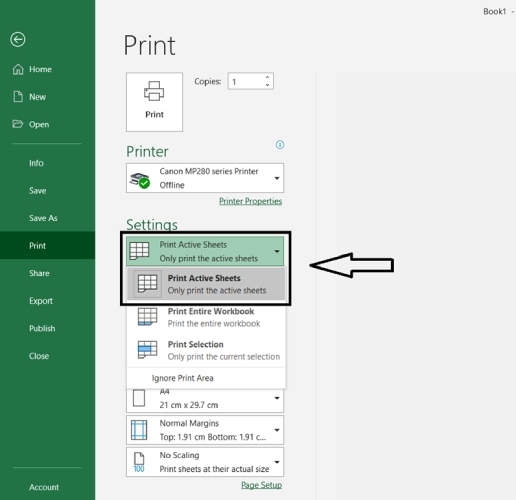
Select "Print" from the "File" menu to actually print the file
Excel's Print Region Settings Can Be Used To Customize The Printed Area.
Select the individual sheet you need and print it off.
You may choose several cells for simultaneous printing.
Choose "Page Layout" from Excel's main menu bar.
Select the area you wish to print by selecting the "Print Area" button, followed by "Set Print Area."
Do this for each sheet, making sure you choose the right range each time.
Select "Print" from the "File" menu to produce hard copies of the document.
Developing Separate Printing Zones: ?Step one is to open Excel.
Choose the sheet you'd want to print off separately from the others.
You may pick a range of cells to print all at once.
Select the "Page Layout" option from Excel's ribbon.
Select a print region from the menu labeled "Print Area" to add one.
Repeat for each page to create a fresh printing area.
To print the file, choose "Print" from the "File" menu.
These methods allow you to print individual Excel sheets on a single page, providing you more control over the final product.
To print each sheet on a separate page, you can follow these steps
Get ready to print by firing up your favorite word processor (like Microsoft Word or Google Docs) and selecting your document.
Check the document's structure and page breaks to make sure it reads well. That means there must be a blank page in between every set of sheets or pages.
To print a document, either click "Print" in the program's "File" menu (located in the upper left corner of the screen) or use the appropriate keyboard shortcut (e.g., Ctrl + P in Windows, Command + P in Mac OS).
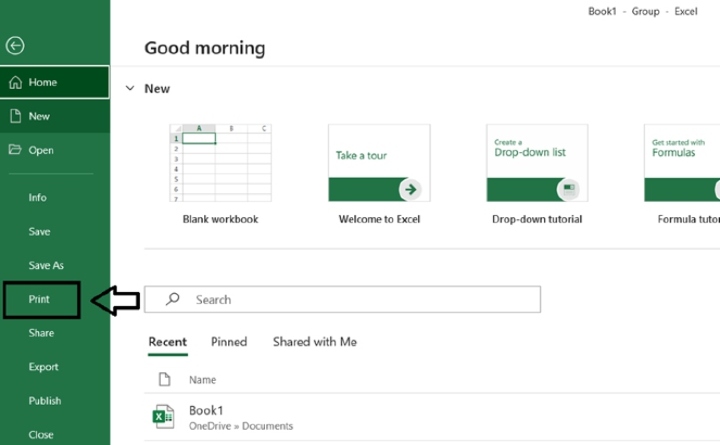
If you want to print "Each sheet on a separate page" or anything similar, you may find this option in the print options or print dialog box. It all depends on the program you're using, down to the precise place and phrase.
Find the appropriate menu option and then choose it to use the function. In this way, you can be certain that each page of your document will be printed on its own separate sheet.
Consider the quantity of prints, the size of the paper, and the preferred orientation (portrait or landscape).
After you've confirmed your print options, you can start the printing process by clicking the "Print" button.
Since your word processor will print each sheet on a separate page, the final printed document will have the sheets physically separated from one another.
Conclusion
This approach is not only useful and speedy, but also contributes to greater clarity and organization. If the option to print many pages on a single page is accessible to you, you may choose to do so. If you follow the steps in this manual to print your document, you won't end up with any pages that are printed together or material that is duplicated. When you use this strategy, you may have complete confidence that the information you have provided will be represented correctly in any printed reports, presentations, or other multi?sheet publications. By modifying the print settings on your word processor, you can ensure that each sheet will print on a different page when you put it through the printing process. This information need to be included in the menu of available printing choices. It is possible that using this function may make your printing duties easier to complete and will improve the readability of the printed documents you produce.

1K+ Views
