
Article Categories
- All Categories
-
 Data Structure
-
 Networking
-
 RDBMS
RDBMS
-
 Operating System
-
 Java
Java
-
 MS Excel
-
 iOS
iOS
-
 HTML
HTML
-
 CSS
CSS
-
 Android
-
 Python
-
 C Programming
-
 C++
C++
-
 C#
C#
-
 MongoDB
-
 MySQL
MySQL
-
 Javascript
-
 PHP
PHP
-
 Economics & Finance
How to prevent text from spilling over to next cell in Excel?
Introduction
Data management and analysis are common uses for Excel's many features. When dealing with large amounts of data, it may be frustrating to see text in one cell overflow into neighboring cells. There are, however, a number of methods available inside Excel for preventing data loss due to stray text. This tutorial will show you how to keep Excel cells from spilling over into adjacent ones, so that your data will always be neat and legible.
Steps to prevent text from spilling over to the next cell
Wrap Text
Excel's "Wrap Text" function may be used to prevent text from extending into adjacent cells.
When the "Wrap Text" option is on, the contents of the specified cell(s) will be contained within the cell rather than continuing into the adjacent cell.
If the cells to either side of the one containing the wrapped text include data, the column width may need to be changed. Either by dragging the column's border to the desired width or by double-clicking on the right edge of the column header, which will force the width to expand to accommodate the content, you may accomplish your goal. Either method will work.
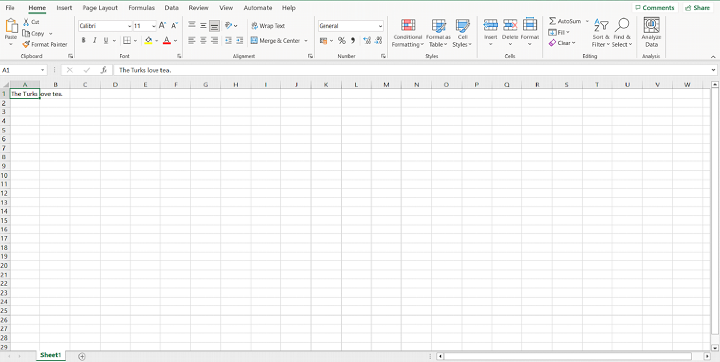
In the first step, select the cell or cells that will house the text that you will be entering.
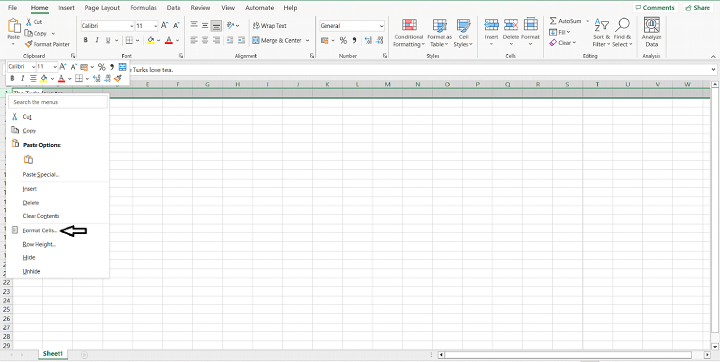
To format the selected cells, right-click on them and choose "Format Cells" from the resultant menu. Alternatively, you may format cells by clicking the arrow next to "Format" on the "Alignment" sub-tab of the "Home" tab.
Select the "Alignment" tab in the "Format Cells" dialogue box.

The fourth step is to select the "Wrap text" option.

Fifth, accept the modifications by clicking the "OK" button.
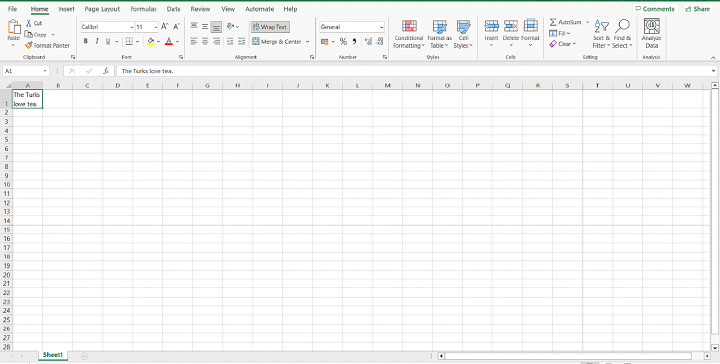
Only the specified cells will be affected by the "Wrap Text" setting. You can format a single cell or an entire column by following the steps outlined above.
Use Excel's "Wrap Text" feature for writing content that requires fitting many lines of text (such as paragraphs or whole articles) into a single cell. Blog entries, product descriptions, and other forms of textual information can benefit from this kind of presentation and organization. You can keep your Excel sheet looking neat and tidy by ensuring that no content from one cell overflows into the next.
AutoFit Column Width
Select the column(s) containing the text you want to prevent from spilling over.
Double-click the right boundary of the selected column header or choose "Format" > "AutoFit Column Width" from the menu.
Excel will automatically adjust the column width to fit the longest text entry within the selected column(s), ensuring that the text remains within the cell boundaries.
Merge Cells
Select the cells you want to merge.
Right-click and choose "Format Cells" from the context menu.
In the "Alignment" tab of the "Format Cells" dialog box, check the "Merge cells" box under the "Text control" section.
Click "OK" to merge the selected cells.
The text within the merged cells will be combined into a single cell, allowing it to fit without spilling over into adjacent cells.
Shrink to Fit
In order to change the width of a certain cell's text, you must first select that cell or cells.
The second action is to choose "Format Cells" from the resulting submenu.
To do so, bring up the "Format Cells" dialogue box and choose the "Alignment" tab before checking the "Shrink to fit" box under the "Text control" heading.
Click the "OK" button to commit your changes after making your choices.
Step 5 will take place if the contents of the cell(s) do not fit inside the width of the cell(s).
Expand the column widths to a greater extent
Select the Column(s) Containing the Text That Spills Over to the Next Cell
First, move the cursor so that it is above the line separating the headings of two columns.
To make additional room for the text, you may expand the column width by hand by clicking and dragging the border.
Conclusion
Excel provides many options to keep your spreadsheets legible and organized by preventing text from flowing into adjacent cells. You can keep text inside cell bounds by using tools like AutoFit Column Width, Wrap Text, Merge Cells, Shrink to Fit, or manually modifying column width.
Wrap Text and AutoFit Column Width both allow you to see text in a single cell over numerous lines. When you merge cells, the two neighboring cells become one large one where you may enter your text. If you need additional room to type in a cell, either use the Shrink to Fit feature or expand the column width manually.
By following these procedures, you may avoid text overflow in Excel and keep your data appearing neat and presentable. Learning these methods can help you better organize your spreadsheets and make your Excel workbooks more useful to others.

7K+ Views
