 Data Structure
 Networking
 RDBMS
RDBMS Operating System
 Java
Java MS Excel
 iOS
iOS HTML
HTML CSS
CSS Android
 Python
 C Programming
 C++
C++ C#
C# MongoDB
 MySQL
MySQL Javascript
 PHP
PHP
- Selected Reading
- UPSC IAS Exams Notes
- Developer's Best Practices
- Questions and Answers
- Effective Resume Writing
- HR Interview Questions
- Computer Glossary
- Who is Who
How to Position Text Box Over a Picture in Excel?
Excel is a powerful programme that can be used for more than just manipulating numbers and formulae. It enables you to add graphics and photos to your spreadsheets, enhancing their aesthetic appeal and informational value. Excel offers the ability to employ text boxes, which are adaptable containers that may be positioned and customised in accordance with your needs, when adding text to photos. In this article, we'll look at how to place an Excel text box over a picture.
Learning how to arrange text boxes over images can considerably improve your ability to communicate information effectively, whether you're a student preparing a visual project, a business professional presenting data, or just someone trying to improve their Excel skills. Let's get started and learn the various methods for positioning text boxes over images in Excel. You'll be able to produce visually attractive worksheets by the end of this session that mix the strength of facts with the impact of imagery.
Position Text Box Over a Picture
Here we will first insert a text box, then add the text to complete the task. So let us see a simple process to know how you can position a text box over a picture in Excel.
Step 1
Consider an Excel sheet where you have a picture.
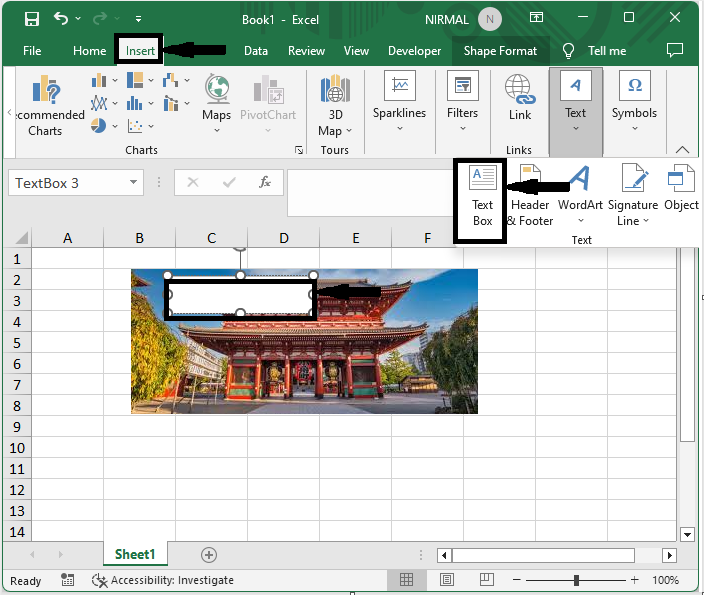
First, click on Insert and select the text box, then draw on the picture.
Insert > Text Box.

Step 2
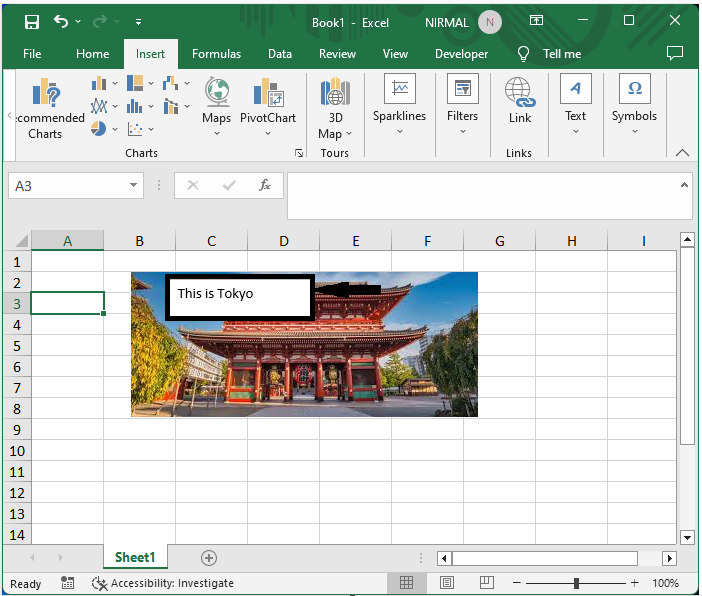
Now enter the text you want to display on the picture.

Step 3
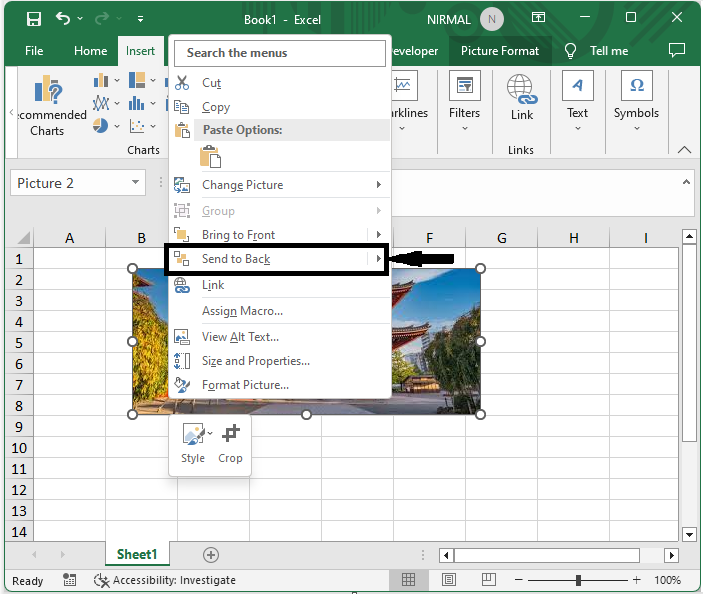
Then right-click on the picture and select Send to Back to complete the task.
Right Click > Send to Bank.

This is how you can position a text box over a picture in Excel.
Conclusion
In this tutorial, we have used a simple example to demonstrate how you can position a text box over a picture in Excel to highlight a particular set of data.

