
Article Categories
- All Categories
-
 Data Structure
-
 Networking
-
 RDBMS
RDBMS
-
 Operating System
-
 Java
Java
-
 MS Excel
-
 iOS
iOS
-
 HTML
HTML
-
 CSS
CSS
-
 Android
-
 Python
-
 C Programming
-
 C++
C++
-
 C#
C#
-
 MongoDB
-
 MySQL
MySQL
-
 Javascript
-
 PHP
PHP
-
 Economics & Finance
How to Move Row Up/Down or Column Left/Right in Excel?
In Microsoft Excel, one of the most powerful features is the ability to manipulate data efficiently. Whether you're reorganizing your spreadsheet or adjusting the layout of your data, moving rows or columns can save you a significant amount of time and effort. In this tutorial we will look the process to move row up and down then you can understand the process for column left or right.
In this tutorial, we will guide you through the step-by-step process of moving rows up/down or columns left/right in Excel. We can complete the task just by holding the Shift Key. By mastering these techniques, you'll be able to rearrange data within your Excel worksheets effortlessly, enhancing your productivity and making your work more organized and visually appealing. So, let's get started and unlock the potential of moving rows and columns in Excel!
Move Row Up/Down or Column Left/Right
Here, we can use the select and drag method to complete the task. So let us see a simple process to know how you can move a row up or down or a column left or right in Excel.
Step 1
Consider an Excel sheet where the data in the sheet is similar to the below image.
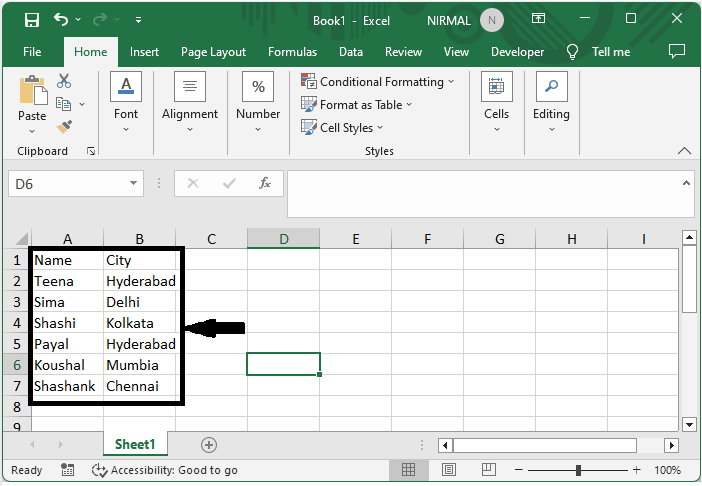
First, to move the row up or down, select the row, then move the cursor till it changes to four arrows.
Select Row > Move Cursor.
Step 2
Then hold the shift key and drag the row to another location.
Shift > Drag.
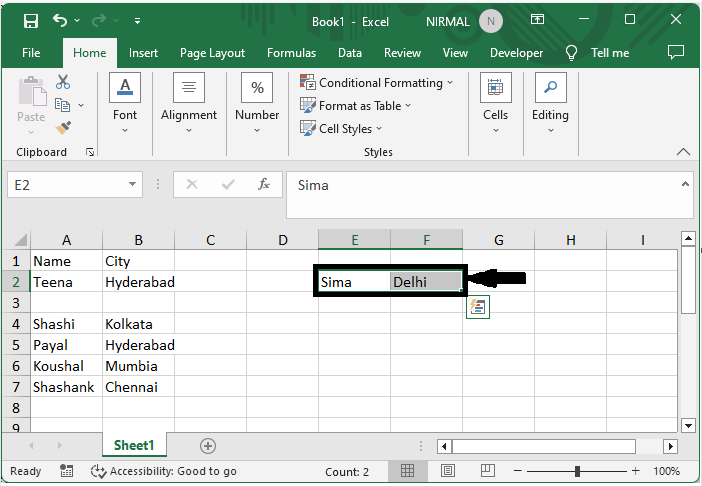
You can follow the same process to move the column left or right.
This is how you can move the row up or down or the column left or right in Excel.
Conclusion
In this tutorial, we have used a simple example to demonstrate how you can move a row up or down or a column left or right in Excel to highlight a particular set of data.

981 Views
