

- Excel - Home
- Excel - Getting Started
- Excel - Explore Window
- Excel - Backstage
- Excel - Entering Values
- Excel - Move Around
- Excel - Save Workbook
- Excel - Create Worksheet
- Excel - Copy Worksheet
- Excel - Hiding Worksheet
- Excel - Delete Worksheet
- Excel - Close Workbook
- Excel - Open Workbook
- Excel - Merge Workbooks
- Excel - File Password
- Excel - File Share
- Excel - Emoji & Symbols
- Excel - Context Help
- Excel - Insert Data
- Excel - Select Data
- Excel - Delete Data
- Excel - Move Data
- Excel - Rows & Columns
- Excel - Copy & Paste
- Excel - Find & Replace
- Excel - Spell Check
- Excel - Zoom In-Out
- Excel - Special Symbols
- Excel - Insert Comments
- Excel - Add Text Box
- Excel - Shapes
- Excel - 3D Models
- Excel - CheckBox
- Excel - Add Sketch
- Excel - Scan Documents
- Excel - Auto Fill
- Excel - SmartArt
- Excel - Insert WordArt
- Excel - Undo Changes
- Formatting Cells
- Excel - Setting Cell Type
- Excel - Move or Copy Cells
- Excel - Add Cells
- Excel - Delete Cells
- Excel - Setting Fonts
- Excel - Text Decoration
- Excel - Rotate Cells
- Excel - Setting Colors
- Excel - Text Alignments
- Excel - Merge & Wrap
- Excel - Borders and Shades
- Excel - Apply Formatting
- Formatting Worksheets
- Excel - Sheet Options
- Excel - Adjust Margins
- Excel - Page Orientation
- Excel - Header and Footer
- Excel - Insert Page Breaks
- Excel - Set Background
- Excel - Freeze Panes
- Excel - Conditional Format
- Excel - Highlight Cell Rules
- Excel - Top/Bottom Rules
- Excel - Data Bars
- Excel - Color Scales
- Excel - Icon Sets
- Excel - Clear Rules
- Excel - Manage Rules
- Working with Formula
- Excel - Formulas
- Excel - Creating Formulas
- Excel - Copying Formulas
- Excel - Formula Reference
- Excel - Relative References
- Excel - Absolute References
- Excel - Arithmetic Operators
- Excel - Parentheses
- Excel - Using Functions
- Excel - Builtin Functions
- Excel Formatting
- Excel - Formatting
- Excel - Format Painter
- Excel - Format Fonts
- Excel - Format Borders
- Excel - Format Numbers
- Excel - Format Grids
- Excel - Format Settings
- Advanced Operations
- Excel - Data Filtering
- Excel - Data Sorting
- Excel - Using Ranges
- Excel - Data Validation
- Excel - Using Styles
- Excel - Using Themes
- Excel - Using Templates
- Excel - Using Macros
- Excel - Adding Graphics
- Excel - Cross Referencing
- Excel - Printing Worksheets
- Excel - Email Workbooks
- Excel- Translate Worksheet
- Excel - Workbook Security
- Excel - Data Tables
- Excel - Pivot Tables
- Excel - Simple Charts
- Excel - Pivot Charts
- Excel - Sparklines
- Excel - Ads-ins
- Excel - Protection and Security
- Excel - Formula Auditing
- Excel - Remove Duplicates
- Excel - Services
- Excel Useful Resources
- Excel - Keyboard Shortcuts
- Excel - Quick Guide
- Excel - Functions
- Excel - Useful Resources
- Excel - Discussion
Selected Reading
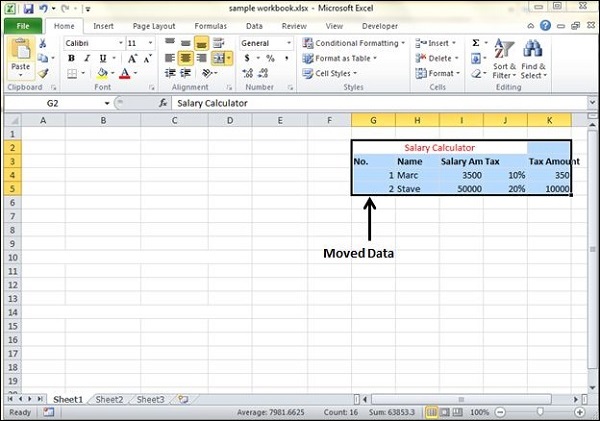
Move Data in Excel
Let us see how we can Move Data with MS Excel.
Step 1 − Select the data you want to Move. Right Click and Select the cut option.

Step 2 − Select the first cell where you want to move the data. Right click on it and paste the data. You can see the data is moved now.
Advertisements