
Article Categories
- All Categories
-
 Data Structure
-
 Networking
-
 RDBMS
RDBMS
-
 Operating System
-
 Java
Java
-
 MS Excel
-
 iOS
iOS
-
 HTML
HTML
-
 CSS
CSS
-
 Android
-
 Python
-
 C Programming
-
 C++
C++
-
 C#
C#
-
 MongoDB
-
 MySQL
MySQL
-
 Javascript
-
 PHP
PHP
-
 Economics & Finance
How to install OpenCV for C++ in Windows?
There are three steps to install OpenCV, which are as follows −
- Downloading all required software and install them.
- Processing OpenCV for Visual Studio.
- Linking OpenCV with Visual Studio.
Let us define these steps one by one.
Step 1 - Downloading and Installing the required Software
We will use OpenCV in Microsoft Visual Studio. So we must have to download Visual Studio and OpenCV.
- Visual Studio
- OpenCV
- CMake
Let us learn how to install this software first.
Installing Visual Studio
The first step is to download the Visual Studio on your system from its official website or follow link https://visualstudio.microsoft.com/downloads/.
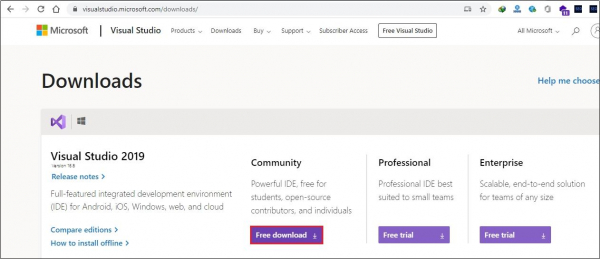
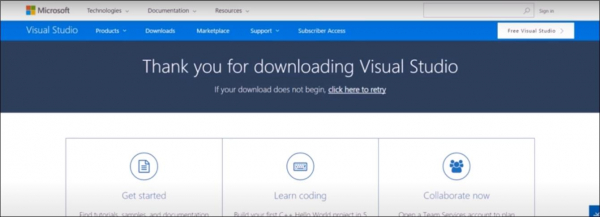
Then click on the download button for downloading the Visual Studio. After installing Visual Studio, you need to download OpenCV.
Installing OpenCV
The first step is to download the OpenCV on your system from its official website or follow link https://opencv.org/.
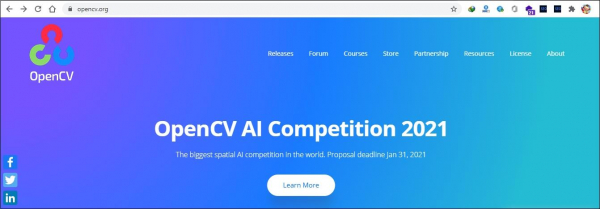
Then click on the download button for downloading OpenCV.
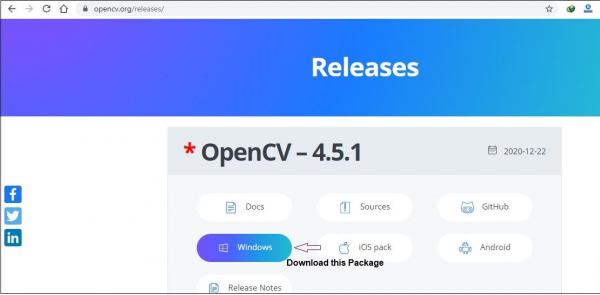
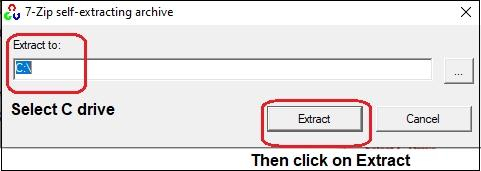
Once the download is completed, run the file and extract it in C Drive. The following picture will support you to understand better.

After the extraction, you will see that two folders named 'build' and 'sources' have been created. The 'sources' folder contains all the modules, include directories, examples and everything. The build folder contains all the binaries.
Installing CMake
CMake is an open-source software tool. It is used to control the compilation process of a software system. We use CMake because it can generate platform-independent configuration files of software modules.
The first step is to download the CMake on your system from its official website or given link https://CMake.org/download/.
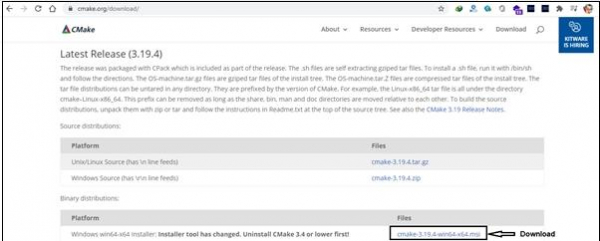
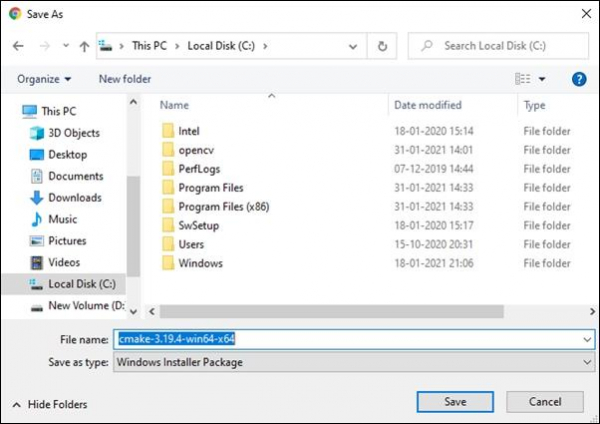
Then click on the download button for downloading CMake.
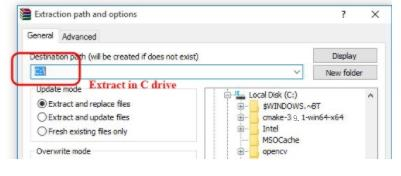
Once the download is completed, extract it in C drive. The figure shows the CMake extraction process.
Step 2 - Processing OpenCV for Visual Studio
There are the following steps to complete this process efficiently −
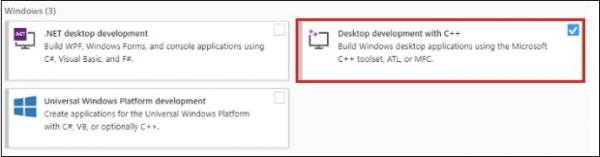
Installing the Desktop Development with C++
Firstly, launch your Visual Studio Installer device and add C++ for desktop development as a workload to your recent Visual Studio IDE version.
Setting the Environmental Variables
The next step is to set the Environmental Variables. If you do not set up the environmental variables correctly, the OpenCV will not run. There are the following steps to set the environmental variables.
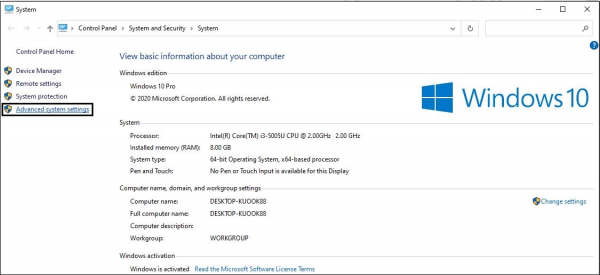
- Right-click on 'This PC', then press on properties. Then press on 'Advanced system settings'. A new window will open.
- Click on 'Environmental Variable' from there. Another window will open. In the 'system variables' use scroll bar and locate and select 'path'.
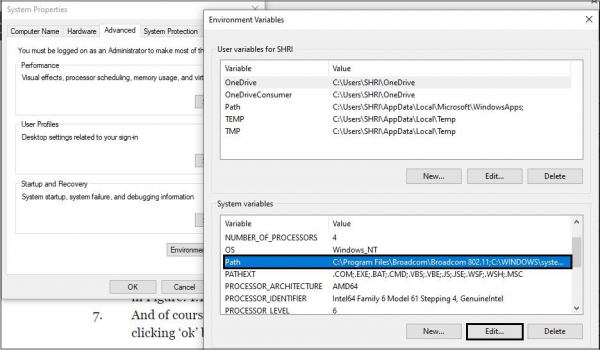
- Now click on 'Edit'. Another window will open.

- In the 'Variable Value' field write down the path to 'debug' and 'release' folder located inside the 'bin' folder of 'build' folder of OpenCV. Then save all the changes by clicking ok buttons.
Step 3 - Linking OpenCV with Microsoft Visual Studio
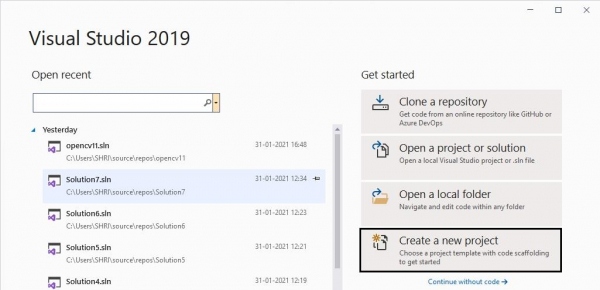
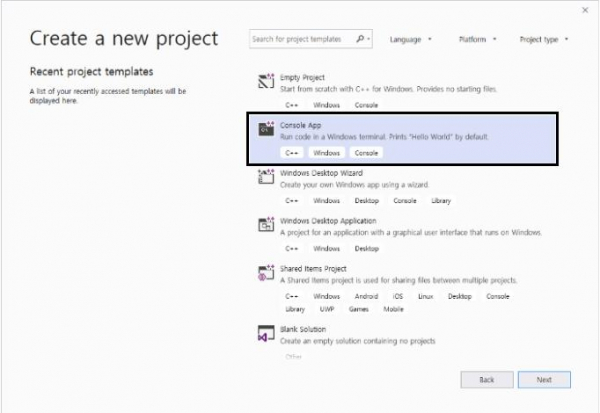
Create a project in Visual Studio 2019
In this step, you can create a new project and go for the C++ Console App template.
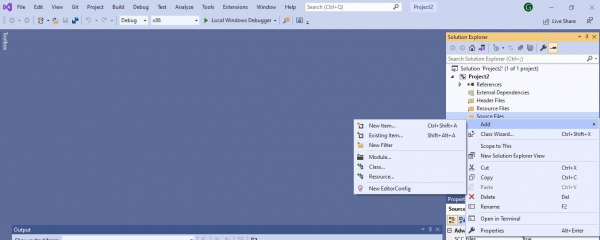
Once the project created and then go to the source files. A menu will open.
Then right-click on adding a new item and then another window will open.
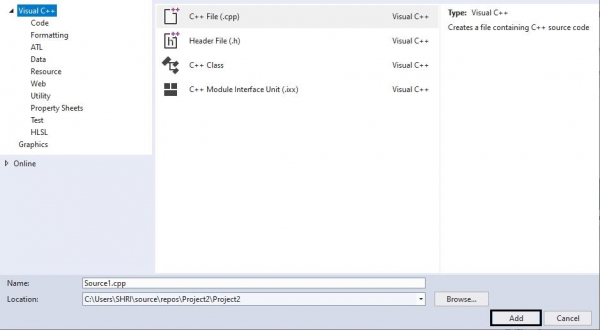
Then we are creating a new CPP file from there. Then click on Add.
The coding Interface will be available. Now you can write C++ code here.
Linking OpenCV
There are the following steps to link OpenCV with the project −
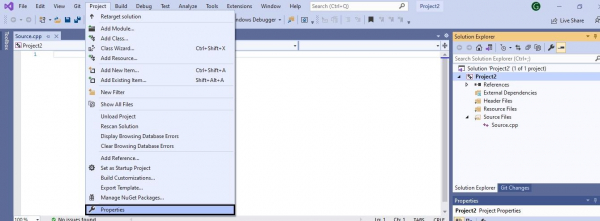
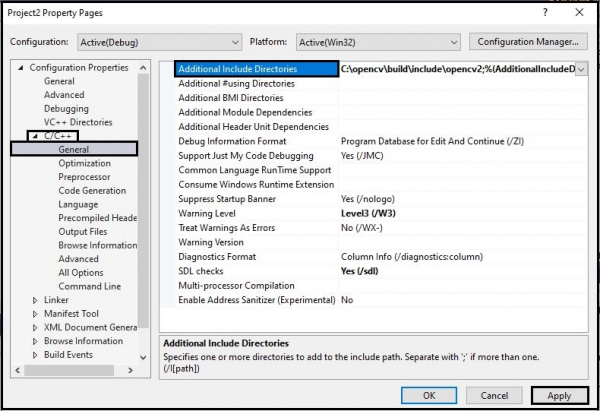
- Right-click on the project and then click on the properties from the menu. A new window will open.
- From there, select 'All Configurations' and the appropriate version of your operating system (win32 for 32 bit and x64 for 64 bit).
- Then click on the dropdown arrow of 'C/C++' and click on General. On the right side, locate Additional Include Directories and add the path of include folder of OpenCV and press Enter from the keyboard.
- The include folder is located at the C:\opencv\build\include if you have installed the OpenCV in C drive. If you have installed in another location, look for the include folder inside the OpenCV build folder.
- Then click on the Apply button.
- Now we will add the OpenCV Libraries. Firstly, to select Debug from Configuration and then click on the dropdown array of Linker.
- Click on General. Then click on the right side in Additional Library Dependencies field add the path of 'Debug' folder and hit 'Enter' from the keyboard.
The Debug folder is located inside the 'Lib' folder, located inside the 'build' folder of OpenCV. The path is C:\opencv\build\x64\vc15\lib if you have extracted OpenCV in C Drive.
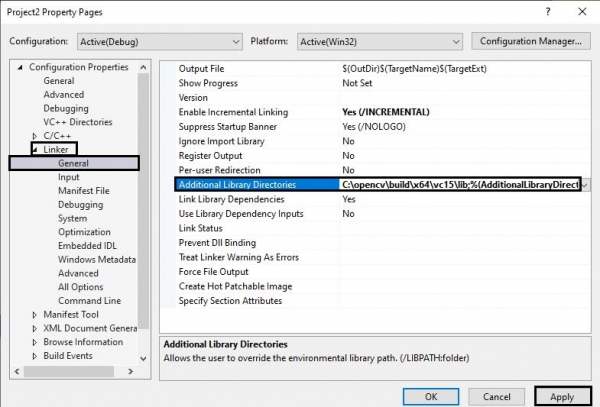
- Then Click on Apply Button and then go to input and locate 'Additional Dependencies' on the right side and click on the dropdown icon.
- Click on the
option. A new window will open.
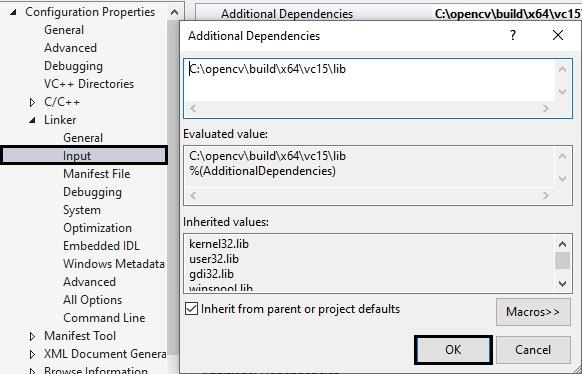
- Then click on Ok button and then press on Apply button.
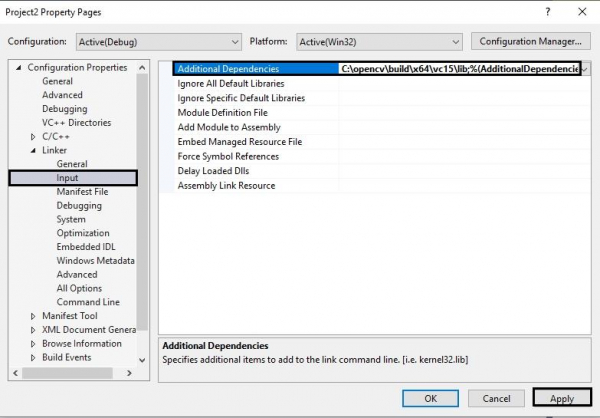
- Finally, you have completed all of the configurations of your visual studio IDE.

24K+ Views
