
Article Categories
- All Categories
-
 Data Structure
-
 Networking
-
 RDBMS
RDBMS
-
 Operating System
-
 Java
Java
-
 MS Excel
-
 iOS
iOS
-
 HTML
HTML
-
 CSS
CSS
-
 Android
-
 Python
-
 C Programming
-
 C++
C++
-
 C#
C#
-
 MongoDB
-
 MySQL
MySQL
-
 Javascript
-
 PHP
PHP
-
 Economics & Finance
How to implement a TabLayout in Android using ViewPager and Fragments
By employing a TabLayout in Android, utilizing ViewPager and Fragments, developers can design intuitive and well-planned user interfaces. With the help of TabLayout, users can effortlessly navigate through multiple sections or categories within an application, making it more user friendly. ViewPager enables smooth swiping between fragments, ensuring a seamless user experience. By combining these components, developers can create a tabbed layout where each tab corresponds to a specific fragment, displaying its unique content.
The process of managing multiple fragments and enhancing app usability can be simplified by implementing a TabLayout in Android using ViewPager and Fragments. This guide takes a narrative approach to explain how to create an engaging and interactive user interface through this method.
TabLayout
TabLayout is an essential UI component in Android that simplifies the arrangement of multiple tabs horizontally. It's commonly utilized alongside ViewPager and Fragments to create smooth tabbed interfaces for users. Each tab corresponds to a specific section or category of content on the screen, giving quick access to essential features of an app. With TabLayout, individuals can effortlessly switch between different fragments or screens, exploring various sections without any hassle.
TabLayout provides visual indicators, such as tab indicators and text labels, to highlight the currently selected tab. It also supports swipe gestures for navigating between tabs when used with ViewPager. Developers can customize the appearance of TabLayout by specifying various attributes, including tab gravity, tab mode, and tab text styling, to match the design requirements of their app.
Approaches
There are different methods to implement a TabLayout in Android using ViewPager and Fragments. Here are three common approaches:
Using a FragmentPagerAdapter
Using a FragmentStatePagerAdapter
Using a custom FragmentPagerAdapter
Using a FragmentPagerAdapter
This method involves creating a layout file that includes TabLayout and ViewPager. A FragmentPagerAdapter subclass is created, where the necessary methods like getItem() and getCount() are overridden to provide the appropriate fragments based on the position. The FragmentPagerAdapter instance is set on the ViewPager, and the TabLayout is connected to the ViewPager using setupWithViewPager(). This approach is suitable for a small number of fragments.
Algorithm
Create a layout file that includes the TabLayout and ViewPager.
Create a FragmentPagerAdapter subclass and override the necessary methods, such as getItem() and getCount().
In the FragmentPagerAdapter's getItem() method, return the appropriate fragment instance based on the position.
Set the FragmentPagerAdapter instance on the ViewPager using setAdapter().
Connect the TabLayout with the ViewPager using setupWithViewPager().
Example
// MainActivity.java

import androidx.appcompat.app.AppCompatActivity;
import androidx.fragment.app.Fragment;
import androidx.fragment.app.FragmentManager;
import androidx.fragment.app.FragmentPagerAdapter;
import androidx.viewpager.widget.ViewPager;

import android.os.Bundle;
import android.view.LayoutInflater;
import android.view.View;
import android.view.ViewGroup;

import com.google.android.material.tabs.TabLayout;

public class MainActivity extends AppCompatActivity {

   private ViewPager viewPager;
   private TabLayout tabLayout;

   @Override
   protected void onCreate(Bundle savedInstanceState) {
      super.onCreate(savedInstanceState);
      setContentView(R.layout.activity_main);

      viewPager = findViewById(R.id.viewPager);
      tabLayout = findViewById(R.id.tabLayout);

      viewPager.setAdapter(new MyPagerAdapter(getSupportFragmentManager()));
      tabLayout.setupWithViewPager(viewPager);
   }

   private static class MyPagerAdapter extends FragmentPagerAdapter {

      MyPagerAdapter(FragmentManager fm) {
         super(fm);
      }

      @Override
      public Fragment getItem(int position) {
         switch (position) {
            case 0:
               return new FragmentOne();
            case 1:
               return new FragmentTwo();
            case 2:
               return new FragmentThree();
            default:
               return null;
         }
      }

      @Override
      public int getCount() {
         return 3;
      }

      @Override
      public CharSequence getPageTitle(int position) {
         switch (position) {
            case 0:
               return "Tab 1";
            case 1:
               return "Tab 2";
            case 2:
               return "Tab 3";
            default:
               return null;
         }
      }
   }
}

// FragmentOne.java, FragmentTwo.java, FragmentThree.java are
simple fragment classes.

// activity_main.xml

<LinearLayout
xmlns:android="http://schemas.android.com/apk/res/android"
   xmlns:app="http://schemas.android.com/apk/res-auto"
   xmlns:tools="http://schemas.android.com/tools"
   android:layout_width="match_parent"
   android:layout_height="match_parent"
   android:orientation="vertical"
   tools:context=".MainActivity">

   <com.google.android.material.tabs.TabLayout
      android:id="@+id/tabLayout"
      android:layout_width="match_parent"
      android:layout_height="wrap_content"
      app:tabMode="fixed" />

   <androidx.viewpager.widget.ViewPager
      android:id="@+id/viewPager"
      android:layout_width="match_parent"
      android:layout_height="0dp"
      android:layout_weight="1" />

</LinearLayout>
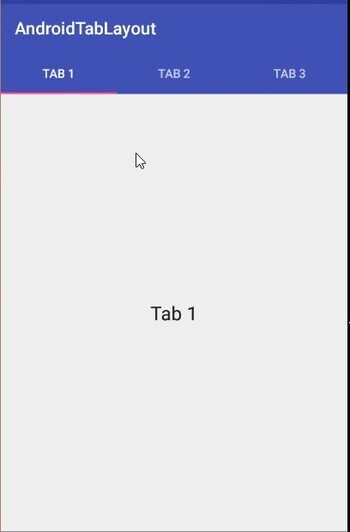
Output

Using a FragmentStatePagerAdapter
Similar to the previous method, a layout file with TabLayout and ViewPager is created. However, a FragmentStatePagerAdapter is used instead of FragmentPagerAdapter. FragmentStatePagerAdapter is more efficient for managing a large number of fragments or memory-intensive content, as it destroys and recreates fragments as needed.
Algorithm
Follow the same steps as above but use a FragmentStatePagerAdapter instead of FragmentPagerAdapter.
FragmentStatePagerAdapter is suitable when dealing with a large number of fragments or memory-intensive content.
Program
// MainActivity.java

import androidx.appcompat.app.AppCompatActivity;
import androidx.fragment.app.Fragment;
import androidx.fragment.app.FragmentManager;
import androidx.fragment.app.FragmentStatePagerAdapter;
import androidx.viewpager.widget.ViewPager;

import android.os.Bundle;

import com.google.android.material.tabs.TabLayout;

public class MainActivity extends AppCompatActivity {

   private ViewPager viewPager;
   private TabLayout tabLayout;

   @Override
   protected void onCreate(Bundle savedInstanceState) {
      super.onCreate(savedInstanceState);
      setContentView(R.layout.activity_main);

      viewPager = findViewById(R.id.viewPager);
      tabLayout = findViewById(R.id.tabLayout);

      viewPager.setAdapter(new MyPagerAdapter(getSupportFragmentManager()));
      tabLayout.setupWithViewPager(viewPager);
   }

   private static class MyPagerAdapter extends FragmentStatePagerAdapter {

      MyPagerAdapter(FragmentManager fm) {
         super(fm, BEHAVIOR_RESUME_ONLY_CURRENT_FRAGMENT);
      }

      @Override
      public Fragment getItem(int position) {
         switch (position) {
            case 0:
               return new FragmentOne();
            case 1:
               return new FragmentTwo();
            case 2:
               return new FragmentThree();
            default:
               return null;
         }
      }

      @Override
      public int getCount() {
         return 3;
      }

      @Override
      public CharSequence getPageTitle(int position) {
         switch (position) {
            case 0:
               return "Tab 1";
            case 1:
               return "Tab 2";
            case 2:
               return "Tab 3";
            default:
               return null;
         }
      }
   }
}

// FragmentOne.java, FragmentTwo.java, FragmentThree.java are
simple fragment classes.

// activity_main.xml

<LinearLayout
xmlns:android="http://schemas.android.com/apk/res/android"
   xmlns:app="http://schemas.android.com/apk/res-auto"
   xmlns:tools="http://schemas.android.com/tools"
   android:layout_width="match_parent"
   android:layout_height="match_parent"
   android:orientation="vertical"
   tools:context=".MainActivity">

   <com.google.android.material.tabs.TabLayout
      android:id="@+id/tabLayout"
      android:layout_width="match_parent"
      android:layout_height="wrap_content"
      app:tabMode="fixed" />

   <androidx.viewpager.widget.ViewPager
      android:id="@+id/viewPager"
      android:layout_width="match_parent"
      android:layout_height="0dp"
      android:layout_weight="1" />

</LinearLayout>
Output
Using a custom FragmentPagerAdapter
This approach involves creating a custom FragmentPagerAdapter class that extends either FragmentPagerAdapter or FragmentStatePagerAdapter. The necessary methods are overridden in the custom adapter to handle fragment creation and retrieval. The logic to determine the appropriate fragment based on the selected tab is implemented. The custom adapter is set on the ViewPager using setAdapter(), and the TabLayout is connected to the ViewPager using setupWithViewPager(). This method provides flexibility to handle specific requirements and customization needs.
Algorithm
Create a custom FragmentPagerAdapter class that extends FragmentPagerAdapter or FragmentStatePagerAdapter.
Override the necessary methods and handle the creation and retrieval of fragments.
Implement the logic to determine which fragment to display based on the selected tab.
Set the custom FragmentPagerAdapter instance on the ViewPager using setAdapter().
Connect the TabLayout with the ViewPager using setupWithViewPager().
Program
// MainActivity.java

import androidx.appcompat.app.AppCompatActivity;
import androidx.fragment.app.Fragment;
import androidx.fragment.app.FragmentManager;
import androidx.fragment.app.FragmentPagerAdapter;
import androidx.viewpager.widget.ViewPager;

import android.os.Bundle;

import com.google.android.material.tabs.TabLayout;

public class MainActivity extends AppCompatActivity {

   private ViewPager viewPager;
   private TabLayout tabLayout;

   @Override
   protected void onCreate(Bundle savedInstanceState) {
      super.onCreate(savedInstanceState);
      setContentView(R.layout.activity_main);

      viewPager = findViewById(R.id.viewPager);
      tabLayout = findViewById(R.id.tabLayout);

      viewPager.setAdapter(new CustomPagerAdapter(getSupportFragmentManager()));
      tabLayout.setupWithViewPager(viewPager);
   }

   private static class CustomPagerAdapter extends FragmentPagerAdapter {

      CustomPagerAdapter(FragmentManager fm) {
         super(fm);
      }

      @Override
      public Fragment getItem(int position) {
         switch (position) {
            case 0:
               return new FragmentOne();
            case 1:
               return new FragmentTwo();
            case 2:
               return new FragmentThree();
            default:
               return null;
         }
      }

      @Override
      public int getCount() {
         return 3;
      }

      @Override
      public CharSequence getPageTitle(int position) {
         switch (position) {
            case 0:
               return "Tab 1";
            case 1:
               return "Tab 2";
            case 2:
               return "Tab 3";
            default:
               return null;
         }
      }
   }
}

// FragmentOne.java, FragmentTwo.java, FragmentThree.java are
simple fragment classes.

// activity_main.xml

<LinearLayout
xmlns:android="http://schemas.android.com/apk/res/android"
   xmlns:app="http://schemas.android.com/apk/res-auto"
   xmlns:tools="http://schemas.android.com/tools"
   android:layout_width="match_parent"
   android:layout_height="match_parent"
   android:orientation="vertical"
   tools:context=".MainActivity">

   <com.google.android.material.tabs.TabLayout
      android:id="@+id/tabLayout"
      android:layout_width="match_parent"
      android:layout_height="wrap_content"
      app:tabMode="fixed" />

   <androidx.viewpager.widget.ViewPager
      android:id="@+id/viewPager"
      android:layout_width="match_parent"
      android:layout_height="0dp"
      android:layout_weight="1" />

</LinearLayout>
Output

Conclusion
In this tutorial, implementing a TabLayout in Android using ViewPager and Fragments provides an effective way to organize and navigate through different sections of an app. Whether using FragmentPagerAdapter, FragmentStatePagerAdapter, or a custom adapter, these methods enable developers to create user-friendly tabbed interfaces, enhancing the user experience by allowing seamless switching between fragments and providing visual indicators for the active tab. By leveraging the power of TabLayout, ViewPager, and Fragments, developers can create engaging and organized Android applications.

2K+ Views
