
Article Categories
- All Categories
-
 Data Structure
-
 Networking
-
 RDBMS
RDBMS
-
 Operating System
-
 Java
Java
-
 MS Excel
-
 iOS
iOS
-
 HTML
HTML
-
 CSS
CSS
-
 Android
-
 Python
-
 C Programming
-
 C++
C++
-
 C#
C#
-
 MongoDB
-
 MySQL
MySQL
-
 Javascript
-
 PHP
PHP
-
 Economics & Finance
How To Disable Ability To Insert Row And Column In Excel?
Excel is a powerful spreadsheet software that allows you to organize, analyze, and manipulate data efficiently. However, there may be situations where you want to restrict certain actions to maintain the integrity of your workbook or to prevent accidental changes.
One such action is the ability to insert rows and columns, which can potentially disrupt the structure and calculations in your Excel workbook. By disabling this feature, you can ensure that users are unable to insert new rows or columns, providing a controlled environment for data entry, analysis, and reporting. Let's get started and learn how to safeguard your Excel workbooks by disabling the option to insert rows and columns!
Disable Ability To Insert Row And Column
Here we will insert a VBA module and run it to complete the task. So let us see a simple process to know how you can disable ability to insert row and column in Excel.
Step 1
Consider any excel sheet.
First right click on sheet name and select view code to open VBA application the click on insert and select module and copy the code into text box.
Right click > View code > Insert > Module > Copy.
Code
Sub DisableInsertRowColumn()
   Dim ws As Worksheet
   Set ws = ThisWorkbook.Worksheets("Sheet1")

   ws.Protect Password:="YourPassword", AllowInsertingRows:=False, AllowInsertingColumns:=False
End Sub
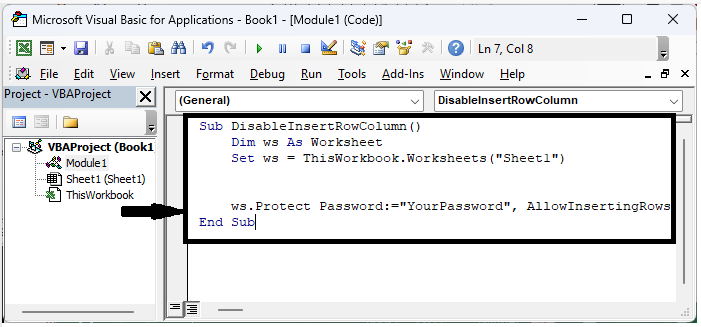
Replace you sheet name with Sheet1 in the code.
Step 2
Then save the sheet as macro enabled template and click F5 to complete the task. From now you will not be able to insert the rows or column.
Save > F5.
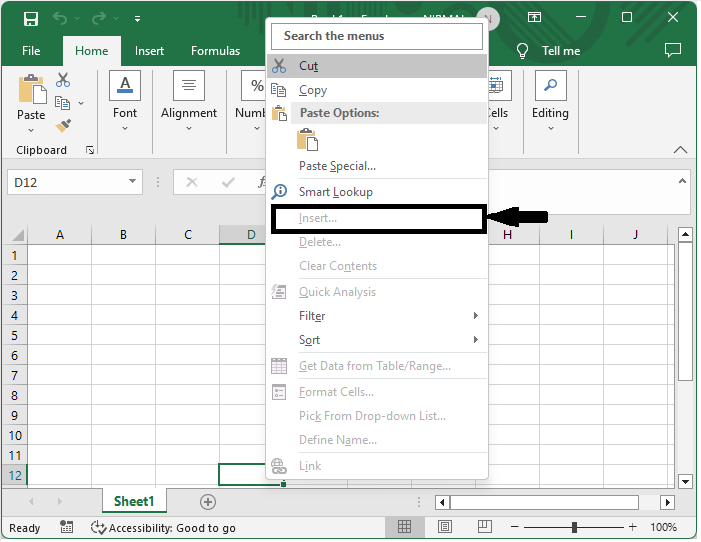
The insert function will be disabled.
Conclusion
In this tutorial, we have used a simple example to demonstrate how you can disable ability to insert row and column in Excel to highlight particular set of data.

921 Views
