
Article Categories
- All Categories
-
 Data Structure
-
 Networking
-
 RDBMS
RDBMS
-
 Operating System
-
 Java
Java
-
 MS Excel
-
 iOS
iOS
-
 HTML
HTML
-
 CSS
CSS
-
 Android
-
 Python
-
 C Programming
-
 C++
C++
-
 C#
C#
-
 MongoDB
-
 MySQL
MySQL
-
 Javascript
-
 PHP
PHP
-
 Economics & Finance
How To Disable Protected View In Excel?
We're glad you're here to learn how to turn off Protected View in Microsoft Excel. A security feature called Protected View aims to shield your computer from potentially harmful files. Although it is a helpful function, there are times when you may want to temporarily or permanently disable it to improve workflow. We will walk you through the procedures needed to turn off Protected View in Excel in this article. Whether you are a novice or seasoned Excel user, this lesson will show you how to change Excel's default settings and increase your productivity.
Please be aware that completely turning off Protected View could put your computer's security at risk. We advise utilising this guide with caution and disabling Protected View only for papers that are from trusted sources.
Disable Protected View
Here we will make changes to the Excel options to complete the task. So let us see a simple process to learn how you can disable protected views in Excel.
Step 1
When we open an Excel file that is downloaded from the Internet or other locations, there is a security warning bar above the formula bar.
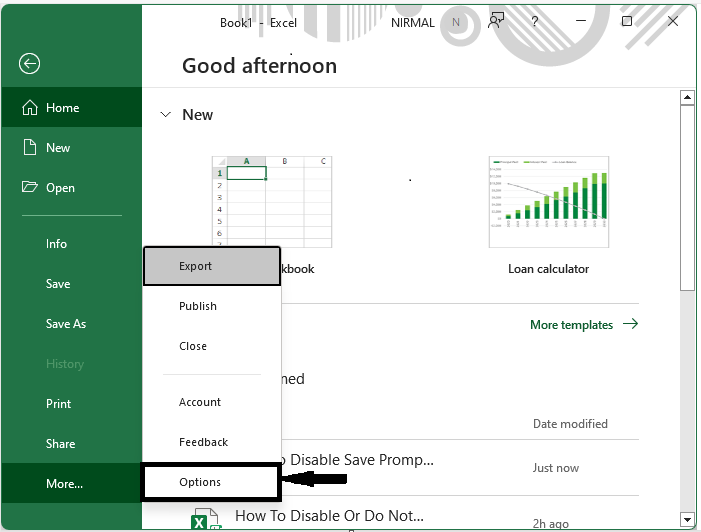
Consider any Excel. First, click on File and select Options to open Excel Options.
File > Options.
Step 2
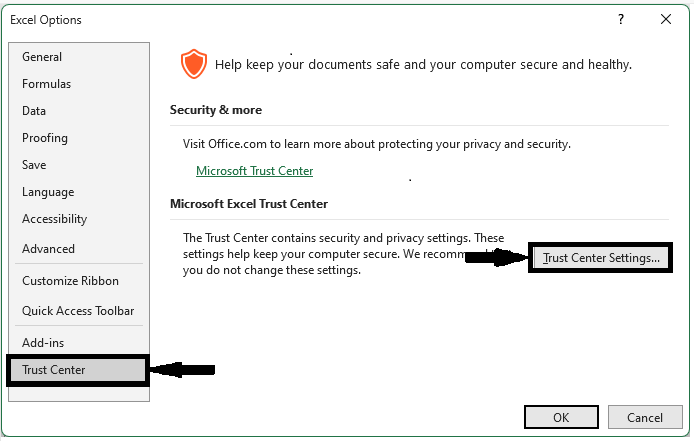
Then click on Trust Centre and then Trust Centre Settings to open Trust Centre Settings.
Trust centre > Trust centre settings.
Step 3
Then click on protected view and uncheck all the boxes and click OK, and again click OK to complete the task.
Protected view > Uncheck > Ok > Ok.
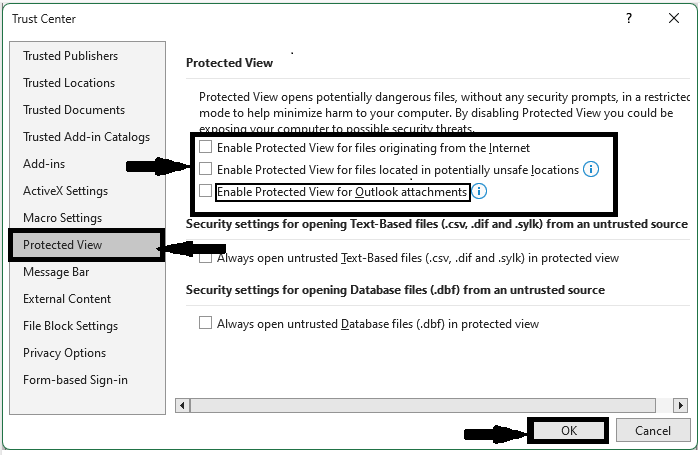
This is how we can disable protected views in Excel. If you need to enable the protected view, check all the boxes and click OK.
Conclusion
In this tutorial, we have used a simple example to demonstrate how you can disable protected views in Excel to highlight a particular set of data.

2K+ Views
