
Article Categories
- All Categories
-
 Data Structure
-
 Networking
-
 RDBMS
RDBMS
-
 Operating System
-
 Java
Java
-
 MS Excel
-
 iOS
iOS
-
 HTML
HTML
-
 CSS
CSS
-
 Android
-
 Python
-
 C Programming
-
 C++
C++
-
 C#
C#
-
 MongoDB
-
 MySQL
MySQL
-
 Javascript
-
 PHP
PHP
-
 Economics & Finance
How To Create Drop Down List With Multiple Checkboxes In Excels?
Excel is a powerful tool for organizing and analyzing data, and one of its most useful features is the ability to create drop down lists. These lists allow users to select an item from a pre-defined list, making data entry more efficient and accurate. But what if you want to allow users to select multiple items from a drop down list? That's where a drop down list with multiple checkboxes comes in.
Creating a drop down list with multiple checkboxes in Excel can be a bit tricky, but it's a useful skill to have if you want to make your spreadsheets more user-friendly. In this tutorial, we'll go through the steps to create a drop down list with multiple checkboxes in Excel, including creating the list, adding checkboxes, and linking the checkboxes to the list. By the end of this tutorial, you'll be able to create drop down lists with multiple checkboxes to streamline your data entry process and make your spreadsheets more efficient.
Create Drop Down List With Multiple Checkboxes
Here we will first insert an Active X control list box, then create a rectangle, and finally assign a macro to it. So let us see a simple process to know how you can create a drop-down list with multiple checkboxes in Excel.
Step 1
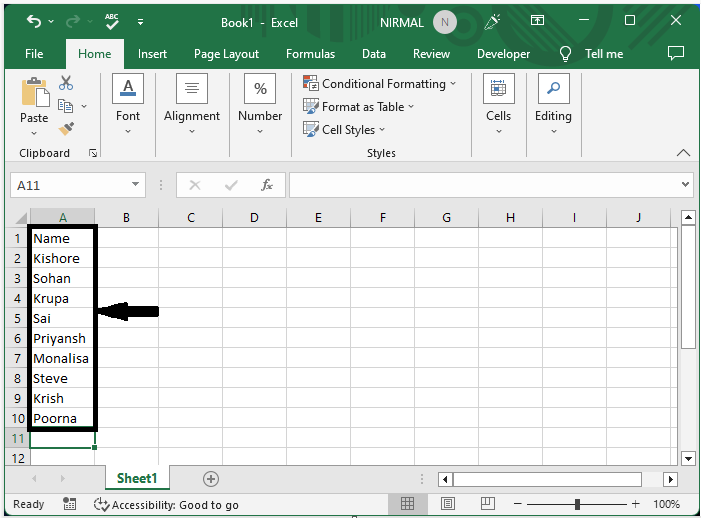
Consider an Excel sheet where you have a list of names similar to the below image.
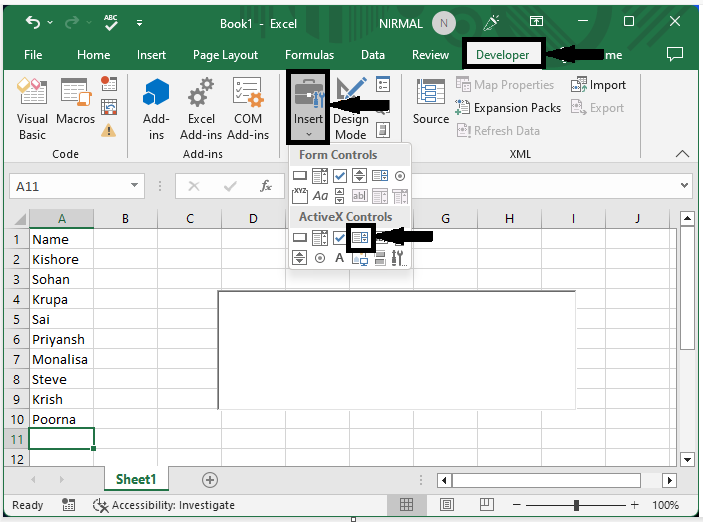
First, click on developer, then click on insert, and draw an active X control list box.
Step 2
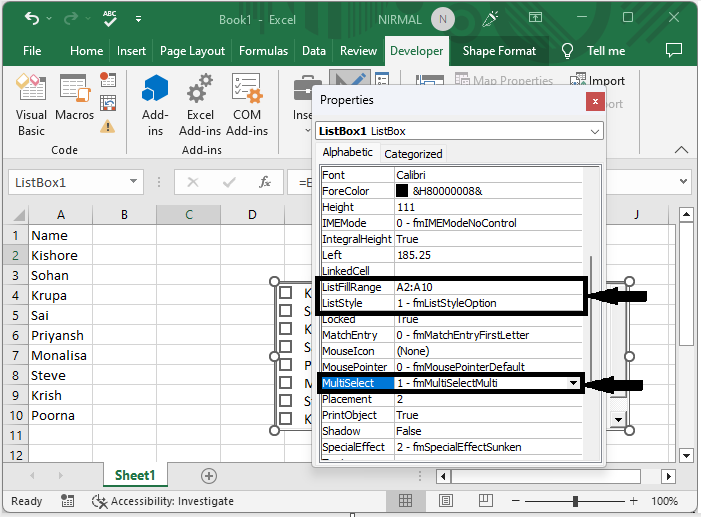
Then right-click on the box and select properties. Edit the following ?
For the ListFillRange box, enter the source range you will display in the list.
For the ListStyle box, select 1 - fmList StyleOption;
For the MultiSelect box, select 1 - fmMultiSelectMulti;
Step 3
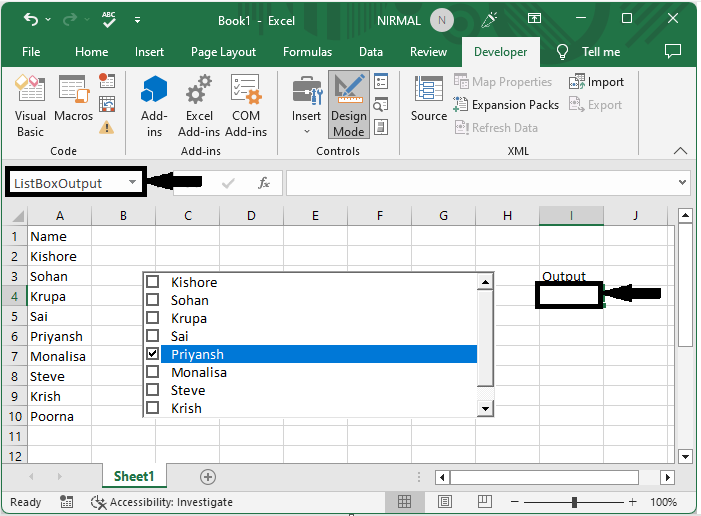
Then click an empty cell, name it ListBoxOutPut, and click enter.
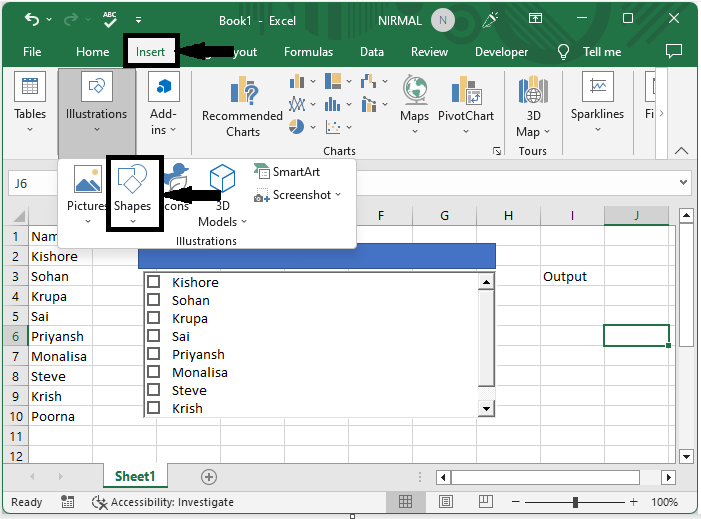
Step 4
Now click Insert, then Shapes, and draw a box as shown in the below image.
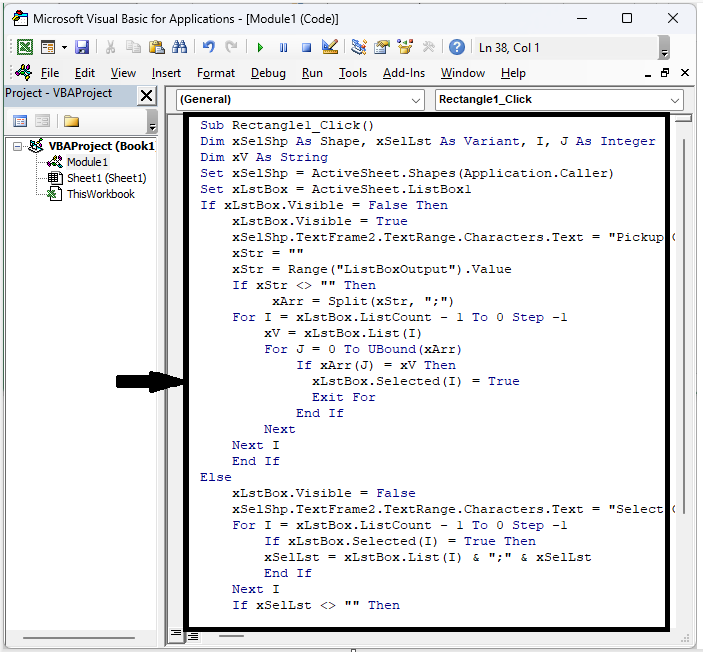
Step 5
Now right-click on the shape, select assign macro, click new, and replace the code with the code mentioned below.
Code
Code
Sub Rectangle1_Click()
Dim xSelShp As Shape, xSelLst As Variant, I, J As Integer
Dim xV As String
Set xSelShp = ActiveSheet.Shapes(Application.Caller)
Set xLstBox = ActiveSheet.ListBox1
If xLstBox.Visible = False Then
   xLstBox.Visible = True
   xSelShp.TextFrame2.TextRange.Characters.Text = "Pickup Options"
   xStr = ""
   xStr = Range("ListBoxOutput").Value
   If xStr <> "" Then
      xArr = Split(xStr, ";")
   For I = xLstBox.ListCount - 1 To 0 Step -1
      xV = xLstBox.List(I)
      For J = 0 To UBound(xArr)
         If xArr(J) = xV Then
            xLstBox.Selected(I) = True
            Exit For
            End If
      Next
   Next I
   End If
Else
   xLstBox.Visible = False
   xSelShp.TextFrame2.TextRange.Characters.Text = "Select Options"
   For I = xLstBox.ListCount - 1 To 0 Step -1
      If xLstBox.Selected(I) = True Then
      xSelLst = xLstBox.List(I) & ";" & xSelLst
      End If
   Next I
   If xSelLst <> "" Then
      Range("ListBoxOutput") = Mid(xSelLst, 1, Len(xSelLst) - 1)
   Else
      Range("ListBoxOutput") = ""
   End If
End If
End Sub
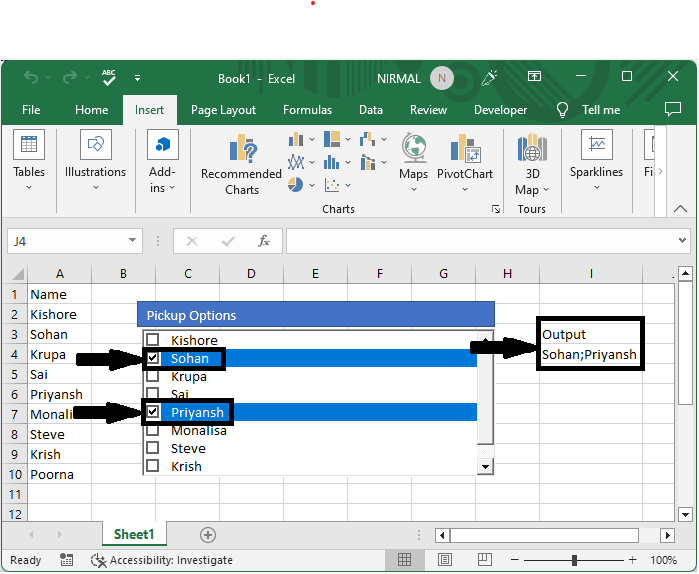
Step 6
Then save the sheet as a macro-enabled template and close the VBA application.
The output will be similar to the image below.
Conclusion
In this tutorial, we have used a simple example to demonstrate how you can create a drop-down list with multiple checkboxes in Excel to highlight a particular set of data.

10K+ Views
