- Groovy Tutorial
- Groovy - Home
- Groovy - Overview
- Groovy - Environment
- Groovy - Basic Syntax
- Groovy - Data Types
- Groovy - Variables
- Groovy - Optionals
- Groovy - Numbers
- Groovy - Strings
- Groovy - Ranges
- Groovy - Lists
- Groovy - Maps
- Groovy - Dates & Times
Groovy Operators
- Groovy - Operators
- Groovy - Arithmetic Operators
- Groovy - Assignment Operators
- Groovy - Relational Operators
- Groovy - Logical Operators
- Groovy - Bitwise Operators
- Groovy - Spaceship Operator
- Groovy - in Operator
- Groovy - Elvis Operator
- Groovy - Safe Navigation Operator
- Groovy Operator Precedence & Associativity
Control Statements
- Groovy - Decision Making
- Groovy - If Else Statement
- Groovy - Switch Statement
- Groovy - Loops
- Groovy - For Loop
- Groovy - For-in Loop
- Groovy - While Loop
- Groovy - Do While Loop
- Groovy - Break Statement
- Groovy - Continue Statement
Groovy File Handling
- Groovy - File I/O
- Java - Create a File
- Java - Write to File
- Java - Append to File
- Java - Read Files
- Java - Delete Files
- Java - File Properties
- Java - File Size
- Java - File Permissions
- Java - Directories
- Java - Listing Directories
- Java - Filtering Files/Directories
- Java - Deleting Directories
- Java - Renaming Files/Directories
Groovy Error & Exceptions
- Groovy - Exception Handling
- Groovy - try-catch Block
- Groovy - try-with-resources
- Groovy - Multi-catch Block
- Groovy - Nested try Block
- Groovy - Finally Block
- Groovy - throw Exception
- Groovy - Exception Propagation
- Groovy - Built-in Exceptions
- Groovy - Custom Exception
Groovy Multithreading
- groovy - Multithreading
- groovy - Thread Life Cycle
- groovy - Creating a Thread
- groovy - Starting a Thread
- groovy - Joining Threads
- groovy - Naming Thread
- groovy - Thread Scheduler
- groovy - Thread Pools
- groovy - Main Thread
- groovy - Thread Priority
- groovy - Daemon Threads
- groovy - Shutdown Hook
Groovy Synchronization
- groovy - Synchronization
- groovy - Block Synchronization
- groovy - Static Synchronization
- groovy - Inter-thread Communication
- groovy - Thread Deadlock
- groovy - Interrupting a Thread
- groovy - Thread Control
- groovy - Reentrant Monitor
- Groovy - Methods
- Groovy - Methods
- Groovy - Optional parenthesis
- Groovy - Named Arguments
- Groovy - Closures as Arguments
- Groovy - Method Overloading
- Groovy - Method Scope and Visibility
- Groovy - isCase Method
- Groovy - Implicit Return
- Groovy - Variable Arguments
- Groovy - Regular Expressions
- Groovy - Regular Expressions
- Groovy - Defining Regular Expressions
- Groovy - Matcher Object
- Groovy - Regex Tasks
- Groovy - XML
- Groovy - XML
- Groovy - Parsing XML
- Groovy - Creating XML
- Groovy - Modifying XML
- Groovy - Querying XML
- Groovy - Simplified Notation
- Groovy - Closure based Querying
- Groovy - Closure based Creation
- Groovy - JSON
- Groovy - JSON
- Groovy - Parsing JSON
- Groovy - Creating JSON using JsonOutput
- Groovy - Creating JSON using JsonBuilder
- Groovy - Modifying JSON
- Groovy - Error Handling
- Groovy - Handling JSON Arrays
- Groovy - JSON Array Operations
- Groovy - JSON Objects
- Groovy - JSON Object Operations
- Groovy - Generics
- Groovy - Generics
- Groovy - Declaring Generic Types
- Groovy - Bound Type Parameters
- Groovy - Wild Cards
- Groovy - Miscellaneous
- Groovy - Object Oriented
- Groovy - Closures
- Groovy - Annotations
- Groovy - JMX
- Groovy - DSLS
- Groovy - Database
- Groovy - Builders
- Groovy - Command Line
- Groovy - Unit Testing
- Groovy - Template Engines
- Groovy - Meta Object Programming
- Groovy Useful Resources
- Groovy - Quick Guide
- Groovy - Useful Resources
- Groovy - Discussion
Groovy - Quick Guide
Groovy - Overview
Groovy is an object oriented language which is based on Java platform. Groovy 1.0 was released in January 2, 2007 with Groovy 2.4 as the current major release. Groovy is distributed via the Apache License v 2.0.
Features of Groovy
Groovy has the following features −
- Support for both static and dynamic typing.
- Support for operator overloading.
- Native syntax for lists and associative arrays.
- Native support for regular expressions.
- Native support for various markup languages such as XML and HTML.
- Groovy is simple for Java developers since the syntax for Java and Groovy are very similar.
- You can use existing Java libraries.
- Groovy extends the java.lang.Object.
The official website for Groovy is http://www.groovy-lang.org/

Groovy - Environment
There are a variety of ways to get the Groovy environment setup.
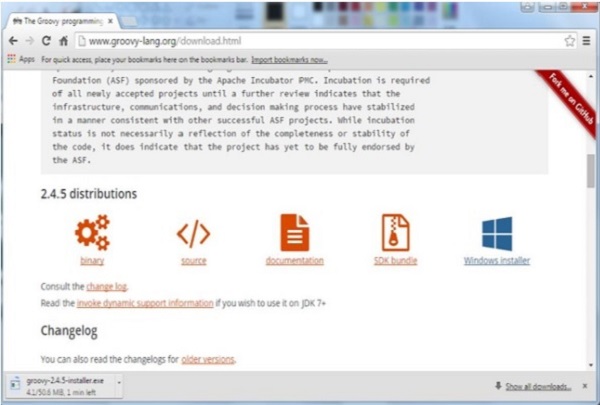
Binary download and installation − Go to the link www.groovy-lang.org/download.html to get the Windows Installer section. Click on this option to start the download of the Groovy installer.
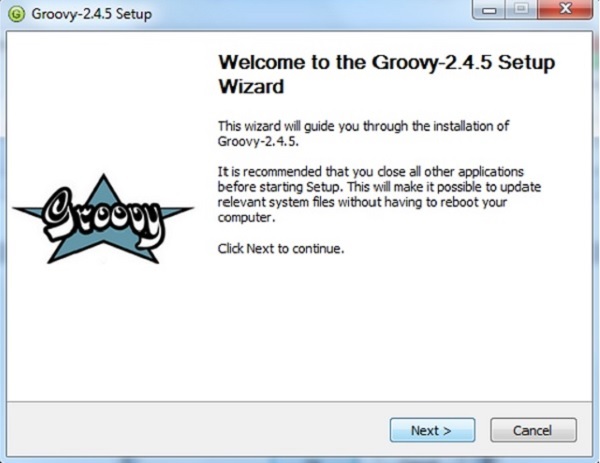
Once you launch the installer, follow the steps given below to complete the installation.
Step 1 − Select the language installer.

Step 2 − Click the Next button in the next screen.
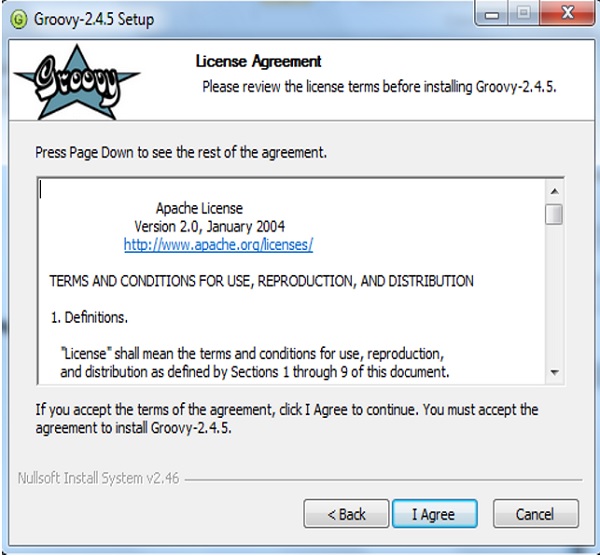
Step 3 − Click the I Agree button.
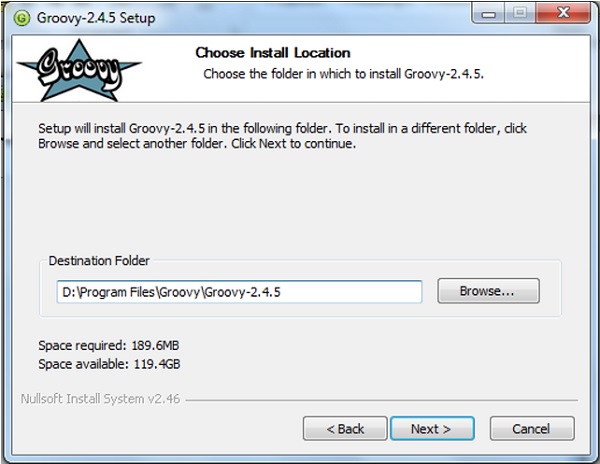
Step 4 − Accept the default components and click the Next button.

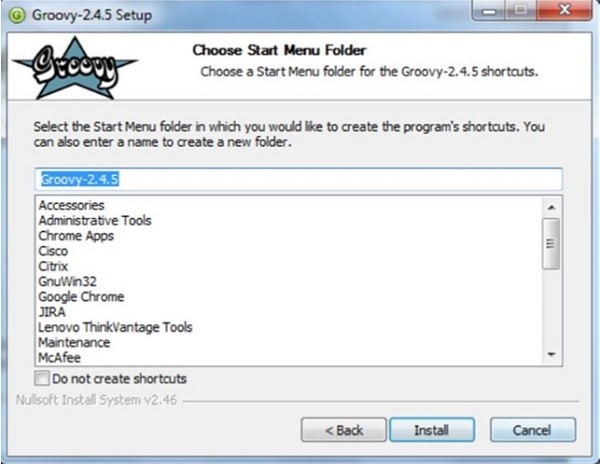
Step 5 − Choose the appropriate destination folder and then click the Next button.
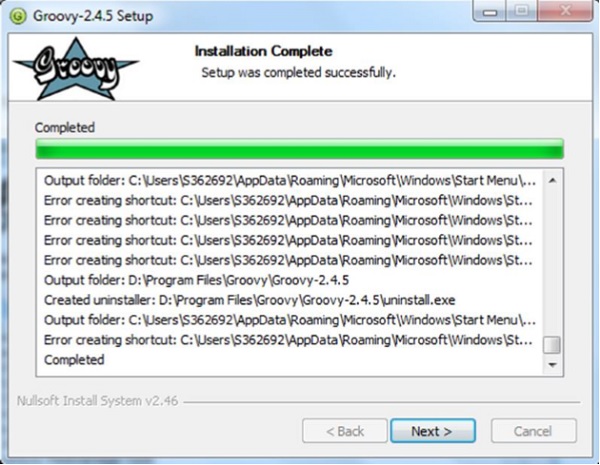
Step 6 − Click the Install button to start the installation.
Step 7 − Once the installation is complete, click the Next button to start the configuration.
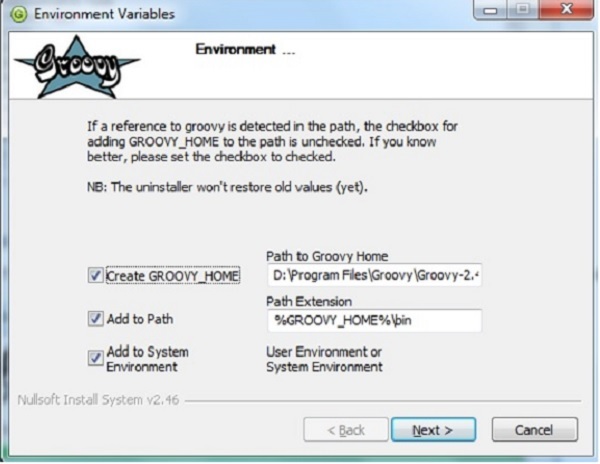
Step 8 − Choose the default options and click the Next button.
Step 9 − Accept the default file associations and click the Next button.
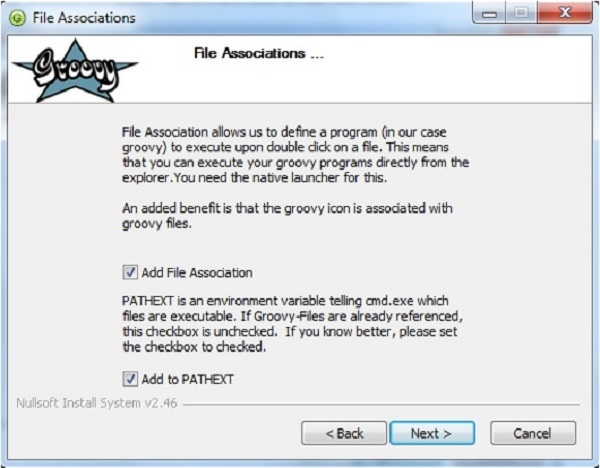
Step 10 − Click the Finish button to complete the installation.
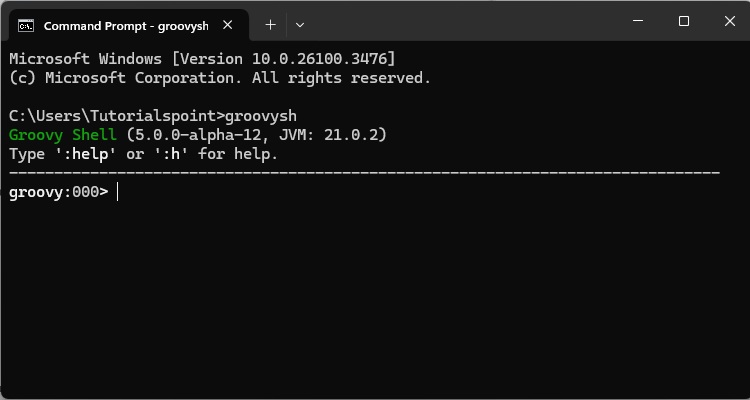
Once the above steps are followed, you can then start the groovy shell which is part of the Groovy installation that helps in testing our different aspects of the Groovy language without the need of having a full-fledged integrated development environment for Groovy. This can be done by running the command groovysh from the command prompt.
If you want to include the groovy binaries as part of you maven or gradle build, you can add the following lines
Gradle
'org.codehaus.groovy:groovy:2.4.5'
Maven
<groupId>org.codehaus.groovy</groupId>
<artifactId>groovy</artifactId>
<version>2.4.5</version>
Groovy - Basic Syntax
In order to understand the basic syntax of Groovy, lets first look at a simple Hello World program.
Creating Your First Hello World Program
Creating your first hello world program is as simple as just entering the following code line −
class Example {
   static void main(String[] args) {
      // Using a simple println statement to print output to the console
      println('Hello World');
   }
}
When we run the above program, we will get the following result −
Hello World
Import Statement in Groovy
The import statement can be used to import the functionality of other libraries which can be used in your code. This is done by using the import keyword.
The following example shows how to use a simple import of the MarkupBuilder class which is probably one of the most used classes for creating HTML or XML markup.
import groovy.xml.MarkupBuilder
def xml = new MarkupBuilder()
By default, Groovy includes the following libraries in your code, so you dont need to explicitly import them.
import java.lang.*
import java.util.*
import java.io.*
import java.net.*

import groovy.lang.*
import groovy.util.*

import java.math.BigInteger
import java.math.BigDecimal
Tokens in Groovy
A token is either a keyword, an identifier, a constant, a string literal, or a symbol.
println(Hello World);
In the above code line, there are two tokens, the first is the keyword println and the next is the string literal of Hello World.
Comments in Groovy
Comments are used to document your code. Comments in Groovy can be single line or multiline.
Single line comments are identified by using the // at any position in the line. An example is shown below −
class Example {
   static void main(String[] args) {
      // Using a simple println statement to print output to the console
      println('Hello World');
   }
}
Multiline comments are identified with /* in the beginning and */ to identify the end of the multiline comment.
class Example {
   static void main(String[] args) {
      /* This program is the first program
      This program shows how to display hello world */
      println('Hello World');
   }
}
Semicolons
Unlike in the Java programming language, it is not mandatory to have semicolons after the end of every statement, It is optional.
class Example {
   static void main(String[] args) {
      def x = 5
      println('Hello World');
   }
}
If you execute the above program, both statements in the main method don't generate any error.
Identifiers
Identifiers are used to define variables, functions or other user defined variables. Identifiers start with a letter, a dollar or an underscore. They cannot start with a number. Here are some examples of valid identifiers −
def employeename
def student1
def student_name
where def is a keyword used in Groovy to define an identifier.
Here is a code example of how an identifier can be used in our Hello World program.
class Example {
   static void main(String[] args) {
      // One can see the use of a semi-colon after each statement
      def x = 5;
      println('Hello World');
   }
}
In the above example, the variable x is used as an identifier.
Keywords
Keywords as the name suggest are special words which are reserved in the Groovy Programming language. The following table lists the keywords which are defined in Groovy.
| as | assert | break | case |
| catch | class | const | continue |
| def | default | do | else |
| enum | extends | false | Finally |
| for | goto | if | implements |
| import | in | instanceof | interface |
| new | pull | package | return |
| super | switch | this | throw |
| throws | trait | true | try |
| while |
Whitespaces
Whitespace is the term used in a programming language such as Java and Groovy to describe blanks, tabs, newline characters and comments. Whitespace separates one part of a statement from another and enables the compiler to identify where one element in a statement.
For example, in the following code example, there is a white space between the keyword def and the variable x. This is so that the compiler knows that def is the keyword which needs to be used and that x should be the variable name that needs to be defined.
def x = 5;
Literals
A literal is a notation for representing a fixed value in groovy. The groovy language has notations for integers, floating-point numbers, characters and strings. Here are some of the examples of literals in the Groovy programming language −
12
1.45
a
aa
Groovy - Data Types
In any programming language, you need to use various variables to store various types of information. Variables are nothing but reserved memory locations to store values. This means that when you create a variable you reserve some space in memory to store the value associated with the variable.
You may like to store information of various data types like string, character, wide character, integer, floating point, Boolean, etc. Based on the data type of a variable, the operating system allocates memory and decides what can be stored in the reserved memory.
Built-in Data Types
Groovy offers a wide variety of built-in data types. Following is a list of data types which are defined in Groovy −
byte − This is used to represent a byte value. An example is 2.
short − This is used to represent a short number. An example is 10.
int − This is used to represent whole numbers. An example is 1234.
long − This is used to represent a long number. An example is 10000090.
float − This is used to represent 32-bit floating point numbers. An example is 12.34.
double − This is used to represent 64-bit floating point numbers which are longer decimal number representations which may be required at times. An example is 12.3456565.
char − This defines a single character literal. An example is a.
Boolean − This represents a Boolean value which can either be true or false.
String − These are text literals which are represented in the form of chain of characters. For example Hello World.
Bound values
The following table shows the maximum allowed values for the numerical and decimal literals.
| byte | -128 to 127 |
| short | -32,768 to 32,767 |
| int | -2,147,483,648 to 2,147,483,647 |
| long | -9,223,372,036,854,775,808 to +9,223,372,036,854,775,807 |
| float | 1.40129846432481707e-45 to 3.40282346638528860e+38 |
| double | 4.94065645841246544e-324d to 1.79769313486231570e+308d |
Class Numeric
Types In addition to the primitive types, the following object types (sometimes referred to as wrapper types) are allowed −
- java.lang.Byte
- java.lang.Short
- java.lang.Integer
- java.lang.Long
- java.lang.Float
- java.lang.Double
In addition, the following classes can be used for supporting arbitrary precision arithmetic −
| Name | Description | Example |
|---|---|---|
| java.math.BigInteger | Immutable arbitrary-precision signed integral numbers | 30g |
| java.math.BigDecimal | Immutable arbitrary-precision signed decimal numbers | 3.5g |
The following code example showcases how the different built-in data types can be used −
class Example {
   static void main(String[] args) {
      //Example of a int datatype
      int x = 5;

      //Example of a long datatype
      long y = 100L;

      //Example of a floating point datatype
      float a = 10.56f;

      //Example of a double datatype
      double b = 10.5e40;

      //Example of a BigInteger datatype
      BigInteger bi = 30g;

      //Example of a BigDecimal datatype
      BigDecimal bd = 3.5g;

      println(x);
      println(y);
      println(a);
      println(b);
      println(bi);
      println(bd);
   }
}
When we run the above program, we will get the following result −
5
100
10.56
1.05E41
30
3.5
Groovy - Variables
Variables in Groovy can be defined in two ways − using the native syntax for the data type or the next is by using the def keyword. For variable definitions it is mandatory to either provide a type name explicitly or to use "def" in replacement. This is required by the Groovy parser.
There are following basic types of variable in Groovy as explained in the previous chapter −
byte − This is used to represent a byte value. An example is 2.
short − This is used to represent a short number. An example is 10.
int − This is used to represent whole numbers. An example is 1234.
long − This is used to represent a long number. An example is 10000090.
float − This is used to represent 32-bit floating point numbers. An example is 12.34.
double − This is used to represent 64-bit floating point numbers which are longer decimal number representations which may be required at times. An example is 12.3456565.
char − This defines a single character literal. An example is a.
Boolean − This represents a Boolean value which can either be true or false.
String − These are text literals which are represented in the form of chain of characters. For example Hello World.
Groovy also allows for additional types of variables such as arrays, structures and classes which we will see in the subsequent chapters.
Variable Declarations
A variable declaration tells the compiler where and how much to create the storage for the variable.
Following is an example of variable declaration −
class Example {
   static void main(String[] args) {
      // x is defined as a variable
      String x = "Hello";

      // The value of the variable is printed to the console
      println(x);
   }
}
When we run the above program, we will get the following result −
Hello
Naming Variables
The name of a variable can be composed of letters, digits, and the underscore character. It must begin with either a letter or an underscore. Upper and lowercase letters are distinct because Groovy, just like Java is a case-sensitive programming language.
class Example {
   static void main(String[] args) {
      // Defining a variable in lowercase
      int x = 5;

      // Defining a variable in uppercase
      int X = 6;

      // Defining a variable with the underscore in it's name
      def _Name = "Joe";

      println(x);
      println(X);
      println(_Name);
   }
}
When we run the above program, we will get the following result −
5
6
Joe
We can see that x and X are two different variables because of case sensitivity and in the third case, we can see that _Name begins with an underscore.
Printing Variables
You can print the current value of a variable with the println function. The following example shows how this can be achieved.
class Example {
   static void main(String[] args) {
      //Initializing 2 variables
      int x = 5;
      int X = 6;

      //Printing the value of the variables to the console
      println("The value of x is " + x + "The value of X is " + X);
   }
}
When we run the above program, we will get the following result −
The value of x is 5 The value of X is 6
Groovy - Operators
An operator is a symbol that tells the compiler to perform specific mathematical or logical manipulations.
Groovy has the following types of operators −
- Arithmetic operators
- Relational operators
- Logical operators
- Bitwise operators
- Assignment operators
Arithmetic Operators
The Groovy language supports the normal Arithmetic operators as any the language. Following are the Arithmetic operators available in Groovy −
| Operator | Description | Example |
|---|---|---|
| + | Addition of two operands | 1 + 2 will give 3 |
| − | Subtracts second operand from the first | 2 1 will give 1 |
| * | Multiplication of both operands | 2 * 2 will give 4 |
| / | Division of numerator by denominator | 3 / 2 will give 1.5 |
| % | Modulus Operator and remainder of after an integer/float division | 3 % 2 will give 1 |
| ++ | Incremental operators used to increment the value of an operand by 1 | int x = 5; x++; x will give 6 |
| -- | Incremental operators used to decrement the value of an operand by 1 | int x = 5; x--; x will give 4 |
Relational operators
Relational operators allow of the comparison of objects. Following are the relational operators available in Groovy −
| Operator | Description | Example |
|---|---|---|
| == | Tests the equality between two objects | 2 == 2 will give true |
| != | Tests the difference between two objects | 3 != 2 will give true |
| < | Checks to see if the left objects is less than the right operand. | 2 < 3 will give true |
| <= | Checks to see if the left objects is less than or equal to the right operand. | 2 <= 3 will give true |
| > | Checks to see if the left objects is greater than the right operand. | 3 > 2 will give true |
| >= | Checks to see if the left objects is greater than or equal to the right operand. | 3 >= 2 will give true |
Logical Operators
Logical operators are used to evaluate Boolean expressions. Following are the logical operators available in Groovy −
| Operator | Description | Example |
|---|---|---|
| && | This is the logical and operator | true && true will give true |
| || | This is the logical or operator | true || true will give true |
| ! | This is the logical not operator | !false will give true |
Bitwise Operators
Groovy provides four bitwise operators. Following are the bitwise operators available in Groovy −
| Sr.No | Operator & Description |
|---|---|
| 1 |
& This is the bitwise and operator |
| 2 |
| This is the bitwise or operator |
| 3 |
^ This is the bitwise xor or Exclusive or operator |
| 4 |
~ This is the bitwise negation operator |
Here is the truth table showcasing these operators.
| p | q | p & q | p | q | p ^ q |
|---|---|---|---|---|
| 0 | 0 | 0 | 0 | 0 |
| 0 | 1 | 0 | 1 | 1 |
| 1 | 1 | 1 | 1 | 0 |
| 1 | 0 | 0 | 1 | 1 |
Assignment operators
The Groovy language also provides assignment operators. Following are the assignment operators available in Groovy −
| Operator | Description | Example |
|---|---|---|
| += | This adds right operand to the left operand and assigns the result to left operand. | def A = 5 A+=3 Output will be 8 |
| -= | This subtracts right operand from the left operand and assigns the result to left operand | def A = 5 A-=3 Output will be 2 |
| *= | This multiplies right operand with the left operand and assigns the result to left operand | def A = 5 A*=3 Output will be 15 |
| /= | This divides left operand with the right operand and assigns the result to left operand | def A = 6 A/=3 Output will be 2 |
| %= | This takes modulus using two operands and assigns the result to left operand | def A = 5 A%=3 Output will be 2 |
Range Operators
Groovy supports the concept of ranges and provides a notation of range operators with the help of the .. notation. A simple example of the range operator is given below.
def range = 0..5
This just defines a simple range of integers, stored into a local variable called range with a lower bound of 0 and an upper bound of 5.
The following code snippet shows how the various operators can be used.
class Example {
   static void main(String[] args) {
      def range = 5..10;
      println(range);
      println(range.get(2));
   }
}
When we run the above program, we will get the following result −
From the println statement, you can see that the entire range of numbers which are defined in the range statement are displayed.
The get statement is used to get an object from the range defined which takes in an index value as the parameter.
[5, 6, 7, 8, 9, 10]
7
Operator Precedence
The following table lists all groovy operators in order of precedence.
| Sr.No | Operators & Names |
|---|---|
| 1 | ++ -- + - pre increment/decrement, unary plus, unary minus |
| 2 | * / % multiply, div, modulo |
| 3 |
+ - addition, subtraction |
| 4 | == != <=> equals, not equals, compare to |
| 5 | & binary/bitwise and |
| 6 | ^ binary/bitwise xor |
| 7 | | binary/bitwise or |
| 8 | && logical and |
| 9 | || logical or |
| 10 | = **= *= /= %= += -= <<= >>= >>>= &= ^= |= Various assignment operators |
Groovy - Loops
So far, we have seen statements which have been executed one after the other in a sequential manner. Additionally, statements are provided in Groovy to alter the flow of control in a programs logic. They are then classified into flow of control statements which we will see in detail.
| S.No. | Statements & Description |
|---|---|
| 1 | While Statement
The while statement is executed by first evaluating the condition expression (a Boolean value), and if the result is true, then the statements in the while loop are executed. |
| 2 | for Statement
The for statement is used to iterate through a set of values. |
| 3 | for-in Statement
The for-in statement is used to iterate through a set of values. |
Loop Control Statements
| S.No. | Statements & Description |
|---|---|
| 1 | Break Statement
The break statement is used to alter the flow of control inside loops and switch statements. |
| 2 | Continue Statement
The continue statement complements the break statement. Its use is restricted to while and for loops. |
Groovy - Decision Making
Decision-making structures require that the programmer specify one or more conditions to be evaluated or tested by the program, along with a statement or statements to be executed if the condition is determined to be true, and optionally, other statements to be executed if the condition is determined to be false.
| Sr.No. | Statements & Description |
|---|---|
| 1 | if Statement
The general working of this statement is that first a condition is evaluated in the if statement. If the condition is true, it then executes the statements. |
| 2 | if/else Statement
The general working of this statement is that first a condition is evaluated in the if statement. If the condition is true it then executes the statements thereafter and stops before the else condition and exits out of the loop. If the condition is false it then executes the statements in the else statement block and then exits the loop. |
| 3 | Nested If Statement
Sometimes there is a requirement to have multiple if statement embedded inside of each other. |
| 4 | Switch Statement
Sometimes the nested if-else statement is so common and is used so often that an easier statement was designed called the switch statement. |
| 5 | Nested Switch Statement
It is also possible to have a nested set of switch statements. |
Groovy - Methods
A method is in Groovy is defined with a return type or with the def keyword. Methods can receive any number of arguments. Its not necessary that the types are explicitly defined when defining the arguments. Modifiers such as public, private and protected can be added. By default, if no visibility modifier is provided, the method is public.
The simplest type of a method is one with no parameters as the one shown below −
def methodName() {
   //Method code
}
Following is an example of simple method
class Example {
   static def DisplayName() {
      println("This is how methods work in groovy");
      println("This is an example of a simple method");
   }

   static void main(String[] args) {
      DisplayName();
   }
}
In the above example, DisplayName is a simple method which consists of two println statements which are used to output some text to the console. In our static main method, we are just calling the DisplayName method. The output of the above method would be −
This is how methods work in groovy
This is an example of a simple method
Method Parameters
A method is more generally useful if its behavior is determined by the value of one or more parameters. We can transfer values to the called method using method parameters. Note that the parameter names must differ from each other.
The simplest type of a method with parameters as the one shown below −
def methodName(parameter1, parameter2, parameter3) {
   // Method code goes here
}
Following is an example of simple method with parameters
class Example {
   static void sum(int a,int b) {
      int c = a+b;
      println(c);
   }

   static void main(String[] args) {
      sum(10,5);
   }
}
In this example, we are creating a sum method with 2 parameters, a and b. Both parameters are of type int. We are then calling the sum method from our main method and passing the values to the variables a and b.
The output of the above method would be the value 15.
Default Parameters
There is also a provision in Groovy to specify default values for parameters within methods. If no values are passed to the method for the parameters, the default ones are used. If both nondefault and default parameters are used, then it has to be noted that the default parameters should be defined at the end of the parameter list.
Following is an example of simple method with parameters −
def someMethod(parameter1, parameter2 = 0, parameter3 = 0) {
   // Method code goes here
}
Lets look at the same example we looked at before for the addition of two numbers and create a method which has one default and another non-default parameter −
class Example {
   static void sum(int a,int b = 5) {
      int c = a+b;
      println(c);
   }

   static void main(String[] args) {
      sum(6);
   }
}
In this example, we are creating a sum method with two parameters, a and b. Both parameters are of type int. The difference between this example and the previous example is that in this case we are specifying a default value for b as 5. So when we call the sum method from our main method, we have the option of just passing one value which is 6 and this will be assigned to the parameter a within the sum method.
The output of the above method would be the value 11.
class Example {
   static void sum(int a,int b = 5) {
      int c = a+b;
      println(c);
   }

   static void main(String[] args) {
      sum(6,6);
   }
}
We can also call the sum method by passing 2 values, in our example above we are passing 2 values of 6. The second value of 6 will actually replace the default value which is assigned to the parameter b.
The output of the above method would be the value 12.
Method Return Values
Methods can also return values back to the calling program. This is required in modern-day programming language wherein a method does some sort of computation and then returns the desired value to the calling method.
Following is an example of simple method with a return value.
class Example {
   static int sum(int a,int b = 5) {
      int c = a+b;
      return c;
   }

   static void main(String[] args) {
      println(sum(6));
   }
}
In our above example, note that this time we are specifying a return type for our method sum which is of the type int. In the method we are using the return statement to send the sum value to the calling main program. Since the value of the method is now available to the main method, we are using the println function to display the value in the console.
The output of the above method would be the value 11.
Instance methods
Methods are normally implemented inside classes within Groovy just like the Java language. A class is nothing but a blueprint or a template for creating different objects which defines its properties and behaviors. The class objects exhibit the properties and behaviors defined by its class. So the behaviors are defined by creating methods inside of the class.
We will see classes in more detail in a later chapter but Following is an example of a method implementation in a class. In our previous examples we defined our method as static methods which meant that we could access those methods directly from the class. The next example of methods is instance methods wherein the methods are accessed by creating objects of the class. Again we will see classes in a later chapter, for now we will demonstrate how to use methods.
Following is an example of how methods can be implemented.
class Example {
   int x;

   public int getX() {
      return x;
   }

   public void setX(int pX) {
      x = pX;
   }

   static void main(String[] args) {
      Example ex = new Example();
      ex.setX(100);
      println(ex.getX());
   }
}
In our above example, note that this time we are specifying no static attribute for our class methods. In our main function we are actually creating an instance of the Example class and then invoking the method of the ex object.
The output of the above method would be the value 100.
Local and External Parameter Names
Groovy provides the facility just like java to have local and global parameters. In the following example, lx is a local parameter which has a scope only within the function of getX() and x is a global property which can be accessed inside the entire Example class. If we try to access the variable lx outside of the getX() function, we will get an error.
class Example {
   static int x = 100;

   public static int getX() {
      int lx = 200;
      println(lx);
      return x;
   }

   static void main(String[] args) {
      println(getX());
   }
}
When we run the above program, we will get the following result.
200
100
this method for Properties
Just like in Java, groovy can access its instance members using the this keyword. The following example shows how when we use the statement this.x, it refers to its instance and sets the value of x accordingly.
class Example {
   int x = 100;

   public int getX() {
      this.x = 200;
      return x;
   }

   static void main(String[] args) {
      Example ex = new Example();
      println(ex.getX());
   }
}
When we run the above program, we will get the result of 200 printed on the console.
Groovy - File I/O
Groovy provides a number of helper methods when working with I/O. Groovy provides easier classes to provide the following functionalities for files.
- Reading files
- Writing to files
- Traversing file trees
- Reading and writing data objects to files
In addition to this, you can always use the normal Java classes listed below for File I/O operations.
- java.io.File
- java.io.InputStream
- java.io.OutputStream
- java.io.Reader
- java.io.Writer
Reading files
The following example will output all the lines of a text file in Groovy. The method eachLine is in-built in the File class in Groovy for the purpose of ensuring that each line of the text file is read.
import java.io.File
class Example {
   static void main(String[] args) {
      new File("E:/Example.txt").eachLine {
         line -> println "line : $line";
      }
   }
}
The File class is used to instantiate a new object which takes the file name as the parameter. It then takes the function of eachLine, puts it to a variable called line and prints it accordingly.
If the file contains the following lines, they will be printed.
line : Example1
line : Example2
Reading the Contents of a File as an Entire String
If you want to get the entire contents of the file as a string, you can use the text property of the file class. The following example shows how this can be done.
class Example {
   static void main(String[] args) {
      File file = new File("E:/Example.txt")
      println file.text
   }
}
If the file contains the following lines, they will be printed.
line : Example1
line : Example2
Writing to Files
If you want to write to files, you need to use the writer class to output text to a file. The following example shows how this can be done.
import java.io.File
class Example {
   static void main(String[] args) {
      new File('E:/','Example.txt').withWriter('utf-8') {
         writer -> writer.writeLine 'Hello World'
      }
   }
}
If you open the file Example.txt, you will see the words Hello World printed to the file.
Getting the Size of a File
If you want to get the size of the file one can use the length property of the file class to get the size of the file. The following example shows how this can be done.
class Example {
   static void main(String[] args) {
      File file = new File("E:/Example.txt")
      println "The file ${file.absolutePath} has ${file.length()} bytes"
   }
}
The above code would show the size of the file in bytes.
Testing if a File is a Directory
If you want to see if a path is a file or a directory, one can use the isFile and isDirectory option of the File class. The following example shows how this can be done.
class Example {
   static void main(String[] args) {
      def file = new File('E:/')
      println "File? ${file.isFile()}"
      println "Directory? ${file.isDirectory()}"
   }
}
The above code would show the following output −
File? false
Directory? True
Creating a Directory
If you want to create a new directory you can use the mkdir function of the File class. The following example shows how this can be done.
class Example {
   static void main(String[] args) {
      def file = new File('E:/Directory')
      file.mkdir()
   }
}
The directory E:\Directory will be created if it does not exist.
Deleting a File
If you want to delete a file you can use the delete function of the File class. The following example shows how this can be done.
class Example {
   static void main(String[] args) {
      def file = new File('E:/Example.txt')
      file.delete()
   }
}
The file will be deleted if it exists.
Copying files
Groovy also provides the functionality to copy the contents from one file to another. The following example shows how this can be done.
class Example {
   static void main(String[] args) {
      def src = new File("E:/Example.txt")
      def dst = new File("E:/Example1.txt")
      dst << src.text
   }
}
The file Example1.txt will be created and all of the contents of the file Example.txt will be copied to this file.
Getting Directory Contents
Groovy also provides the functionality to list the drives and files in a drive.
The following example shows how the drives on a machine can be displayed by using the listRoots function of the File class.
class Example {
   static void main(String[] args) {
      def rootFiles = new File("test").listRoots()
      rootFiles.each {
         file -> println file.absolutePath
      }
   }
}
Depending on the drives available on your machine, the output could vary. On a standard machine the output would be similar to the following one −
C:\
D:\
The following example shows how to list the files in a particular directory by using the eachFile function of the File class.
class Example {
   static void main(String[] args) {
      new File("E:/Temp").eachFile() {
         file->println file.getAbsolutePath()
      }
   }
}
The output would display all of the files in the directory E:\Temp
If you want to recursively display all of files in a directory and its subdirectories, then you would use the eachFileRecurse function of the File class. The following example shows how this can be done.
class Example {
   static void main(String[] args) {
      new File("E:/temp").eachFileRecurse() {
         file -> println file.getAbsolutePath()
      }
   }
}
The output would display all of the files in the directory E:\Temp and in its subdirectories if they exist.
Groovy - Optionals
Groovy is an optionally typed language, and that distinction is an important one when understanding the fundamentals of the language. When compared to Java, which is a strongly typed language, whereby the compiler knows all of the types for every variable and can understand and honor contracts at compile time. This means that method calls are able to be determined at compile time.
When writing code in Groovy, developers are given the flexibility to provide a type or not. This can offer some simplicity in implementation and, when leveraged properly, can service your application in a robust and dynamic way.
In Groovy, optional typing is done via the def keyword. Following is an example of the usage of the def method −
class Example {
   static void main(String[] args) {
      // Example of an Integer using def
      def a = 100;
      println(a);

      // Example of an float using def
      def b = 100.10;
      println(b);

      // Example of an Double using def
      def c = 100.101;
      println(c);

      // Example of an String using def
      def d = "HelloWorld";
      println(d);
   }
}
From the above program, we can see that we have not declared the individual variables as Integer, float, double, or string even though they contain these types of values.
When we run the above program, we will get the following result −
100
100.10
100.101
HelloWorld
Optional typing can be a powerful utility during development, but can lead to problems in maintainability during the later stages of development when the code becomes too vast and complex.
To get a handle on how you can utilize optional typing in Groovy without getting your codebase into an unmaintainable mess, it is best to embrace the philosophy of duck typing in your applications.
If we re-write the above code using duck typing, it would look like the one given below. The variable names are given names which resemble more often than not the type they represent which makes the code more understandable.
class Example {
   static void main(String[] args) {
      // Example of an Integer using def
      def aint = 100;
      println(aint);

      // Example of an float using def
      def bfloat = 100.10;
      println(bfloat);

      // Example of an Double using def
      def cDouble = 100.101;
      println(cDouble);

      // Example of an String using def
      def dString = "HelloWorld";
      println(dString);
   }
}
Groovy - Numbers
In Groovy, Numbers are actually represented as objects, all of them being an instance of the class Integer. To make an object do something, we need to invoke one of the methods declared in its class.
Groovy supports integer and floating point numbers.
- An integer is a value that does not include a fraction.
- A floating-point number is a decimal value that includes a decimal fraction.
An Example of numbers in Groovy is shown below −
Integer x = 5;
Float y = 1.25;
Where x is of the type Integer and y is the float.
The reason why numbers in groovy are defined as objects is generally because there are requirements to perform operations on numbers. The concept of providing a class over primitive types is known as wrapper classes.
By default the following wrapper classes are provided in Groovy.
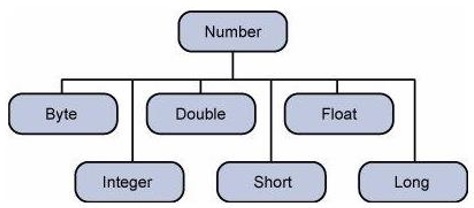
The object of the wrapper class contains or wraps its respective primitive data type. The process of converting a primitive data types into object is called boxing, and this is taken care by the compiler. The process of converting the object back to its corresponding primitive type is called unboxing.
Example
Following is an example of boxing and unboxing −
class Example {
   static void main(String[] args) {
      Integer x = 5,y = 10,z = 0;

      // The the values of 5,10 and 0 are boxed into Integer types
      // The values of x and y are unboxed and the addition is performed
      z = x+y;
      println(z);
   }
}
The output of the above program would be 15. In the above example, the values of 5, 10, and 0 are first boxed into the Integer variables x, y and z accordingly. And then the when the addition of x and y is performed the values are unboxed from their Integer types.
Number Methods
Since the Numbers in Groovy are represented as classes, following are the list of methods available.
| S.No. | Methods & Description |
|---|---|
| 1 | xxxValue()
This method takes on the Number as the parameter and returns a primitive type based on the method which is invoked. |
| 2 | compareTo()
The compareTo method is to use compare one number against another. This is useful if you want to compare the value of numbers. |
| 3 | equals()
The method determines whether the Number object that invokes the method is equal to the object that is passed as argument. |
| 4 | valueOf()
The valueOf method returns the relevant Number Object holding the value of the argument passed. |
| 5 | toString()
The method is used to get a String object representing the value of the Number Object. |
| 6 | parseInt()
This method is used to get the primitive data type of a certain String. parseXxx() is a static method and can have one argument or two. |
| 7 | abs()
The method gives the absolute value of the argument. The argument can be int, float, long, double, short, byte. |
| 8 | ceil()
The method ceil gives the smallest integer that is greater than or equal to the argument. |
| 9 | floor()
The method floor gives the largest integer that is less than or equal to the argument. |
| 10 | rint()
The method rint returns the integer that is closest in value to the argument. |
| 11 | round()
The method round returns the closest long or int, as given by the methods return type. |
| 12 | min()
The method gives the smaller of the two arguments. The argument can be int, float, long, double. |
| 13 | max()
The method gives the maximum of the two arguments. The argument can be int, float, long, double. |
| 14 | exp()
The method returns the base of the natural logarithms, e, to the power of the argument. |
| 15 | log()
The method returns the natural logarithm of the argument. |
| 16 | pow()
The method returns the value of the first argument raised to the power of the second argument. |
| 17 | sqrt()
The method returns the square root of the argument. |
| 18 | sin()
The method returns the sine of the specified double value. |
| 19 | cos()
The method returns the cosine of the specified double value. |
| 20 | tan()
The method returns the tangent of the specified double value. |
| 21 | asin()
The method returns the arcsine of the specified double value. |
| 22 | acos()
The method returns the arccosine of the specified double value. |
| 23 | atan()
The method returns the arctangent of the specified double value. |
| 24 | atan2()
The method Converts rectangular coordinates (x, y) to polar coordinate (r, theta) and returns theta. |
| 25 | toDegrees()
The method converts the argument value to degrees. |
| 26 | radian()
The method converts the argument value to radians. |
| 27 | random()
The method is used to generate a random number between 0.0 and 1.0. The range is: 0.0 =< Math.random < 1.0. Different ranges can be achieved by using arithmetic. |
Groovy - Strings
A String literal is constructed in Groovy by enclosing the string text in quotations.
Groovy offers a variety of ways to denote a String literal. Strings in Groovy can be enclosed in single quotes (), double quotes (), or triple quotes (). Further, a Groovy String enclosed by triple quotes may span multiple lines.
Following is an example of the usage of strings in Groovy −
class Example {
   static void main(String[] args) {
      String a = 'Hello Single';
      String b = "Hello Double";
      String c = "'Hello Triple" + "Multiple lines'";

      println(a);
      println(b);
      println(c);
   }
}
When we run the above program, we will get the following result −
Hello Single
Hello Double
'Hello TripleMultiple lines'
String Indexing
Strings in Groovy are an ordered sequences of characters. The individual character in a string can be accessed by its position. This is given by an index position.
String indices start at zero and end at one less than the length of the string. Groovy also permits negative indices to count back from the end of the string.
Following is an example of the usage of string indexing in Groovy −
class Example {
   static void main(String[] args) {
      String sample = "Hello world";
      println(sample[4]); // Print the 5 character in the string

      //Print the 1st character in the string starting from the back
      println(sample[-1]);
      println(sample[1..2]);//Prints a string starting from Index 1 to 2
      println(sample[4..2]);//Prints a string starting from Index 4 back to 2

   }
}
When we run the above program, we will get the following result −
o
d
el
oll
Basic String Operations
First lets learn the basic string operations in groovy. They are given below.
| S.No. | String Operation & Description |
|---|---|
| 1 | Concatenation of two strings
The concatenation of strings can be done by the simple + operator. |
| 2 | String Repetition
The repetition of strings can be done by the simple * operator. |
| 3 | String Length
The length of the string determined by the length() method of the string. |
String Methods
Here is the list of methods supported by String class.
| S.No. | Methods & Description |
|---|---|
| 1 | center()
Returns a new String of length numberOfChars consisting of the recipient padded on the left and right with space characters. |
| 2 | compareToIgnoreCase()
Compares two strings lexicographically, ignoring case differences. |
| 3 | concat()
Concatenates the specified String to the end of this String. |
| 4 | eachMatch()
Processes each regex group (see next section) matched substring of the given String. |
| 5 | endsWith()
Tests whether this string ends with the specified suffix. |
| 6 | equalsIgnoreCase()
Compares this String to another String, ignoring case considerations. |
| 7 | getAt()
It returns string value at the index position |
| 8 | indexOf()
Returns the index within this String of the first occurrence of the specified substring. |
| 9 | matches()
It outputs whether a String matches the given regular expression. |
| 10 | minus()
Removes the value part of the String. |
| 11 | next()
This method is called by the ++ operator for the class String. It increments the last character in the given String. |
| 12 | padLeft()
Pad the String with the spaces appended to the left. |
| 13 | padRight()
Pad the String with the spaces appended to the right. |
| 14 | plus()
Appends a String |
| 15 | previous()
This method is called by the -- operator for the CharSequence. |
| 16 | replaceAll()
Replaces all occurrences of a captured group by the result of a closure on that text. |
| 17 | reverse()
Creates a new String which is the reverse of this String. |
| 18 | split()
Splits this String around matches of the given regular expression. |
| 19 | subString()
Returns a new String that is a substring of this String. |
| 20 | toUpperCase()
Converts all of the characters in this String to upper case. |
| 21 | toLowerCase()
Converts all of the characters in this String to lower case. |
Groovy - Ranges
A range is shorthand for specifying a sequence of values. A Range is denoted by the first and last values in the sequence, and Range can be inclusive or exclusive. An inclusive Range includes all the values from the first to the last, while an exclusive Range includes all values except the last. Here are some examples of Range literals −
- 1..10 - An example of an inclusive Range
- 1..<10 - An example of an exclusive Range
- a..x Ranges can also consist of characters
- 10..1 Ranges can also be in descending order
- x..a Ranges can also consist of characters and be in descending order.
Following are the various methods available for ranges.
| Sr.No. | Methods & Description |
|---|---|
| 1 | contains()
Checks if a range contains a specific value |
| 2 | get()
Returns the element at the specified position in this Range. |
| 3 | getFrom()
Get the lower value of this Range. |
| 4 | getTo()
Get the upper value of this Range. |
| 5 | isReverse()
Is this a reversed Range, iterating backwards |
| 6 | size()
Returns the number of elements in this Range. |
| 7 | subList()
Returns a view of the portion of this Range between the specified fromIndex, inclusive, and toIndex, exclusive |
Groovy - Lists
The List is a structure used to store a collection of data items. In Groovy, the List holds a sequence of object references. Object references in a List occupy a position in the sequence and are distinguished by an integer index. A List literal is presented as a series of objects separated by commas and enclosed in square brackets.
To process the data in a list, we must be able to access individual elements. Groovy Lists are indexed using the indexing operator []. List indices start at zero, which refers to the first element.
Following are some example of lists −
- [11, 12, 13, 14] A list of integer values
- [Angular, Groovy, Java] A list of Strings
- [1, 2, [3, 4], 5] A nested list
- [Groovy, 21, 2.11] A heterogeneous list of object references
- [ ] An empty list
In this chapter, we will discuss the list methods available in Groovy.
| Sr.No. | Methods & Description |
|---|---|
| 1 | add()
Append the new value to the end of this List. |
| 2 | contains()
Returns true if this List contains the specified value. |
| 3 | get()
Returns the element at the specified position in this List. |
| 4 | isEmpty()
Returns true if this List contains no elements |
| 5 | minus()
Creates a new List composed of the elements of the original without those specified in the collection. |
| 6 | plus()
Creates a new List composed of the elements of the original together with those specified in the collection. |
| 7 | pop()
Removes the last item from this List |
| 8 | remove()
Removes the element at the specified position in this List. |
| 9 | reverse()
Create a new List that is the reverse the elements of the original List |
| 10 | size()
Obtains the number of elements in this List. |
| 11 | sort()
Returns a sorted copy of the original List. |
Groovy - Maps
A Map (also known as an associative array, dictionary, table, and hash) is an unordered collection of object references. The elements in a Map collection are accessed by a key value. The keys used in a Map can be of any class. When we insert into a Map collection, two values are required: the key and the value.
Following are some examples of maps −
[TopicName : Lists, Author : Raghav] Collections of key value pairs which has TopicName as the key and their respective values.
[ : ] An Empty map.
In this chapter, we will discuss the map methods available in Groovy.
| Sr.No. | Methods & Description |
|---|---|
| 1 | containsKey()
Does this Map contain this key? |
| 2 | get()
Look up the key in this Map and return the corresponding value. If there is no entry in this Map for the key, then return null. |
| 3 | keySet()
Obtain a Set of the keys in this Map. |
| 4 | put()
Associates the specified value with the specified key in this Map. If this Map previously contained a mapping for this key, the old value is replaced by the specified value. |
| 5 | size()
Returns the number of key-value mappings in this Map. |
| 6 | values()
Returns a collection view of the values contained in this Map. |
Groovy - Dates & Times
The class Date represents a specific instant in time, with millisecond precision. The Date class has two constructors as shown below.
Date()
Syntax
public Date()
Parameters − None.
Return Value
Allocates a Date object and initializes it so that it represents the time at which it was allocated, measured to the nearest millisecond.
Example
Following is an example of the usage of this method −
class Example {
   static void main(String[] args) {
      Date date = new Date();

      // display time and date using toString()
      System.out.println(date.toString());
   }
}
When we run the above program, we will get the following result. The following output will give you the current date and time −
Thu Dec 10 21:31:15 GST 2015
Date (long millisec)
Syntax
public Date(long millisec)
Parameters
Millisec The number of millisecconds to specify since the standard base time.
Return Value − Allocates a Date object and initializes it to represent the specified number of milliseconds since the standard base time known as "the epoch", namely January 1, 1970, 00:00:00 GMT.
Example
Following is an example of the usage of this method −
class Example {
   static void main(String[] args) {
      Date date = new Date(100);

      // display time and date using toString()
      System.out.println(date.toString());
   }
}
When we run the above program, we will get the following result −
Thu Jan 01 04:00:00 GST 1970
Following are the given methods of the Date class. In all methods of class Date that accept or return year, month, date, hours, minutes, and seconds values, the following representations are used −
A year y is represented by the integer y - 1900.
A month is represented by an integer from 0 to 11; 0 is January, 1 is February, and so forth; thus 11 is December.
A date (day of month) is represented by an integer from 1 to 31 in the usual manner.
An hour is represented by an integer from 0 to 23. Thus, the hour from midnight to 1 a.m. is hour 0, and the hour from noon to 1 p.m. is hour 12.
A minute is represented by an integer from 0 to 59 in the usual manner.
A second is represented by an integer from 0 to 61.
| Sr.No. | Methods & Description |
|---|---|
| 1 | after()
Tests if this date is after the specified date. |
| 2 | equals()
Compares two dates for equality. The result is true if and only if the argument is not null and is a Date object that represents the same point in time, to the millisecond, as this object. |
| 3 | compareTo()
Compares two Dates for ordering. |
| 4 | toString()
Converts this Date object to a String |
| 5 | before()
Tests if this date is before the specified date. |
| 6 | getTime()
Returns the number of milliseconds since January 1, 1970, 00:00:00 GMT represented by this Date object. |
| 7 | setTime()
Sets this Date object to represent a point in time that is time milliseconds after January 1, 1970 00:00:00 GMT. |
Groovy - Regular Expressions
A regular expression is a pattern that is used to find substrings in text. Groovy supports regular expressions natively using the ~regex expression. The text enclosed within the quotations represent the expression for comparison.
For example we can create a regular expression object as shown below −
def regex = ~'Groovy'
When the Groovy operator =~ appears as a predicate (expression returning a Boolean) in if and while statements (see Chapter 8), the String operand on the left is matched against the regular expression operand on the right. Hence, each of the following delivers the value true.
When defining regular expression, the following special characters can be used −
There are two special positional characters that are used to denote the beginning and end of a line: caret () and dollar sign ($).
Regular expressions can also include quantifiers. The plus sign (+) represents one or more times, applied to the preceding element of the expression. The asterisk (*) is used to represent zero or more occurrences. The question mark (?) denotes zero or once.
The metacharacter { and } is used to match a specific number of instances of the preceding character.
In a regular expression, the period symbol (.) can represent any character. This is described as the wildcard character.
A regular expression may include character classes. A set of characters can be given as a simple sequence of characters enclosed in the metacharacters [and] as in [aeiou]. For letter or number ranges, you can use a dash separator as in [az] or [amAM]. The complement of a character class is denoted by a leading caret within the square rackets as in [az] and represents all characters other than those specified. Some examples of Regular expressions are given below
'Groovy' =~ 'Groovy'
'Groovy' =~ 'oo'
'Groovy' ==~ 'Groovy'
'Groovy' ==~ 'oo'
'Groovy' =~ 'G'
Groovy' =~ 'G$'
Groovy' =~ 'Gro*vy' 'Groovy' =~ 'Gro{2}vy'
Groovy - Exception Handling
Exception handling is required in any programming language to handle the runtime errors so that normal flow of the application can be maintained.
Exception normally disrupts the normal flow of the application, which is the reason why we need to use Exception handling in our application.
Exceptions are broadly classified into the following categories −
Checked Exception − The classes that extend Throwable class except RuntimeException and Error are known as checked exceptions e.g.IOException, SQLException etc. Checked exceptions are checked at compile-time.
One classical case is the FileNotFoundException. Suppose you had the following codein your application which reads from a file in E drive.
class Example {
   static void main(String[] args) {
      File file = new File("E://file.txt");
      FileReader fr = new FileReader(file);
   }
}
if the File (file.txt) is not there in the E drive then the following exception will be raised.
Caught: java.io.FileNotFoundException: E:\file.txt (The system cannot find the file specified).
java.io.FileNotFoundException: E:\file.txt (The system cannot find the file specified).
Unchecked Exception − The classes that extend RuntimeException are known as unchecked exceptions, e.g., ArithmeticException, NullPointerException, ArrayIndexOutOfBoundsException etc. Unchecked exceptions are not checked at compile-time rather they are checked at runtime.
One classical case is the ArrayIndexOutOfBoundsException which happens when you try to access an index of an array which is greater than the length of the array. Following is a typical example of this sort of mistake.
class Example {
   static void main(String[] args) {
      def arr = new int[3];
      arr[5] = 5;
   }
}
When the above code is executed the following exception will be raised.
Caught: java.lang.ArrayIndexOutOfBoundsException: 5
java.lang.ArrayIndexOutOfBoundsException: 5
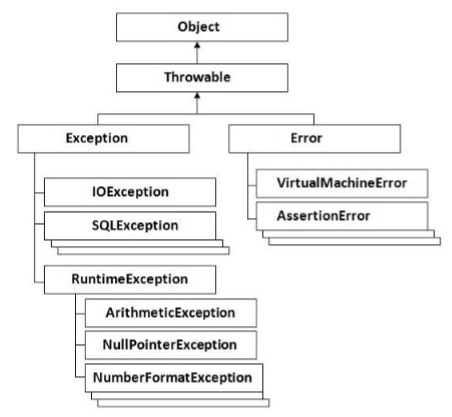
Error − Error is irrecoverable e.g. OutOfMemoryError, VirtualMachineError, AssertionError etc.
These are errors which the program can never recover from and will cause the program to crash.
The following diagram shows how the hierarchy of exceptions in Groovy is organized. Its all based on the hierarchy defined in Java.
Catching Exceptions
A method catches an exception using a combination of the try and catch keywords. A try/catch block is placed around the code that might generate an exception.
try {
   //Protected code
} catch(ExceptionName e1) {
   //Catch block
}
All of your code which could raise an exception is placed in the Protected code block.
In the catch block, you can write custom code to handle your exception so that the application can recover from the exception.
Lets look at an example of the similar code we saw above for accessing an array with an index value which is greater than the size of the array. But this time lets wrap our code in a try/catch block.
class Example {
   static void main(String[] args) {
      try {
         def arr = new int[3];
         arr[5] = 5;
      } catch(Exception ex) {
         println("Catching the exception");
      }

      println("Let's move on after the exception");
   }
}
When we run the above program, we will get the following result −
Catching the exception
Let's move on after the exception
From the above code, we wrap out faulty code in the try block. In the catch block we are just catching our exception and outputting a message that an exception has occurred.
Multiple Catch Blocks
One can have multiple catch blocks to handle multiple types of exceptions. For each catch block, depending on the type of exception raised you would write code to handle it accordingly.
Lets modify our above code to catch the ArrayIndexOutOfBoundsException specifically. Following is the code snippet.
class Example {
   static void main(String[] args) {
      try {
         def arr = new int[3];
         arr[5] = 5;
      }catch(ArrayIndexOutOfBoundsException ex) {
         println("Catching the Array out of Bounds exception");
      }catch(Exception ex) {
         println("Catching the exception");
      }

      println("Let's move on after the exception");
   }
}
When we run the above program, we will get the following result −
Catching the Aray out of Bounds exception
Let's move on after the exception
From the above code you can see that the ArrayIndexOutOfBoundsException catch block is caught first because it means the criteria of the exception.
Finally Block
The finally block follows a try block or a catch block. A finally block of code always executes, irrespective of occurrence of an Exception.
Using a finally block allows you to run any cleanup-type statements that you want to execute, no matter what happens in the protected code. The syntax for this block is given below.
try {
   //Protected code
} catch(ExceptionType1 e1) {
   //Catch block
} catch(ExceptionType2 e2) {
   //Catch block
} catch(ExceptionType3 e3) {
   //Catch block
} finally {
   //The finally block always executes.
}
Lets modify our above code and add the finally block of code. Following is the code snippet.
class Example {
   static void main(String[] args) {
      try {
         def arr = new int[3];
         arr[5] = 5;
      } catch(ArrayIndexOutOfBoundsException ex) {
         println("Catching the Array out of Bounds exception");
      }catch(Exception ex) {
         println("Catching the exception");
      } finally {
         println("The final block");
      }

      println("Let's move on after the exception");
   }
}
When we run the above program, we will get the following result −
Catching the Array out of Bounds exception
The final block
Let's move on after the exception
Following are the Exception methods available in Groovy −
public String getMessage()
Returns a detailed message about the exception that has occurred. This message is initialized in the Throwable constructor.
public Throwable getCause()
Returns the cause of the exception as represented by a Throwable object.
public String toString()
Returns the name of the class concatenated with the result of getMessage()
public void printStackTrace()
Prints the result of toString() along with the stack trace to System.err, the error output stream.
public StackTraceElement [] getStackTrace()
Returns an array containing each element on the stack trace. The element at index 0 represents the top of the call stack, and the last element in the array represents the method at the bottom of the call stack.
public Throwable fillInStackTrace()
Fills the stack trace of this Throwable object with the current stack trace, adding to any previous information in the stack trace.
Example
Following is the code example using some of the methods given above −
class Example {
   static void main(String[] args) {
      try {
         def arr = new int[3];
         arr[5] = 5;
      }catch(ArrayIndexOutOfBoundsException ex) {
         println(ex.toString());
         println(ex.getMessage());
         println(ex.getStackTrace());
      } catch(Exception ex) {
         println("Catching the exception");
      }finally {
         println("The final block");
      }

      println("Let's move on after the exception");
   }
}
When we run the above program, we will get the following result −
java.lang.ArrayIndexOutOfBoundsException: 5
5
[org.codehaus.groovy.runtime.dgmimpl.arrays.IntegerArrayPutAtMetaMethod$MyPojoMetaMet
hodSite.call(IntegerArrayPutAtMetaMethod.java:75),
org.codehaus.groovy.runtime.callsite.CallSiteArray.defaultCall(CallSiteArray.java:48) ,
org.codehaus.groovy.runtime.callsite.AbstractCallSite.call(AbstractCallSite.java:113) ,
org.codehaus.groovy.runtime.callsite.AbstractCallSite.call(AbstractCallSite.java:133) ,
Example.main(Sample:8), sun.reflect.NativeMethodAccessorImpl.invoke0(Native Method),
sun.reflect.NativeMethodAccessorImpl.invoke(NativeMethodAccessorImpl.java:57),
sun.reflect.DelegatingMethodAccessorImpl.invoke(DelegatingMethodAccessorImpl.java:43) ,
java.lang.reflect.Method.invoke(Method.java:606),
org.codehaus.groovy.reflection.CachedMethod.invoke(CachedMethod.java:93),
groovy.lang.MetaMethod.doMethodInvoke(MetaMethod.java:325),
groovy.lang.MetaClassImpl.invokeStaticMethod(MetaClassImpl.java:1443),
org.codehaus.groovy.runtime.InvokerHelper.invokeMethod(InvokerHelper.java:893),
groovy.lang.GroovyShell.runScriptOrMainOrTestOrRunnable(GroovyShell.java:287),
groovy.lang.GroovyShell.run(GroovyShell.java:524),
groovy.lang.GroovyShell.run(GroovyShell.java:513),
groovy.ui.GroovyMain.processOnce(GroovyMain.java:652),
groovy.ui.GroovyMain.run(GroovyMain.java:384),
groovy.ui.GroovyMain.process(GroovyMain.java:370),
groovy.ui.GroovyMain.processArgs(GroovyMain.java:129),
groovy.ui.GroovyMain.main(GroovyMain.java:109),
sun.reflect.NativeMethodAccessorImpl.invoke0(Native Method),
sun.reflect.NativeMethodAccessorImpl.invoke(NativeMethodAccessorImpl.java:57),
sun.reflect.DelegatingMethodAccessorImpl.invoke(DelegatingMethodAccessorImpl.java:43) ,
java.lang.reflect.Method.invoke(Method.java:606),
org.codehaus.groovy.tools.GroovyStarter.rootLoader(GroovyStarter.java:109),
org.codehaus.groovy.tools.GroovyStarter.main(GroovyStarter.java:131),
sun.reflect.NativeMethodAccessorImpl.invoke0(Native Method),
sun.reflect.NativeMethodAccessorImpl.invoke(NativeMethodAccessorImpl.java:57),
sun.reflect.DelegatingMethodAccessorImpl.invoke(DelegatingMethodAccessorImpl.java:43) ,
java.lang.reflect.Method.invoke(Method.java:606),
com.intellij.rt.execution.application.AppMain.main(AppMain.java:144)]

The final block
Let's move on after the exception
Groovy - Object Oriented
In Groovy, as in any other Object-Oriented language, there is the concept of classes and objects to represent the objected oriented nature of the programming language. A Groovy class is a collection of data and the methods that operate on that data. Together, the data and methods of a class are used to represent some real world object from the problem domain.
A class in Groovy declares the state (data) and the behavior of objects defined by that class. Hence, a Groovy class describes both the instance fields and methods for that class.
Following is an example of a class in Groovy. The name of the class is Student which has two fields StudentID and StudentName. In the main function, we are creating an object of this class and assigning values to the StudentID and StudentName of the object.
class Student {
   int StudentID;
   String StudentName;

   static void main(String[] args) {
      Student st = new Student();
      st.StudentID = 1;
      st.StudentName = "Joe"
   }
}
getter and setter Methods
In any programming language, it always a practice to hide the instance members with the private keyword and instead provide getter and setter methods to set and get the values of the instance variables accordingly. The following example shows how this can be done.
class Student {
   private int StudentID;
   private String StudentName;

   void setStudentID(int pID) {
      StudentID = pID;
   }

   void setStudentName(String pName) {
      StudentName = pName;
   }

   int getStudentID() {
      return this.StudentID;
   }

   String getStudentName() {
      return this.StudentName;
   }

   static void main(String[] args) {
      Student st = new Student();
      st.setStudentID(1);
      st.setStudentName("Joe");

      println(st.getStudentID());
      println(st.getStudentName());
   }
}
When we run the above program, we will get the following result −
1
Joe
Note the following key points about the above program −
In the class both the studentID and studentName are marked as private which means that they cannot be accessed from outside of the class.
Each instance member has its own getter and setter method. The getter method returns the value of the instance variable, for example the method int getStudentID() and the setter method sets the value of the instance ID, for example the method - void setStudentName(String pName)
Instance Methods
Its normally a natural to include more methods inside of the class which actually does some sort of functionality for the class. In our student example, lets add instance members of Marks1, Marks2 and Marks3 to denote the marks of the student in 3 subjects. We will then add a new instance method which will calculate the total marks of the student. Following is how the code would look like.
In the following example, the method Total is an additional Instance method which has some logic built into it.
class Student {
   int StudentID;
   String StudentName;

   int Marks1;
   int Marks2;
   int Marks3;

   int Total() {
      return Marks1+Marks2+Marks3;
   }

   static void main(String[] args) {
      Student st = new Student();
      st.StudentID = 1;
      st.StudentName="Joe";

      st.Marks1 = 10;
      st.Marks2 = 20;
      st.Marks3 = 30;

      println(st.Total());
   }
}
When we run the above program, we will get the following result −
60
Creating Multiple Objects
One can also create multiple objects of a class. Following is the example of how this can be achieved. In here we are creating 3 objects (st, st1 and st2) and calling their instance members and instance methods accordingly.
class Student {
   int StudentID;
   String StudentName;

   int Marks1;
   int Marks2;
   int Marks3;

   int Total() {
      return Marks1+Marks2+Marks3;
   }

   static void main(String[] args) {
      Student st = new Student();
      st.StudentID = 1;
      st.StudentName = "Joe";

      st.Marks1 = 10;
      st.Marks2 = 20;
      st.Marks3 = 30;

      println(st.Total());

      Student st1 = new Student();
      st.StudentID = 1;
      st.StudentName = "Joe";

      st.Marks1 = 10;
      st.Marks2 = 20;
      st.Marks3 = 40;

      println(st.Total());

      Student st3 = new Student();
      st.StudentID = 1;
      st.StudentName = "Joe";

      st.Marks1 = 10;
      st.Marks2 = 20;
      st.Marks3 = 50;

      println(st.Total());
   }
}
When we run the above program, we will get the following result −
60
70
80
Inheritance
Inheritance can be defined as the process where one class acquires the properties (methods and fields) of another. With the use of inheritance the information is made manageable in a hierarchical order.
The class which inherits the properties of other is known as subclass (derived class, child class) and the class whose properties are inherited is known as superclass (base class, parent class).
Extends
extends is the keyword used to inherit the properties of a class. Given below is the syntax of extends keyword. In the following example we are doing the following things −
Creating a class called Person. This class has one instance member called name.
Creating a class called Student which extends from the Person class. Note that the name instance member which is defined in the Person class gets inherited in the Student class.
In the Student class constructor, we are calling the base class constructor.
In our Student class, we are adding 2 additional instance members of StudentID and Marks1.
class Example {
   static void main(String[] args) {
      Student st = new Student();
      st.StudentID = 1;

      st.Marks1 = 10;
      st.name = "Joe";

      println(st.name);
   }
}

class Person {
   public String name;
   public Person() {}
}

class Student extends Person {
   int StudentID
   int Marks1;

   public Student() {
      super();
   }
}
When we run the above program, we will get the following result −
Joe
Inner Classes
Inner classes are defined within another classes. The enclosing class can use the inner class as usual. On the other side, a inner class can access members of its enclosing class, even if they are private. Classes other than the enclosing class are not allowed to access inner classes.
Following is an example of an Outer and Inner class. In the following example we are doing the following things −
- Creating an class called Outer which will be our outer class.
- Defining a string called name in our Outer class.
- Creating an Inner or nested class inside of our Outer class.
- Note that in the inner class we are able to access the name instance member defined in the Outer class.
class Example {
   static void main(String[] args) {
      Outer outobj = new Outer();
      outobj.name = "Joe";
      outobj.callInnerMethod()
   }
}

class Outer {
   String name;

   def callInnerMethod() {
      new Inner().methodA()
   }

   class Inner {
      def methodA() {
         println(name);
      }
   }

}
When we run the above program, we will get the following result −
Joe
Abstract Classes
Abstract classes represent generic concepts, thus, they cannot be instantiated, being created to be subclassed. Their members include fields/properties and abstract or concrete methods. Abstract methods do not have implementation, and must be implemented by concrete subclasses. Abstract classes must be declared with abstract keyword. Abstract methods must also be declared with abstract keyword.
In the following example, note that the Person class is now made into an abstract class and cannot be instantiated. Also note that there is an abstract method called DisplayMarks in the abstract class which has no implementation details. In the student class it is mandatory to add the implementation details.
class Example {
   static void main(String[] args) {
      Student st = new Student();
      st.StudentID = 1;

      st.Marks1 = 10;
      st.name="Joe";

      println(st.name);
      println(st.DisplayMarks());
   }
}

abstract class Person {
   public String name;
   public Person() { }
   abstract void DisplayMarks();
}

class Student extends Person {
   int StudentID
   int Marks1;

   public Student() {
      super();
   }

   void DisplayMarks() {
      println(Marks1);
   }
}
When we run the above program, we will get the following result −
Joe
10
null
Interfaces
An interface defines a contract that a class needs to conform to. An interface only defines a list of methods that need to be implemented, but does not define the methods implementation. An interface needs to be declared using the interface keyword. An interface only defines method signatures. Methods of an interface are always public. It is an error to use protected or private methods in interfaces.
Following is an example of an interface in groovy. In the following example we are doing the following things −
Creating an interface called Marks and creating an interface method called DisplayMarks.
In the class definition, we are using the implements keyword to implement the interface.
Because we are implementing the interface we have to provide the implementation for the DisplayMarks method.
class Example {
   static void main(String[] args) {
      Student st = new Student();
      st.StudentID = 1;
      st.Marks1 = 10;
      println(st.DisplayMarks());
   }
}

interface Marks {
   void DisplayMarks();
}

class Student implements Marks {
   int StudentID
   int Marks1;

   void DisplayMarks() {
      println(Marks1);
   }
}
When we run the above program, we will get the following result −
10
null
Groovy - Generics
Generics enable types (classes and interfaces) to be parameters when defining classes, interfaces and methods. Much like the more familiar formal parameters used in method declarations, type parameters provide a way for you to re-use the same code with different inputs. The difference is that the inputs to formal parameters are values, while the inputs to type parameters are types.
Generic for Collections
The collections classes such as the List class can be generalized so that only collections of that type are accepted in the application. An example of the generalized ArrayList is shown below. What the following statement does is that it only accepts list items which are of the type string −
List<String> list = new ArrayList<String>();
In the following code example, we are doing the following −
- Creating a Generalized ArrayList collection which will hold only Strings.
- Add 3 strings to the list.
- For each item in the list, printing the value of the strings.
class Example {
   static void main(String[] args) {
      // Creating a generic List collection
      List<String> list = new ArrayList<String>();
      list.add("First String");
      list.add("Second String");
      list.add("Third String");

      for(String str : list) {
         println(str);
      }
   }
}
The output of the above program would be −
First String
Second String
Third String
Generalized Classes
The entire class can also be generalized. This makes the class more flexible in accepting any types and working accordingly with those types. Lets look at an example of how we can accomplish this.
In the following program, we are carrying out the following steps −
We are creating a class called ListType. Note the <T> keywords placed in front of the class definition. This tells the compiler that this class can accept any type. So when we declare an object of this class, we can specify a type during the the declaration and that type would be replaced in the placeholder <T>
The generic class has simple getter and setter methods to work with the member variable defined in the class.
In the main program, notice that we are able to declare objects of the ListType class, but of different types. The first one is of the type Integer and the second one is of the type String.
class Example {
   static void main(String[] args) {
      // Creating a generic List collection
      ListType<String> lststr = new ListType<>();
      lststr.set("First String");
      println(lststr.get());

      ListType<Integer> lstint = new ListType<>();
      lstint.set(1);
      println(lstint.get());
   }
}

public class ListType<T> {
   private T localt;

   public T get() {
      return this.localt;
   }

   public void set(T plocal) {
      this.localt = plocal;
   }
}
The output of the above program would be −
First String
1
Groovy - Traits
Traits are a structural construct of the language which allow −
- Composition of behaviors.
- Runtime implementation of interfaces.
- Compatibility with static type checking/compilation
They can be seen as interfaces carrying both default implementations and state. A trait is defined using the trait keyword.
An example of a trait is given below −
trait Marks {
   void DisplayMarks() {
      println("Display Marks");
   }
}
One can then use the implement keyword to implement the trait in the similar way as interfaces.
class Example {
   static void main(String[] args) {
      Student st = new Student();
      st.StudentID = 1;
      st.Marks1 = 10;
      println(st.DisplayMarks());
   }
}

trait Marks {
   void DisplayMarks() {
      println("Display Marks");
   }
}

class Student implements Marks {
   int StudentID
   int Marks1;
}
Implementing Interfaces
Traits may implement interfaces, in which case the interfaces are declared using the implements keyword.
An example of a trait implementing an interface is given below. In the following example the following key points can be noted.
An interface Total is defined with the method DisplayTotal.
The trait Marks implements the Total interface and hence needs to provide an implementation for the DisplayTotal method.
class Example {
   static void main(String[] args) {
      Student st = new Student();
      st.StudentID = 1;
      st.Marks1 = 10;

      println(st.DisplayMarks());
      println(st.DisplayTotal());
   }
}

interface Total {
   void DisplayTotal()
}

trait Marks implements Total {
   void DisplayMarks() {
      println("Display Marks");
   }

   void DisplayTotal() {
      println("Display Total");
   }
}

class Student implements Marks {
   int StudentID
   int Marks1;
}
The output of the above program would be −
Display Marks
Display Total
Properties
A trait may define properties. An example of a trait with a property is given below.
In the following example, the Marks1 of type integer is a property.
class Example {
   static void main(String[] args) {
      Student st = new Student();
      st.StudentID = 1;

      println(st.DisplayMarks());
      println(st.DisplayTotal());
   }

   interface Total {
      void DisplayTotal()
   }

   trait Marks implements Total {
      int Marks1;

      void DisplayMarks() {
         this.Marks1 = 10;
         println(this.Marks1);
      }

      void DisplayTotal() {
         println("Display Total");
      }
   }

   class Student implements Marks {
      int StudentID
   }
}
The output of the above program would be −
10
Display Total
Composition of Behaviors
Traits can be used to implement multiple inheritance in a controlled way, avoiding the diamond issue. In the following code example, we have defined two traits Marks and Total. Our Student class implements both traits. Since the student class extends both traits, it is able to access the both of the methods DisplayMarks and DisplayTotal.
class Example {
   static void main(String[] args) {
      Student st = new Student();
      st.StudentID = 1;

      println(st.DisplayMarks());
      println(st.DisplayTotal());
   }
}

trait Marks {
   void DisplayMarks() {
      println("Marks1");
   }
}

trait Total {
   void DisplayTotal() {
      println("Total");
   }
}

class Student implements Marks,Total {
   int StudentID
}
The output of the above program would be −
Total
Marks1
Extending Traits
Traits may extend another trait, in which case you must use the extends keyword. In the following code example, we are extending the Total trait with the Marks trait.
class Example {
   static void main(String[] args) {
      Student st = new Student();
      st.StudentID = 1;
      println(st.DisplayMarks());
   }
}

trait Marks {
   void DisplayMarks() {
      println("Marks1");
   }
}

trait Total extends Marks {
   void DisplayMarks() {
      println("Total");
   }
}

class Student implements Total {
   int StudentID
}
The output of the above program would be −
Total
Groovy - Closures
A closure is a short anonymous block of code. It just normally spans a few lines of code. A method can even take the block of code as a parameter. They are anonymous in nature.
Following is an example of a simple closure and what it looks like.
class Example {
   static void main(String[] args) {
      def clos = {println "Hello World"};
      clos.call();
   }
}
In the above example, the code line - {println "Hello World"} is known as a closure. The code block referenced by this identifier can be executed with the call statement.
When we run the above program, we will get the following result −
Hello World
Formal parameters in closures
Closures can also contain formal parameters to make them more useful just like methods in Groovy.
class Example {
   static void main(String[] args) {
      def clos = {param->println "Hello ${param}"};
      clos.call("World");
   }
}
In the above code example, notice the use of the ${param } which causes the closure to take a parameter. When calling the closure via the clos.call statement we now have the option to pass a parameter to the closure.
When we run the above program, we will get the following result −
Hello World
The next illustration repeats the previous example and produces the same result, but shows that an implicit single parameter referred to as it can be used. Here it is a keyword in Groovy.
class Example {
   static void main(String[] args) {
      def clos = {println "Hello ${it}"};
      clos.call("World");
   }
}
When we run the above program, we will get the following result −
Hello World
Closures and Variables
More formally, closures can refer to variables at the time the closure is defined. Following is an example of how this can be achieved.
class Example {
   static void main(String[] args) {
      def str1 = "Hello";
      def clos = {param -> println "${str1} ${param}"}
      clos.call("World");

      // We are now changing the value of the String str1 which is referenced in the closure
      str1 = "Welcome";
      clos.call("World");
   }
}
In the above example, in addition to passing a parameter to the closure, we are also defining a variable called str1. The closure also takes on the variable along with the parameter.
When we run the above program, we will get the following result −
Hello World
Welcome World
Using Closures in Methods
Closures can also be used as parameters to methods. In Groovy, a lot of the inbuilt methods for data types such as Lists and collections have closures as a parameter type.
The following example shows how a closure can be sent to a method as a parameter.
class Example {
   def static Display(clo) {
      // This time the $param parameter gets replaced by the string "Inner"
      clo.call("Inner");
   }

   static void main(String[] args) {
      def str1 = "Hello";
      def clos = { param -> println "${str1} ${param}" }
      clos.call("World");

      // We are now changing the value of the String str1 which is referenced in the closure
      str1 = "Welcome";
      clos.call("World");

      // Passing our closure to a method
      Example.Display(clos);
   }
}
In the above example,
We are defining a static method called Display which takes a closure as an argument.
We are then defining a closure in our main method and passing it to our Display method as a parameter.
When we run the above program, we will get the following result −
Hello World
Welcome World
Welcome Inner
Closures in Collections and String
Several List, Map, and String methods accept a closure as an argument. Lets look at example of how closures can be used in these data types.
Using Closures with Lists
The following example shows how closures can be used with Lists. In the following example we are first defining a simple list of values. The list collection type then defines a function called .each. This function takes on a closure as a parameter and applies the closure to each element of the list.
class Example {
   static void main(String[] args) {
      def lst = [11, 12, 13, 14];
      lst.each {println it}
   }
}
When we run the above program, we will get the following result −
11
12
13
14
Using Closures with Maps
The following example shows how closures can be used with Maps. In the following example we are first defining a simple Map of key value items. The map collection type then defines a function called .each. This function takes on a closure as a parameter and applies the closure to each key-value pair of the map.
class Example {
   static void main(String[] args) {
      def mp = ["TopicName" : "Maps", "TopicDescription" : "Methods in Maps"]
      mp.each {println it}
      mp.each {println "${it.key} maps to: ${it.value}"}
   }
}
When we run the above program, we will get the following result −
TopicName = Maps
TopicDescription = Methods in Maps
TopicName maps to: Maps
TopicDescription maps to: Methods in Maps
Often, we may wish to iterate across the members of a collection and apply some logic only when the element meets some criterion. This is readily handled with a conditional statement in the closure.
class Example {
   static void main(String[] args) {
      def lst = [1,2,3,4];
      lst.each {println it}
      println("The list will only display those numbers which are divisible by 2")
      lst.each{num -> if(num % 2 == 0) println num}
   }
}
The above example shows the conditional if(num % 2 == 0) expression being used in the closure which is used to check if each item in the list is divisible by 2.
When we run the above program, we will get the following result −
1
2
3
4
The list will only display those numbers which are divisible by 2.
2
4
Methods used with Closures
The closures themselves provide some methods.
| Sr.No. | Methods & Description |
|---|---|
| 1 | find()
The find method finds the first value in a collection that matches some criterion. |
| 2 | findAll()
It finds all values in the receiving object matching the closure condition. |
| 3 | any() & every()
Method any iterates through each element of a collection checking whether a Boolean predicate is valid for at least one element. |
| 4 | collect()
The method collect iterates through a collection, converting each element into a new value using the closure as the transformer. |
Groovy - Annotations
Annotations are a form of metadata wherein they provide data about a program that is not part of the program itself. Annotations have no direct effect on the operation of the code they annotate.
Annotations are mainly used for the following reasons −
Information for the compiler − Annotations can be used by the compiler to detect errors or suppress warnings.
Compile-time and deployment-time processing − Software tools can process annotation information to generate code, XML files, and so forth.
Runtime processing − Some annotations are available to be examined at runtime.
In Groovy, a basic annotation looks as follows −
@interface - The at sign character (@) indicates to the compiler that what follows is an annotation.
An annotation may define members in the form of methods without bodies and an optional default value.
Annotations can be applied to the following types −
String Type
An example of an Annotation for a string is given below −
@interface Simple {
   String str1() default "HelloWorld";
}
Enum type
enum DayOfWeek { mon, tue, wed, thu, fri, sat, sun }
@interface Scheduled {
   DayOfWeek dayOfWeek()
}
Class type
@interface Simple {}
@Simple
class User {
   String username
   int age
}

def user = new User(username: "Joe",age:1);
println(user.age);
println(user.username);
Annotation Member Values
When an annotation is used, it is required to set at least all members that do not have a default value. An example is given below. When the annotation Example is used after being defined, it needs to have a value assigned to it.
@interface Example {
   int status()
}

@Example(status = 1)
Closure Annotation Parameters
A good feature of annotations in Groovy is that you can use a closure as an annotation value also. Therefore annotations may be used with a wide variety of expressions.
An example is given below on this. The annotation Onlyif is created based on a class value. Then the annotation is applied to two methods which posts different messages to the result variable based on the value of the number variable.
@interface OnlyIf {
   Class value()
}

@OnlyIf({ number<=6 })
void Version6() {
   result << 'Number greater than 6'
}

@OnlyIf({ number>=6 })
void Version7() {
   result << 'Number greater than 6'
}
Meta Annotations
This is quite a useful feature of annotations in groovy. There may comes times wherein you might have multiple annotations for a method as the one shown below. Sometimes this can become messy to have multiple annotations.
@Procedure
@Master class
MyMasterProcedure {}
In such a case you can define a meta-annotation which clubs multiple annotations together and the apply the meta annotation to the method. So for the above example you can fist define the collection of annotation using the AnnotationCollector.
import groovy.transform.AnnotationCollector

@Procedure
@Master
@AnnotationCollector
Once this is done, you can apply the following meta-annotator to the method −
import groovy.transform.AnnotationCollector

@Procedure
@Master
@AnnotationCollector

@MasterProcedure
class MyMasterProcedure {}
Groovy - XML
XML is a portable, open source language that allows programmers to develop applications that can be read by other applications, regardless of operating system and/or developmental language. This is one of the most common languages used for exchanging data between applications.
What is XML?
The Extensible Markup Language XML is a markup language much like HTML or SGML. This is recommended by the World Wide Web Consortium and available as an open standard. XML is extremely useful for keeping track of small to medium amounts of data without requiring a SQLbased backbone.
XML Support in Groovy
The Groovy language also provides a rich support of the XML language. The two most basic XML classes used are −
XML Markup Builder − Groovy supports a tree-based markup generator, BuilderSupport, that can be subclassed to make a variety of tree-structured object representations. Commonly, these builders are used to represent XML markup, HTML markup. Groovys markup generator catches calls to pseudomethods and converts them into elements or nodes of a tree structure. Parameters to these pseudomethods are treated as attributes of the nodes. Closures as part of the method call are considered as nested subcontent for the resulting tree node.
XML Parser − The Groovy XmlParser class employs a simple model for parsing an XML document into a tree of Node instances. Each Node has the name of the XML element, the attributes of the element, and references to any child Nodes. This model is sufficient for most simple XML processing.
For all our XML code examples, let's use the following simple XML file movies.xml for construction of the XML file and reading the file subsequently.
<collection shelf = "New Arrivals">

   <movie title = "Enemy Behind">
      <type>War, Thriller</type>
      <format>DVD</format>
      <year>2003</year>
      <rating>PG</rating>
      <stars>10</stars>
      <description>Talk about a US-Japan war</description>
   </movie>

   <movie title = "Transformers">
      <type>Anime, Science Fiction</type>
      <format>DVD</format>
      <year>1989</year>
      <rating>R</rating>
      <stars>8</stars>
      <description>A schientific fiction</description>
   </movie>

   <movie title = "Trigun">
      <type>Anime, Action</type>
      <format>DVD</format>
      <year>1986</year>
      <rating>PG</rating>
      <stars>10</stars>
      <description>Vash the Stam pede!</description>
   </movie>

   <movie title = "Ishtar">
      <type>Comedy</type>
      <format>VHS</format>
      <year>1987</year>
      <rating>PG</rating>
      <stars>2</stars>
      <description>Viewable boredom </description>
   </movie>

</collection>
XML Markup Builder
Syntax
public MarkupBuilder()
The MarkupBuilder is used to construct the entire XML document. The XML document is created by first creating an object of the XML document class. Once the object is created, a pseudomethod can be called to create the various elements of the XML document.
Lets look at an example of how to create one block, that is, one movie element from the above XML document −
import groovy.xml.MarkupBuilder

class Example {
   static void main(String[] args) {
      def mB = new MarkupBuilder()

      // Compose the builder
      mB.collection(shelf : 'New Arrivals') {
         movie(title : 'Enemy Behind')
         type('War, Thriller')
         format('DVD')
         year('2003')
         rating('PG')
         stars(10)
         description('Talk about a US-Japan war')
      }
   }
}
In the above example, the following things need to be noted −
mB.collection() − This is a markup generator that creates the head XML tag of <collection></collection>
movie(title : 'Enemy Behind') − These pseudomethods create the child tags with this method creating the tag with the value. By specifying a value called title, this actually indicates that an attribute needs to be created for the element.
A closure is provided to the pseudomethod to create the remaining elements of the XML document.
The default constructor for the class MarkupBuilder is initialized so that the generated XML is issued to the standard output stream
When we run the above program, we will get the following result −
<collection shelf = 'New Arrivals'>
   <movie title = 'Enemy Behind' />
      <type>War, Thriller</type>
      <format>DVD</format>
      <year>2003</year>
      <rating>PG</rating>
      <stars>10</stars>
      <description>Talk about a US-Japan war</description>
   </movie>
</collection>
In order to create the entire XML document, the following things need to be done.
- A map entry needs to be created to store the different values of the elements.
- For each element of the map, we are assigning the value to each element.
import groovy.xml.MarkupBuilder

class Example {
   static void main(String[] args) {
      def mp = [1 : ['Enemy Behind', 'War, Thriller','DVD','2003',
         'PG', '10','Talk about a US-Japan war'],
         2 : ['Transformers','Anime, Science Fiction','DVD','1989',
         'R', '8','A scientific fiction'],
         3 : ['Trigun','Anime, Action','DVD','1986',
         'PG', '10','Vash the Stam pede'],
         4 : ['Ishtar','Comedy','VHS','1987', 'PG',
         '2','Viewable boredom ']]

      def mB = new MarkupBuilder()

      // Compose the builder
      def MOVIEDB = mB.collection('shelf': 'New Arrivals') {
         mp.each {
            sd ->
            mB.movie('title': sd.value[0]) {
               type(sd.value[1])
               format(sd.value[2])
               year(sd.value[3])
               rating(sd.value[4])
               stars(sd.value[4])
               description(sd.value[5])
            }
         }
      }
   }
}
When we run the above program, we will get the following result −
<collection shelf = 'New Arrivals'>
   <movie title = 'Enemy Behind'>
      <type>War, Thriller</type>
      <format>DVD</format>
      <year>2003</year>
      <rating>PG</rating>
      <stars>PG</stars>
      <description>10</description>
   </movie>
   <movie title = 'Transformers'>
      <type>Anime, Science Fiction</type>
      <format>DVD</format>
      <year>1989</year>
	  <rating>R</rating>
      <stars>R</stars>
      <description>8</description>
   </movie>
   <movie title = 'Trigun'>
      <type>Anime, Action</type>
      <format>DVD</format>
      <year>1986</year>
      <rating>PG</rating>
      <stars>PG</stars>
      <description>10</description>
   </movie>
   <movie title = 'Ishtar'>
      <type>Comedy</type>
      <format>VHS</format>
      <year>1987</year>
      <rating>PG</rating>
      <stars>PG</stars>
      <description>2</description>
   </movie>
</collection>
XML Parsing
The Groovy XmlParser class employs a simple model for parsing an XML document into a tree of Node instances. Each Node has the name of the XML element, the attributes of the element, and references to any child Nodes. This model is sufficient for most simple XML processing.
Syntax
public XmlParser()
   throws ParserConfigurationException,
      SAXException
The following codeshows an example of how the XML parser can be used to read an XML document.
Lets assume we have the same document called Movies.xml and we wanted to parse the XML document and display a proper output to the user. The following codeis a snippet of how we can traverse through the entire content of the XML document and display a proper response to the user.
import groovy.xml.MarkupBuilder
import groovy.util.*

class Example {

   static void main(String[] args) {

      def parser = new XmlParser()
      def doc = parser.parse("D:\\Movies.xml");

      doc.movie.each{
         bk->
         print("Movie Name:")
         println "${bk['@title']}"

         print("Movie Type:")
         println "${bk.type[0].text()}"

         print("Movie Format:")
         println "${bk.format[0].text()}"

         print("Movie year:")
         println "${bk.year[0].text()}"

         print("Movie rating:")
         println "${bk.rating[0].text()}"

         print("Movie stars:")
         println "${bk.stars[0].text()}"

         print("Movie description:")
         println "${bk.description[0].text()}"
         println("*******************************")
      }
   }
}
When we run the above program, we will get the following result −
Movie Name:Enemy Behind
Movie Type:War, Thriller
Movie Format:DVD
Movie year:2003
Movie rating:PG
Movie stars:10
Movie description:Talk about a US-Japan war
*******************************
Movie Name:Transformers
Movie Type:Anime, Science Fiction
Movie Format:DVD
Movie year:1989
Movie rating:R
Movie stars:8
Movie description:A schientific fiction
*******************************
Movie Name:Trigun
Movie Type:Anime, Action
Movie Format:DVD
Movie year:1986
Movie rating:PG
Movie stars:10
Movie description:Vash the Stam pede!
*******************************
Movie Name:Ishtar
Movie Type:Comedy
Movie Format:VHS
Movie year:1987
Movie rating:PG
Movie stars:2
Movie description:Viewable boredom
The important things to note about the above code.
An object of the class XmlParser is being formed so that it can be used to parse the XML document.
The parser is given the location of the XML file.
For each movie element, we are using a closure to browse through each child node and display the relevant information.
For the movie element itself, we are using the @ symbol to display the title attribute attached to the movie element.
Groovy - JMX
JMX is the defacto standard which is used for monitoring all applications which have anything to do with the Java virual environment. Given that Groovy sits directly on top of Java, Groovy can leverage the tremendous amount of work already done for JMX with Java.
Monitoring the JVM
One can use the standard classes available in java.lang.management for carrying out the monitoring of the JVM. The following code example shows how this can be done.
import java.lang.management.*

def os = ManagementFactory.operatingSystemMXBean
println """OPERATING SYSTEM:
\tOS architecture = $os.arch
\tOS name = $os.name
\tOS version = $os.version
\tOS processors = $os.availableProcessors
"""

def rt = ManagementFactory.runtimeMXBean
println """RUNTIME:
   \tRuntime name = $rt.name
   \tRuntime spec name = $rt.specName
   \tRuntime vendor = $rt.specVendor
   \tRuntime spec version = $rt.specVersion
   \tRuntime management spec version = $rt.managementSpecVersion
   """

def mem = ManagementFactory.memoryMXBean
def heapUsage = mem.heapMemoryUsage
def nonHeapUsage = mem.nonHeapMemoryUsage

println """MEMORY:
   HEAP STORAGE:
      \tMemory committed = $heapUsage.committed
      \tMemory init = $heapUsage.init
      \tMemory max = $heapUsage.max
      \tMemory used = $heapUsage.used NON-HEAP STORAGE:
      \tNon-heap memory committed = $nonHeapUsage.committed
      \tNon-heap memory init = $nonHeapUsage.init
      \tNon-heap memory max = $nonHeapUsage.max
      \tNon-heap memory used = $nonHeapUsage.used
   """

println "GARBAGE COLLECTION:"
ManagementFactory.garbageCollectorMXBeans.each { gc ->
   println "\tname = $gc.name"
   println "\t\tcollection count = $gc.collectionCount"
   println "\t\tcollection time = $gc.collectionTime"
   String[] mpoolNames =   gc.memoryPoolNames

   mpoolNames.each {
      mpoolName -> println "\t\tmpool name = $mpoolName"
   }
}
When the code is executed, the output will vary depending on the system on which the code is run. A sample of the output is given below.
OPERATING SYSTEM:
   OS architecture = x86
   OS name = Windows 7
   OS version = 6.1
   OS processors = 4

RUNTIME:
   Runtime name = 5144@Babuli-PC
   Runtime spec name = Java Virtual Machine Specification
   Runtime vendor = Oracle Corporation
   Runtime spec version = 1.7
   Runtime management spec version = 1.2

MEMORY:
   HEAP STORAGE:
      Memory committed = 16252928
      Memory init = 16777216
      Memory max = 259522560
      Memory used = 7355840

NON-HEAP STORAGE:
   Non-heap memory committed = 37715968
   Non-heap memory init = 35815424
   Non-heap memory max = 123731968
   Non-heap memory used = 18532232

GARBAGE COLLECTION:
   name = Copy
   collection count = 15
   collection time = 47
   mpool name = Eden Space
   mpool name = Survivor Space

   name = MarkSweepCompact
      collection count = 0
      collection time = 0

      mpool name = Eden Space
      mpool name = Survivor Space
      mpool name = Tenured Gen
      mpool name = Perm Gen
      mpool name = Perm Gen [shared-ro]
      mpool name = Perm Gen [shared-rw]
Monitoring Tomcat
In order to monitor tomcat, the following parameter should be set when tomcat is started −
set JAVA_OPTS = -Dcom.sun.management.jmxremote
Dcom.sun.management.jmxremote.port = 9004\

-Dcom.sun.management.jmxremote.authenticate=false
Dcom.sun.management.jmxremote.ssl = false
The following code uses JMX to discover the available MBeans in the running Tomcat, determine which are the web modules and extract the processing time for each web module.
import groovy.swing.SwingBuilder

import javax.management.ObjectName
import javax.management.remote.JMXConnectorFactory as JmxFactory
import javax.management.remote.JMXServiceURL as JmxUrl
import javax.swing.WindowConstants as WC

import org.jfree.chart.ChartFactory
import org.jfree.data.category.DefaultCategoryDataset as Dataset
import org.jfree.chart.plot.PlotOrientation as Orientation

def serverUrl = 'service:jmx:rmi:///jndi/rmi://localhost:9004/jmxrmi'
def server = JmxFactory.connect(new JmxUrl(serverUrl)).MBeanServerConnection
def serverInfo = new GroovyMBean(server, 'Catalina:type = Server').serverInfo
println "Connected to: $serverInfo"

def query = new ObjectName('Catalina:*')
String[] allNames = server.queryNames(query, null)

def modules = allNames.findAll { name ->
   name.contains('j2eeType=WebModule')
}.collect{ new GroovyMBean(server, it) }

println "Found ${modules.size()} web modules. Processing ..."
def dataset = new Dataset()

modules.each { m ->
   println m.name()
   dataset.addValue m.processingTime, 0, m.path
}
Groovy - JSON
This chapter covers how to we can use the Groovy language for parsing and producing JSON objects.
JSON Functions
| Sr.No | Function & Libraries |
|---|---|
| 1 |
JsonSlurper JsonSlurper is a class that parses JSON text or reader content into Groovy data Structures such as maps, lists and primitive types like Integer, Double, Boolean and String. |
| 2 |
JsonOutput This method is responsible for serialising Groovy objects into JSON strings. |
Parsing Data using JsonSlurper
JsonSlurper is a class that parses JSON text or reader content into Groovy data Structures such as maps, lists and primitive types like Integer, Double, Boolean and String.
Syntax
def slurper = new JsonSlurper()
JSON slurper parses text or reader content into a data structure of lists and maps.
The JsonSlurper class comes with a couple of variants for parser implementations. Sometimes you may have different requirements when it comes to parsing certain strings. Lets take an instance wherein one needs to read the JSON which is returned from the response from a web server. In such a case its beneficial to use the parser JsonParserLax variant. This parsee allows comments in the JSON text as well as no quote strings etc. To specify this sort of parser you need to use JsonParserType.LAX parser type when defining an object of the JsonSlurper.
Lets see an example of this given below. The example is for getting JSON data from a web server using the http module. For this type of traversal, the best option is to have the parser type set to JsonParserLax variant.
http.request( GET, TEXT ) {
   headers.Accept = 'application/json'
   headers.'User-Agent' = USER_AGENT

   response.success = {
      res, rd ->
      def jsonText = rd.text

      //Setting the parser type to JsonParserLax
      def parser = new JsonSlurper().setType(JsonParserType.LAX)
      def jsonResp = parser.parseText(jsonText)
   }
}
Similarly the following additional parser types are available in Groovy −
The JsonParserCharArray parser basically takes a JSON string and operates on the underlying character array. During value conversion it copies character sub-arrays (a mechanism known as "chopping") and operates on them individually.
The JsonFastParser is a special variant of the JsonParserCharArray and is the fastest parser. JsonFastParser is also known as the index-overlay parser. During parsing of the given JSON String it tries as hard as possible to avoid creating new char arrays or String instances. It just keeps pointers to the underlying original character array only. In addition, it defers object creation as late as possible.
The JsonParserUsingCharacterSource is a special parser for very large files. It uses a technique called "character windowing" to parse large JSON files (large means files over 2MB size in this case) with constant performance characteristics.
Parsing Text
Lets have a look at some examples of how we can use the JsonSlurper class.
import groovy.json.JsonSlurper

class Example {
   static void main(String[] args) {
      def jsonSlurper = new JsonSlurper()
      def object = jsonSlurper.parseText('{ "name": "John", "ID" : "1"}')

      println(object.name);
      println(object.ID);
   }
}
In the above example, we are −
First creating an instance of the JsonSlurper class
We are then using the parseText function of the JsonSlurper class to parse some JSON text.
When we get the object, you can see that we can actually access the values in the JSON string via the key.
The output of the above program is given below −
John
1
Parsing List of Integers
Lets take a look at another example of the JsonSlurper parsing method. In the following example, we are pasing a list of integers. You will notice from The following codethat we are able to use the List method of each and pass a closure to it.
import groovy.json.JsonSlurper
class Example {
   static void main(String[] args) {
      def jsonSlurper = new JsonSlurper()
      Object lst = jsonSlurper.parseText('{ "List": [2, 3, 4, 5] }')
      lst.each { println it }
   }
}
The output of the above program is given below −
List=[2, 3, 4, 5]
Parsing List of Primitive Data types
The JSON parser also supports the primitive data types of string, number, object, true, false and null. The JsonSlurper class converts these JSON types into corresponding Groovy types.
The following example shows how to use the JsonSlurper to parse a JSON string. And here you can see that the JsonSlurper is able to parse the individual items into their respective primitive types.
import groovy.json.JsonSlurper
class Example {

   static void main(String[] args) {
      def jsonSlurper = new JsonSlurper()
      def obj = jsonSlurper.parseText ''' {"Integer": 12, "fraction": 12.55, "double": 12e13}'''

      println(obj.Integer);
      println(obj.fraction);
      println(obj.double);
   }
}
The output of the above program is given below −
12
12.55
1.2E+14
JsonOutput
Now lets talk about how to print output in Json. This can be done by the JsonOutput method. This method is responsible for serialising Groovy objects into JSON strings.
Syntax
Static string JsonOutput.toJson(datatype obj)
Parameters − The parameters can be an object of a datatype Number, Boolean, character,String, Date, Map, closure etc.
Return type − The return type is a json string.
Example
Following is a simple example of how this can be achieved.
import groovy.json.JsonOutput
class Example {
   static void main(String[] args) {
      def output = JsonOutput.toJson([name: 'John', ID: 1])
      println(output);
   }
}
The output of the above program is given below −
{"name":"John","ID":1}
The JsonOutput can also be used for plain old groovy objects. In the following example, you can see that we are actually passing objects of the type Student to the JsonOutput method.
import groovy.json.JsonOutput
class Example {
   static void main(String[] args) {
      def output = JsonOutput.toJson([ new Student(name: 'John',ID:1),
         new Student(name: 'Mark',ID:2)])
      println(output);
   }
}

class Student {
   String name
   int ID;
}
The output of the above program is given below −
[{"name":"John","ID":1},{"name":"Mark","ID":2}]
Groovy - DSLS
Groovy allows one to omit parentheses around the arguments of a method call for top-level statements. This is known as the "command chain" feature. This extension works by allowing one to chain such parentheses-free method calls, requiring neither parentheses around arguments, nor dots between the chained calls.
If a call is executed as a b c d, this will actually be equivalent to a(b).c(d).
DSL or Domain specific language is meant to simplify the code written in Groovy in such a way that it becomes easily understandable for the common user. The following example shows what exactly is meant by having a domain specific language.
def lst = [1,2,3,4]
print lst
The above code shows a list of numbers being printed to the console using the println statement. In a domain specific language the commands would be as −
Given the numbers 1,2,3,4

Display all the numbers
So the above example shows the transformation of the programming language to meet the needs of a domain specific language.
Lets look at a simple example of how we can implement DSLs in Groovy −
class EmailDsl {
   String toText
   String fromText
   String body

   /**
   * This method accepts a closure which is essentially the DSL. Delegate the
   * closure methods to
   * the DSL class so the calls can be processed
   */

   def static make(closure) {
      EmailDsl emailDsl = new EmailDsl()
      // any method called in closure will be delegated to the EmailDsl class
      closure.delegate = emailDsl
      closure()
   }

   /**
   * Store the parameter as a variable and use it later to output a memo
   */

   def to(String toText) {
      this.toText = toText
   }

   def from(String fromText) {
      this.fromText = fromText
   }

   def body(String bodyText) {
      this.body = bodyText
   }
}

EmailDsl.make {
   to "Nirav Assar"
   from "Barack Obama"
   body "How are things? We are doing well. Take care"
}
When we run the above program, we will get the following result −
How are things? We are doing well. Take care
The following needs to be noted about the above code implementation −
A static method is used that accepts a closure. This is mostly a hassle free way to implement a DSL.
In the email example, the class EmailDsl has a make method. It creates an instance and delegates all calls in the closure to the instance. This is the mechanism where the "to", and "from" sections end up executing methods inside the EmailDsl class.
Once the to() method is called, we store the text in the instance for formatting later on.
We can now call the EmailDSL method with an easy language that is easy to understand for end users.
Groovy - Database
Groovys groovy-sql module provides a higher-level abstraction over the current Javas JDBC technology. The Groovy sql API supports a wide variety of databases, some of which are shown below.
- HSQLDB
- Oracle
- SQL Server
- MySQL
- MongoDB
In our example, we are going to use MySQL DB as an example. In order to use MySQL with Groovy, the first thing to do is to download the MySQL jdbc jar file from the mysql site. The format of the MySQL will be shown below.
mysql-connector-java-5.1.38-bin
Then ensure to add the above jar file to the classpath in your workstation.
Database Connection
Before connecting to a MySQL database, make sure of the followings −
- You have created a database TESTDB.
- You have created a table EMPLOYEE in TESTDB.
- This table has fields FIRST_NAME, LAST_NAME, AGE, SEX and INCOME.
- User ID "testuser" and password "test123" are set to access TESTDB.
- Ensure you have downloaded the mysql jar file and added the file to your classpath.
- You have gone through MySQL tutorial to understand MySQL Basics
The following example shows how to connect with MySQL database "TESTDB".
import java.sql.*;
import groovy.sql.Sql

class Example {
   static void main(String[] args) {
      // Creating a connection to the database
      def sql = Sql.newInstance('jdbc:mysql://localhost:3306/TESTDB',
         'testuser', 'test123', 'com.mysql.jdbc.Driver')

      // Executing the query SELECT VERSION which gets the version of the database
      // Also using the eachROW method to fetch the result from the database

      sql.eachRow('SELECT VERSION()'){ row ->
         println row[0]
      }

      sql.close()
   }
}
While running this script, it is producing the following result −
5.7.10-log
The Sql.newInstance method is used to establish a connection to the database.
Creating Database Table
The next step after connecting to the database is to create the tables in our database. The following example shows how to create a table in the database using Groovy. The execute method of the Sql class is used to execute statements against the database.
import java.sql.*;
import groovy.sql.Sql

class Example {
   static void main(String[] args) {
      // Creating a connection to the database
      def sql = Sql.newInstance('jdbc:mysql://localhost:3306/TESTDB', 'testuser',
         'test123', 'com.mysql.jdbc.Driver')

      def sqlstr = """CREATE TABLE EMPLOYEE (
         FIRST_NAME CHAR(20) NOT NULL,
         LAST_NAME CHAR(20),
         AGE INT,
         SEX CHAR(1),
         INCOME FLOAT )"""

      sql.execute(sqlstr);
      sql.close()
   }
}
Insert Operation
It is required when you want to create your records into a database table.
Example
The following example will insert a record in the employee table. The code is placed in a try catch block so that if the record is executed successfully, the transaction is committed to the database. If the transaction fails, a rollback is done.
import java.sql.*;
import groovy.sql.Sql

class Example {
   static void main(String[] args) {
      // Creating a connection to the database
      def sql = Sql.newInstance('jdbc:mysql://localhost:3306/TESTDB', 'testuser',
         'test123', 'com.mysql.jdbc.Driver')

      sql.connection.autoCommit = false

      def sqlstr = """INSERT INTO EMPLOYEE(FIRST_NAME,
         LAST_NAME, AGE, SEX, INCOME) VALUES ('Mac', 'Mohan', 20, 'M', 2000)"""
      try {
         sql.execute(sqlstr);
         sql.commit()
         println("Successfully committed")
      }catch(Exception ex) {
         sql.rollback()
         println("Transaction rollback")
      }

      sql.close()
   }
}
Suppose if you wanted to just select certain rows based on a criteria. The following codeshows how you can add a parameter placeholder to search for values. The above example can also be written to take in parameters as shown in the following code. The $ symbol is used to define a parameter which can then be replaced by values when the sql statement is executed.
import java.sql.*;
import groovy.sql.Sql

class Example {
   static void main(String[] args) {
      // Creating a connection to the database
      def sql = Sql.newInstance('jdbc:mysql://localhost:3306/TESTDB', 'testuser',
         'test123', 'com.mysql.jdbc.Driver')

      sql.connection.autoCommit = false

      def firstname = "Mac"
      def lastname ="Mohan"
      def age = 20
      def sex = "M"
      def income = 2000

      def sqlstr = "INSERT INTO EMPLOYEE(FIRST_NAME,LAST_NAME, AGE, SEX,
         INCOME) VALUES " + "(${firstname}, ${lastname}, ${age}, ${sex}, ${income} )"

      try {
         sql.execute(sqlstr);
         sql.commit()
         println("Successfully committed")
      } catch(Exception ex) {
         sql.rollback()
         println("Transaction rollback")
      }

      sql.close()
   }
}
READ Operation
READ Operation on any database means to fetch some useful information from the database. Once our database connection is established, you are ready to make a query into this database.
The read operation is performed by using the eachRow method of the sql class.
Syntax
eachRow(GString gstring, Closure closure)
Performs the given SQL query calling the given Closure with each row of the result set.
Parameters
Gstring − The sql statement which needs to be executed.
Closure − The closure statement to process the rows retrived from the read operation. Performs the given SQL query calling the given Closure with each row of the result set.
The following code example shows how to fetch all the records from the employee table.
import java.sql.*;
import groovy.sql.Sql

class Example {
   static void main(String[] args) {
      // Creating a connection to the database
      def sql = Sql.newInstance('jdbc:mysql://localhost:3306/TESTDB', 'testuser',
         'test123', 'com.mysql.jdbc.Driver')

      sql.eachRow('select * from employee') {
         tp ->
         println([tp.FIRST_NAME,tp.LAST_NAME,tp.age,tp.sex,tp.INCOME])
      }

      sql.close()
   }
}
The output from the above program would be −
[Mac, Mohan, 20, M, 2000.0]
Update Operation
UPDATE Operation on any database means to update one or more records, which are already available in the database. The following procedure updates all the records having SEX as 'M'. Here, we increase AGE of all the males by one year.
import java.sql.*;
import groovy.sql.Sql

class Example {
   static void main(String[] args){
      // Creating a connection to the database
      def sql = Sql.newInstance('jdbc:mysql://localhost:3306/TESTDB', 'testuser',
         'test@123', 'com.mysql.jdbc.Driver')

      sql.connection.autoCommit = false
      def sqlstr = "UPDATE EMPLOYEE SET AGE = AGE + 1 WHERE SEX = 'M'"

      try {
         sql.execute(sqlstr);
         sql.commit()
         println("Successfully committed")
      }catch(Exception ex) {
         sql.rollback()
         println("Transaction rollback")
      }

      sql.close()
   }
}
DELETE Operation
DELETE operation is required when you want to delete some records from your database. Following is the procedure to delete all the records from EMPLOYEE where AGE is more than 20.
import java.sql.*;
import groovy.sql.Sql

class Example {
   static void main(String[] args) {
      // Creating a connection to the database
      def sql = Sql.newInstance('jdbc:mysql://localhost:3306/TESTDB', 'testuser',
         'test@123', 'com.mysql.jdbc.Driver')

      sql.connection.autoCommit = false
      def sqlstr = "DELETE FROM EMPLOYEE WHERE AGE > 20"

      try {
         sql.execute(sqlstr);
         sql.commit()
         println("Successfully committed")
      }catch(Exception ex) {
         sql.rollback()
         println("Transaction rollback")
      }

      sql.close()
   }
}
Performing Transactions
Transactions are a mechanism that ensures data consistency. Transactions have the following four properties −
Atomicity − Either a transaction completes or nothing happens at all.
Consistency − A transaction must start in a consistent state and leave the system in a consistent state.
Isolation − Intermediate results of a transaction are not visible outside the current transaction.
Durability − Once a transaction was committed, the effects are persistent, even after a system failure.
Here is a simple example of how to implement transactions. We have already seen this example from our previous topic of the DELETE operation.
def sqlstr = "DELETE FROM EMPLOYEE WHERE AGE > 20"

try {
   sql.execute(sqlstr);
   sql.commit()
   println("Successfully committed")
}catch(Exception ex) {
   sql.rollback()
   println("Transaction rollback")
}
sql.close()
Commit Operation
The commit operation is what tells the database to proceed ahead with the operation and finalize all changes to the database.
In our above example, this is achieved by the following statement −
sql.commit()
Rollback Operation
If you are not satisfied with one or more of the changes and you want to revert back those changes completely, then use rollback method. In our above example, this is achieved by the following statement −
sql.rollback()
Disconnecting Databases
To disconnect Database connection, use the close method.
sql.close()
Groovy - Builders
During the process of software development, sometimes developers spend a lot of time in creating Data structures, domain classes, XML, GUI Layouts, Output streams etc.And sometimes the code used to create these specific requirements results in the repitition of the same snippet of code in many places. This is where Groovy builders come into play. Groovy has builders which can be used to create standard objects and structures. These builders saves time as developer dont need to write their own code to create these builders. In the couse of this chapter we will look at the different builders available in groovy.
Swing Builder
In groovy one can also create graphical user interfaces using the swing builders available in groovy. The main class for developing swing components is the SwingBuilder class. This class has many methods for creating graphical components such as −
JFrame − This is for creating the frame element.
JTextField − This is used for creating the textfield component.
Lets look at a simple example of how to create a Swing application using the SwingBuilder class. In the following example, you can see the following points −
You need to import the groovy.swing.SwingBuilder and the javax.swing.* classes.
All of the componets displayed in the Swing application are part of the SwingBuilder class.
For the frame itself, you can specify the initial location and size of the frame. You can also specify the title of the frame.
You need to set the Visibility property to true in order for the frame to be shown.
import groovy.swing.SwingBuilder
import javax.swing.*

// Create a builder
def myapp = new SwingBuilder()

// Compose the builder
def myframe = myapp.frame(title : 'Tutorials Point', location : [200, 200],
   size : [400, 300], defaultCloseOperation : WindowConstants.EXIT_ON_CLOSE {
      label(text : 'Hello world')
   }

// The following  statement is used for displaying the form
frame.setVisible(true)
The output of the above program is given below. The following output shows a JFrame along with a JLabel with a text of Hello World.
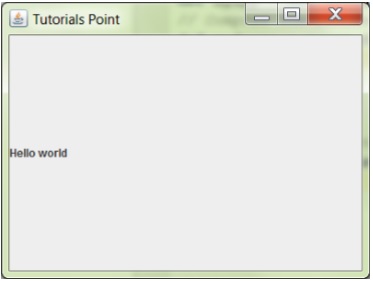
Lets look at our next example for creating an input screen with textboxes. In the following example, we want to create a form which has text boxes for Student name, subject and School Name. In the following example, you can see the following key points −
- We are defining a layout for our controls on the screen. In this case we are using the Grid Layout.
- We are using an alignment property for our labels.
- We are using the textField method for displaying textboxes on the screen.
import groovy.swing.SwingBuilder
import javax.swing.*
import java.awt.*

// Create a builder
def myapp = new SwingBuilder()

// Compose the builder
def myframe = myapp.frame(title : 'Tutorials Point', location : [200, 200],
   size : [400, 300], defaultCloseOperation : WindowConstants.EXIT_ON_CLOSE) {
      panel(layout: new GridLayout(3, 2, 5, 5)) {
         label(text : 'Student Name:', horizontalAlignment : JLabel.RIGHT)
         textField(text : '', columns : 10)

         label(text : 'Subject Name:', horizontalAlignment : JLabel.RIGHT)
         textField(text : '', columns : 10)

         label(text : 'School Name:', horizontalAlignment : JLabel.RIGHT)
         textField(text : '', columns : 10)
      }
   }

// The following  statement is used for displaying the form
myframe.setVisible(true)
The output of the above program is given below −
Event Handlers
Now lets look at event handlers. Event handlers are used for button to perform some sort of processing when a button is pressed. Each button pseudomethod call includes the actionPerformed parameter. This represents a code block presented as a closure.
Lets look at our next example for creating a screen with 2 buttons. When either button is pressed a corresponding message is sent to the console screen. In the following example, you can see the following key points −
For each button defined, we are using the actionPerformed method and defining a closure to send some output to the console when the button is clicked.
import groovy.swing.SwingBuilder
import javax.swing.*
import java.awt.*

def myapp = new SwingBuilder()

def buttonPanel = {
   myapp.panel(constraints : BorderLayout.SOUTH) {

      button(text : 'Option A', actionPerformed : {
         println 'Option A chosen'
      })

      button(text : 'Option B', actionPerformed : {
         println 'Option B chosen'
      })
   }
}

def mainPanel = {
   myapp.panel(layout : new BorderLayout()) {
      label(text : 'Which Option do you want', horizontalAlignment :
      JLabel.CENTER,
      constraints : BorderLayout.CENTER)
      buttonPanel()
   }
}

def myframe = myapp.frame(title : 'Tutorials Point', location : [100, 100],
   size : [400, 300], defaultCloseOperation : WindowConstants.EXIT_ON_CLOSE){
      mainPanel()
   }

myframe.setVisible(true)
The output of the above program is given below. When you click on either button, the required message is sent to the console log screen.
Another variation of the above example is to define methods which can can act as handlers. In the following example we are defining 2 handlers of DisplayA and DisplayB.
import groovy.swing.SwingBuilder
import javax.swing.*
import java.awt.*

def myapp = new SwingBuilder()

def DisplayA = {
   println("Option A")
}

def DisplayB = {
   println("Option B")
}

def buttonPanel = {
   myapp.panel(constraints : BorderLayout.SOUTH) {
      button(text : 'Option A', actionPerformed : DisplayA)
      button(text : 'Option B', actionPerformed : DisplayB)
   }
}

def mainPanel = {
   myapp.panel(layout : new BorderLayout()) {
      label(text : 'Which Option do you want', horizontalAlignment : JLabel.CENTER,
      constraints : BorderLayout.CENTER)
      buttonPanel()
   }
}

def myframe = myapp.frame(title : 'Tutorials Point', location : [100, 100],
   size : [400, 300], defaultCloseOperation : WindowConstants.EXIT_ON_CLOSE) {
      mainPanel()
   }

myframe.setVisible(true)
The output of the above program would remain the same as the earlier example.
DOM Builder
The DOM builder can be used for parsing HTML, XHTML and XML and converting it into a W3C DOM tree.
The following example shows how the DOM builder can be used.
String records = '''
   <library>

      <Student>
         <StudentName division = 'A'>Joe</StudentName>
         <StudentID>1</StudentID>
      </Student>

      <Student>
         <StudentName division = 'B'>John</StudentName>
         <StudentID>2</StudentID>
      </Student>

      <Student>
         <StudentName division = 'C'>Mark</StudentName>
         <StudentID>3</StudentID>
      </Student>

   </library>'''

def rd = new StringReader(records)
def doc = groovy.xml.DOMBuilder.parse(rd)
JsonBuilder
The JsonBuilder is used for creating json type objects.
The following example shows how the Json builder can be used.
def builder = new groovy.json.JsonBuilder()

def root = builder.students {
   student {
      studentname 'Joe'
      studentid '1'

      Marks(
         Subject1: 10,
         Subject2: 20,
         Subject3:30,
      )
   }
}
println(builder.toString());
The output of the above program is given below. The output clearlt shows that the Jsonbuilder was able to build the json object out of a structed set of nodes.
{"students":{"student":{"studentname":"Joe","studentid":"1","Marks":{"Subject1":10,
"S ubject2":20,"Subject3":30}}}}
The jsonbuilder can also take in a list and convert it to a json object. The following example shows how this can be accomplished.
def builder = new groovy.json.JsonBuilder()
def lst = builder([1, 2, 3])
println(builder.toString());
The output of the above program is given below.
[1,2,3]
The jsonBuilder can also be used for classes. The following example shows how objects of a class can become inputs to the json builder.
def builder = new groovy.json.JsonBuilder()

class Student {
   String name
}

def studentlist = [new Student (name: "Joe"), new Student (name: "Mark"),
   new Student (name: "John")]

builder studentlist, { Student student ->name student.name}
println(builder)
The output of the above program is given below.
[{"name":"Joe"},{"name":"Mark"},{"name":"John"}]
NodeBuilder
NodeBuilder is used for creating nested trees of Node objects for handling arbitrary data. An example of the usage of a Nodebuilder is shown below.
def nodeBuilder = new NodeBuilder()

def studentlist = nodeBuilder.userlist {
   user(id: '1', studentname: 'John', Subject: 'Chemistry')
   user(id: '2', studentname: 'Joe', Subject: 'Maths')
   user(id: '3', studentname: 'Mark', Subject: 'Physics')
}

println(studentlist)
FileTreeBuilder
FileTreeBuilder is a builder for generating a file directory structure from a specification. Following is an example of how the FileTreeBuilder can be used.
tmpDir = File.createTempDir()
def fileTreeBuilder = new FileTreeBuilder(tmpDir)

fileTreeBuilder.dir('main') {
   dir('submain') {
      dir('Tutorial') {
        file('Sample.txt', 'println "Hello World"')
      }
   }
}
From the execution of the above code a file called sample.txt will be created in the folder main/submain/Tutorial. And the sample.txt file will have the text of Hello World.
Groovy - Command Line
The Groovy shell known as groovysh can be easily used to evaluate groovy expressions, define classes and run simple programs. The command line shell gets installed when Groovy is installed.
Following are the command line options available in Groovy −
| Command line parameter | Full Name | Details |
|---|---|---|
| -C | --color[=FLAG] | Enable or disable use of ANSI colors |
| -D | --define=NAME=VALUE | Define a system property |
| -T | --terminal=TYPE | Specify the terminal TYPE to use |
| -V | --version | Display the version |
| -classpath | Specify where to find the class files must be the first argument | |
| -cp | --classpath | Aliases for '-classpath' |
| -d | --debug | --debug Enable debug output |
| -e | --evaluate=arg | Evaluate option fist when starting interactive session |
| -h | --help | Display this help message |
| -q | --quiet | Suppress superfluous output |
| -v | --verbose | Enable verbose output |
The following snapshot shows a simple example of an expression being executed in the Groovy shell. In the following example we are just printing Hello World in the groovy shell.
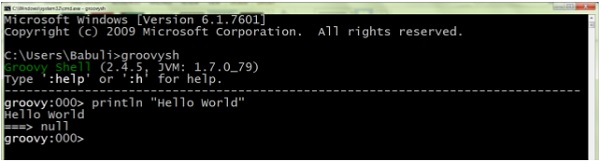
Classes and Functions
It is very easy to define a class in the command prompt, create a new object and invoke a method on the class. The following example shows how this can be implemented. In the following example, we are creating a simple Student class with a simple method. In the command prompt itself, we are creating an object of the class and calling the Display method.
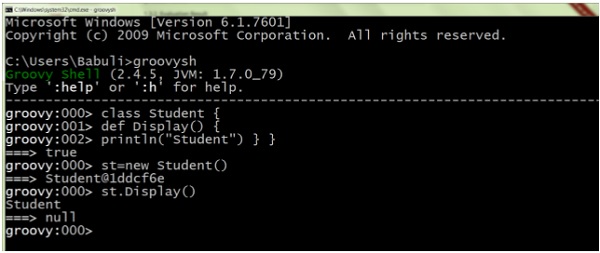
It is very easy to define a method in the command prompt and invoke the method. Note that the method is defined using the def type. Also note that we have included a parameter called name which then gets substituted with the actual value when the Display method is called. The following example shows how this can be implemented.
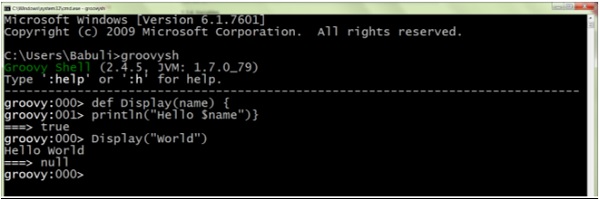
Commands
The shell has a number of different commands, which provide rich access to the shells environment. Following is the list of them and what they do.
| Sr.No | Command &smp; Command Description |
|---|---|
| 1 |
:help (:h ) Display this help message |
| 2 | ? (:? ) Alias to: :help |
| 3 | :exit (:x ) Exit the shell |
| 4 | :quit (:q ) Alias to: :exit |
| 5 | import (:i ) Import a class into the namespace |
| 6 | :display (:d ) Display the current buffer |
| 7 | :clear (:c ) Clear the buffer and reset the prompt counter |
| 8 | :show (:S ) Show variables, classes or imports |
| 9 | :inspect (:n ) Inspect a variable or the last result with the GUI object browser |
| 10 | :purge (:p ) Purge variables, classes, imports or preferences |
| 11 | :edit (:e ) Edit the current buffer |
| 12 | :load (:l ) Load a file or URL into the buffer |
| 13 | . (:. ) Alias to: :load |
| 14 | .save (:s ) Save the current buffer to a file |
| 15 | .record (:r ) Record the current session to a file |
| 16 | :alias (:a ) Create an alias |
| 17 | :set (:= ) Set (or list) preferences |
| 18 | :register (:rc) Registers a new command with the shell |
| 19 | :doc (:D ) Opens a browser window displaying the doc for the argument |
| 20 | :history (:H ) Display, manage and recall edit-line history |
Groovy - Unit Testing
The fundamental unit of an object-oriented system is the class. Therefore unit testing consists of testig within a class. The approach taken is to create an object of the class under testing and use it to check that selected methods execute as expected. Not every method can be tested, since it is not always pratical to test each and every thing. But unit testing should be conducted for key and critical methods.
JUnit is an open-source testing framework that is the accepted industry standard for the automated unit testing of Java code. Fortunately, the JUnit framework can be easily used for testing Groovy classes. All that is required is to extend the GroovyTestCase class that is part of the standard Groovy environment. The Groovy test case class is based on the Junit test case.
Writing a Simple Junit Test Case
Let assume we have the following class defined in a an application class file −
class Example {
   static void main(String[] args) {
      Student mst = new Student();
      mst.name = "Joe";
      mst.ID = 1;
      println(mst.Display())
   }
}

public class Student {
   String name;
   int ID;

   String Display() {
      return name +ID;
   }
}
The output of the above program is given below.
Joe1
And now suppose we wanted to write a test case for the Student class. A typical test case would look like the one below. The following points need to be noted about the following code −
- The test case class extends the GroovyTestCase class
- We are using the assert statement to ensure that the Display method returns the right string.
class StudentTest extends GroovyTestCase {
   void testDisplay() {
      def stud = new Student(name : 'Joe', ID : '1')
      def expected = 'Joe1'
      assertToString(stud.Display(), expected)
   }
}
The Groovy Test Suite
Normally as the number of unit tests increases, it would become difficult to keep on executing all the test cases one by one. Hence Groovy provides a facility to create a test suite that can encapsulate all test cases into one logicial unit. The following codesnippet shows how this can be achieved. The following things should be noted about the code −
The GroovyTestSuite is used to encapsulate all test cases into one.
In the following example, we are assuming that we have two tests case files, one called StudentTest and the other is EmployeeTest which contains all of the necessary testing.
import groovy.util.GroovyTestSuite
import junit.framework.Test
import junit.textui.TestRunner

class AllTests {
   static Test suite() {
      def allTests = new GroovyTestSuite()
      allTests.addTestSuite(StudentTest.class)
      allTests.addTestSuite(EmployeeTest.class)
      return allTests
   }
}

TestRunner.run(AllTests.suite())
Groovy - Template Engines
Groovys template engine operates like a mail merge (the automatic addition of names and addresses from a database to letters and envelopes in order to facilitate sending mail, especially advertising, to many addresses) but it is much more general.
Simple Templating in Strings
If you take the simple example below, we are first defining a name variable to hold the string Groovy. In the println statement, we are using $ symbol to define a parameter or template where a value can be inserted.
def name = "Groovy"
println "This Tutorial is about ${name}"
If the above code is executed in groovy, the following output will be shown. The output clearly shows that the $name was replaced by the value which was assigned by the def statement.
Simple Template Engine
Following is an example of the SimpleTemplateEngine that allows you to use JSP-like scriptlets and EL expressions in your template in order to generate parametrized text. The templating engine allows you to bind a list of parameters and their values so that they can be replaced in the string which has the defined placeholders.
def text ='This Tutorial focuses on $TutorialName. In this tutorial you will learn

about $Topic'

def binding = ["TutorialName":"Groovy", "Topic":"Templates"]
def engine = new groovy.text.SimpleTemplateEngine()
def template = engine.createTemplate(text).make(binding)

println template
If the above code is executed in groovy, the following output will be shown.
Lets now use the templating feature for an XML file. As a first step lets add the following code to a file called Student.template. In the following file you will notice that we have not added the actual values for the elements, but placeholders. So $name,$is and $subject are all put as placeholders which will need to replaced at runtime.
<Student>
   <name>${name}</name>
   <ID>${id}</ID>
   <subject>${subject}</subject>
</Student>
Now lets add our Groovy script code to add the functionality which can be used to replace the above template with actual values. The following things should be noted about the following code.
The mapping of the place-holders to actual values is done through a binding and a SimpleTemplateEngine. The binding is a Map with the place-holders as keys and the replacements as the values.
import groovy.text.*
import java.io.*

def file = new File("D:/Student.template")
def binding = ['name' : 'Joe', 'id' : 1, 'subject' : 'Physics']

def engine = new SimpleTemplateEngine()
def template = engine.createTemplate(file)
def writable = template.make(binding)

println writable
If the above code is executed in groovy, the following output will be shown. From the output it can be seen that the values are successfully replaced in the relevant placeholders.
<Student>
   <name>Joe</name>
   <ID>1</ID>
   <subject>Physics</subject>
</Student>
StreamingTemplateEngine
The StreamingTemplateEngine engine is another templating engine available in Groovy. This is kind of equivalent to the SimpleTemplateEngine, but creates the template using writeable closures making it more scalable for large templates. Specifically this template engine can handle strings larger than 64k.
Following is an example of how StreamingTemplateEngine are used −
def text = '''This Tutorial is <% out.print TutorialName %> The Topic name

is ${TopicName}'''
def template = new groovy.text.StreamingTemplateEngine().createTemplate(text)

def binding = [TutorialName : "Groovy", TopicName  : "Templates",]
String response = template.make(binding)
println(response)
If the above code is executed in groovy, the following output will be shown.
This Tutorial is Groovy The Topic name is Templates
XMLTemplateEngine
The XmlTemplateEngine is used in templating scenarios where both the template source and the expected output are intended to be XML. Templates use the normal ${expression} and $variable notations to insert an arbitrary expression into the template.
Following is an example of how XMLTemplateEngine is used.
def binding = [StudentName: 'Joe', id: 1, subject: 'Physics']
def engine = new groovy.text.XmlTemplateEngine()

def text = '''\
   <document xmlns:gsp='http://groovy.codehaus.org/2005/gsp'>
      <Student>
         <name>${StudentName}</name>
         <ID>${id}</ID>
         <subject>${subject}</subject>
      </Student>
   </document>
'''

def template = engine.createTemplate(text).make(binding)
println template.toString()
If the above code is executed in groovy, the following output will be shown
   Joe


   1


   Physics
Groovy - Meta Object Programming
Meta object programming or MOP can be used to invoke methods dynamically and also create classes and methods on the fly.
So what does this mean? Lets consider a class called Student, which is kind of an empty class with no member variables or methods. Suppose if you had to invoke the following statements on this class.
Def myStudent = new Student()
myStudent.Name = Joe;
myStudent.Display()
Now in meta object programming, even though the class does not have the member variable Name or the method Display(), the above code will still work.
How can this work? Well, for this to work out, one has to implement the GroovyInterceptable interface to hook into the execution process of Groovy. Following are the methods available for this interface.
Public interface GroovyInterceptable {
   Public object invokeMethod(String methodName, Object args)
   Public object getproperty(String propertyName)
   Public object setProperty(String propertyName, Object newValue)
   Public MetaClass getMetaClass()
   Public void setMetaClass(MetaClass metaClass)
}
So in the above interface description, suppose if you had to implement the invokeMethod(), it would be called for every method which either exists or does not exist.
Missing Properties
So lets look an example of how we can implement Meta Object Programming for missing Properties. The following keys things should be noted about the following code.
The class Student has no member variable called Name or ID defined.
The class Student implements the GroovyInterceptable interface.
There is a parameter called dynamicProps which will be used to hold the value of the member variables which are created on the fly.
The methods getproperty and setproperty have been implemented to get and set the values of the propertys of the class at runtime.
class Example {
   static void main(String[] args) {
      Student mst = new Student();
      mst.Name = "Joe";
      mst.ID = 1;

      println(mst.Name);
      println(mst.ID);
   }
}

class Student implements GroovyInterceptable {
   protected dynamicProps=[:]

   void setProperty(String pName,val) {
      dynamicProps[pName] = val
   }

   def getProperty(String pName) {
      dynamicProps[pName]
   }
}
The output of the following code would be −
Joe
1
Missing methods
So lets look an example of how we can implement Meta Object Programming for missing Properties. The following keys things should be noted about the following code −
The class Student now implememts the invokeMethod method which gets called irrespective of whether the method exists or not.
class Example {
   static void main(String[] args) {
      Student mst = new Student();
      mst.Name = "Joe";
      mst.ID = 1;

      println(mst.Name);
      println(mst.ID);
      mst.AddMarks();
   }
}

class Student implements GroovyInterceptable {
   protected dynamicProps = [:]

   void setProperty(String pName, val) {
      dynamicProps[pName] = val
   }

   def getProperty(String pName) {
      dynamicProps[pName]
   }

   def invokeMethod(String name, Object args) {
      return "called invokeMethod $name $args"
   }
}
The output of the following codewould be shown below. Note that there is no error of missing Method Exception even though the method Display does not exist.
Joe
1
Metaclass
This functionality is related to the MetaClass implementation. In the default implementation you can access fields without invoking their getters and setters. The following example shows how by using the metaClass function we are able to change the value of the private variables in the class.
class Example {
   static void main(String[] args) {
      Student mst = new Student();
      println mst.getName()
      mst.metaClass.setAttribute(mst, 'name', 'Mark')
      println mst.getName()
   }
}

class Student {
   private String name = "Joe";

   public String getName() {
      return this.name;
   }
}
The output of the following code would be −
Joe
Mark
Method Missing
Groovy supports the concept of methodMissing. This method differs from invokeMethod in that it is only invoked in case of a failed method dispatch, when no method can be found for the given name and/or the given arguments. The following example shows how the methodMissing can be used.
class Example {
   static void main(String[] args) {
      Student mst = new Student();
      mst.Name = "Joe";
      mst.ID = 1;

      println(mst.Name);
      println(mst.ID);
      mst.AddMarks();
   }
}

class Student implements GroovyInterceptable {
   protected dynamicProps = [:]

   void setProperty(String pName, val) {
      dynamicProps[pName] = val
   }

   def getProperty(String pName) {
      dynamicProps[pName]
   }

   def methodMissing(String name, def args) {
      println "Missing method"
   }
}
The output of the following code would be −
Joe
1
Missing method
