- Groovy Tutorial
- Groovy - Home
- Groovy - Overview
- Groovy - Environment
- Groovy - Basic Syntax
- Groovy - Data Types
- Groovy - Variables
- Groovy - Optionals
- Groovy - Numbers
- Groovy - Strings
- Groovy - Ranges
- Groovy - Lists
- Groovy - Maps
- Groovy - Dates & Times
Groovy Operators
- Groovy - Operators
- Groovy - Arithmetic Operators
- Groovy - Assignment Operators
- Groovy - Relational Operators
- Groovy - Logical Operators
- Groovy - Bitwise Operators
- Groovy - Spaceship Operator
- Groovy - in Operator
- Groovy - Elvis Operator
- Groovy - Safe Navigation Operator
- Groovy Operator Precedence & Associativity
Control Statements
- Groovy - Decision Making
- Groovy - If Else Statement
- Groovy - Switch Statement
- Groovy - Loops
- Groovy - For Loop
- Groovy - For-in Loop
- Groovy - While Loop
- Groovy - Do While Loop
- Groovy - Break Statement
- Groovy - Continue Statement
Groovy File Handling
- Groovy - File I/O
- Java - Create a File
- Java - Write to File
- Java - Append to File
- Java - Read Files
- Java - Delete Files
- Java - File Properties
- Java - File Size
- Java - File Permissions
- Java - Directories
- Java - Listing Directories
- Java - Filtering Files/Directories
- Java - Deleting Directories
- Java - Renaming Files/Directories
Groovy Error & Exceptions
- Groovy - Exception Handling
- Groovy - try-catch Block
- Groovy - try-with-resources
- Groovy - Multi-catch Block
- Groovy - Nested try Block
- Groovy - Finally Block
- Groovy - throw Exception
- Groovy - Exception Propagation
- Groovy - Built-in Exceptions
- Groovy - Custom Exception
Groovy Multithreading
- groovy - Multithreading
- groovy - Thread Life Cycle
- groovy - Creating a Thread
- groovy - Starting a Thread
- groovy - Joining Threads
- groovy - Naming Thread
- groovy - Thread Scheduler
- groovy - Thread Pools
- groovy - Main Thread
- groovy - Thread Priority
- groovy - Daemon Threads
- groovy - Shutdown Hook
Groovy Synchronization
- groovy - Synchronization
- groovy - Block Synchronization
- groovy - Static Synchronization
- groovy - Inter-thread Communication
- groovy - Thread Deadlock
- groovy - Interrupting a Thread
- groovy - Thread Control
- groovy - Reentrant Monitor
- Groovy - Methods
- Groovy - Methods
- Groovy - Optional parenthesis
- Groovy - Named Arguments
- Groovy - Closures as Arguments
- Groovy - Method Overloading
- Groovy - Method Scope and Visibility
- Groovy - isCase Method
- Groovy - Implicit Return
- Groovy - Variable Arguments
- Groovy - Regular Expressions
- Groovy - Regular Expressions
- Groovy - Defining Regular Expressions
- Groovy - Matcher Object
- Groovy - Regex Tasks
- Groovy - XML
- Groovy - XML
- Groovy - Parsing XML
- Groovy - Creating XML
- Groovy - Modifying XML
- Groovy - Querying XML
- Groovy - Simplified Notation
- Groovy - Closure based Querying
- Groovy - Closure based Creation
- Groovy - JSON
- Groovy - JSON
- Groovy - Parsing JSON
- Groovy - Creating JSON using JsonOutput
- Groovy - Creating JSON using JsonBuilder
- Groovy - Modifying JSON
- Groovy - Error Handling
- Groovy - Handling JSON Arrays
- Groovy - JSON Array Operations
- Groovy - JSON Objects
- Groovy - JSON Object Operations
- Groovy - Generics
- Groovy - Generics
- Groovy - Declaring Generic Types
- Groovy - Bound Type Parameters
- Groovy - Wild Cards
- Groovy - Miscellaneous
- Groovy - Object Oriented
- Groovy - Closures
- Groovy - Annotations
- Groovy - JMX
- Groovy - DSLS
- Groovy - Database
- Groovy - Builders
- Groovy - Command Line
- Groovy - Unit Testing
- Groovy - Template Engines
- Groovy - Meta Object Programming
- Groovy Useful Resources
- Groovy - Quick Guide
- Groovy - Useful Resources
- Groovy - Discussion
Groovy - Builders
During the process of software development, sometimes developers spend a lot of time in creating Data structures, domain classes, XML, GUI Layouts, Output streams etc.And sometimes the code used to create these specific requirements results in the repitition of the same snippet of code in many places. This is where Groovy builders come into play. Groovy has builders which can be used to create standard objects and structures. These builders saves time as developer dont need to write their own code to create these builders. In the couse of this chapter we will look at the different builders available in groovy.
Swing Builder
In groovy one can also create graphical user interfaces using the swing builders available in groovy. The main class for developing swing components is the SwingBuilder class. This class has many methods for creating graphical components such as −
JFrame − This is for creating the frame element.
JTextField − This is used for creating the textfield component.
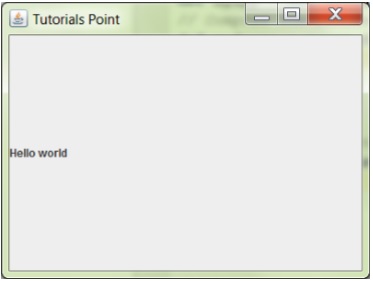
Lets look at a simple example of how to create a Swing application using the SwingBuilder class. In the following example, you can see the following points −
You need to import the groovy.swing.SwingBuilder and the javax.swing.* classes.
All of the componets displayed in the Swing application are part of the SwingBuilder class.
For the frame itself, you can specify the initial location and size of the frame. You can also specify the title of the frame.
You need to set the Visibility property to true in order for the frame to be shown.
import groovy.swing.SwingBuilder
import javax.swing.*

// Create a builder
def myapp = new SwingBuilder()

// Compose the builder
def myframe = myapp.frame(title : 'Tutorials Point', location : [200, 200],
   size : [400, 300], defaultCloseOperation : WindowConstants.EXIT_ON_CLOSE {
      label(text : 'Hello world')
   }

// The following  statement is used for displaying the form
frame.setVisible(true)
The output of the above program is given below. The following output shows a JFrame along with a JLabel with a text of Hello World.
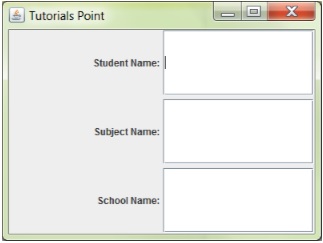
Lets look at our next example for creating an input screen with textboxes. In the following example, we want to create a form which has text boxes for Student name, subject and School Name. In the following example, you can see the following key points −
- We are defining a layout for our controls on the screen. In this case we are using the Grid Layout.
- We are using an alignment property for our labels.
- We are using the textField method for displaying textboxes on the screen.
import groovy.swing.SwingBuilder
import javax.swing.*
import java.awt.*

// Create a builder
def myapp = new SwingBuilder()

// Compose the builder
def myframe = myapp.frame(title : 'Tutorials Point', location : [200, 200],
   size : [400, 300], defaultCloseOperation : WindowConstants.EXIT_ON_CLOSE) {
      panel(layout: new GridLayout(3, 2, 5, 5)) {
         label(text : 'Student Name:', horizontalAlignment : JLabel.RIGHT)
         textField(text : '', columns : 10)

         label(text : 'Subject Name:', horizontalAlignment : JLabel.RIGHT)
         textField(text : '', columns : 10)

         label(text : 'School Name:', horizontalAlignment : JLabel.RIGHT)
         textField(text : '', columns : 10)
      }
   }

// The following  statement is used for displaying the form
myframe.setVisible(true)
The output of the above program is given below −
Event Handlers
Now lets look at event handlers. Event handlers are used for button to perform some sort of processing when a button is pressed. Each button pseudomethod call includes the actionPerformed parameter. This represents a code block presented as a closure.
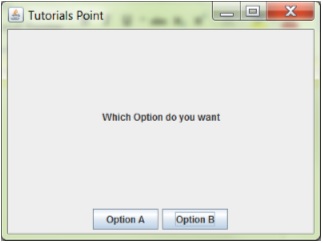
Lets look at our next example for creating a screen with 2 buttons. When either button is pressed a corresponding message is sent to the console screen. In the following example, you can see the following key points −
For each button defined, we are using the actionPerformed method and defining a closure to send some output to the console when the button is clicked.
import groovy.swing.SwingBuilder
import javax.swing.*
import java.awt.*

def myapp = new SwingBuilder()

def buttonPanel = {
   myapp.panel(constraints : BorderLayout.SOUTH) {

      button(text : 'Option A', actionPerformed : {
         println 'Option A chosen'
      })

      button(text : 'Option B', actionPerformed : {
         println 'Option B chosen'
      })
   }
}

def mainPanel = {
   myapp.panel(layout : new BorderLayout()) {
      label(text : 'Which Option do you want', horizontalAlignment :
      JLabel.CENTER,
      constraints : BorderLayout.CENTER)
      buttonPanel()
   }
}

def myframe = myapp.frame(title : 'Tutorials Point', location : [100, 100],
   size : [400, 300], defaultCloseOperation : WindowConstants.EXIT_ON_CLOSE){
      mainPanel()
   }

myframe.setVisible(true)
The output of the above program is given below. When you click on either button, the required message is sent to the console log screen.
Another variation of the above example is to define methods which can can act as handlers. In the following example we are defining 2 handlers of DisplayA and DisplayB.
import groovy.swing.SwingBuilder
import javax.swing.*
import java.awt.*

def myapp = new SwingBuilder()

def DisplayA = {
   println("Option A")
}

def DisplayB = {
   println("Option B")
}

def buttonPanel = {
   myapp.panel(constraints : BorderLayout.SOUTH) {
      button(text : 'Option A', actionPerformed : DisplayA)
      button(text : 'Option B', actionPerformed : DisplayB)
   }
}

def mainPanel = {
   myapp.panel(layout : new BorderLayout()) {
      label(text : 'Which Option do you want', horizontalAlignment : JLabel.CENTER,
      constraints : BorderLayout.CENTER)
      buttonPanel()
   }
}

def myframe = myapp.frame(title : 'Tutorials Point', location : [100, 100],
   size : [400, 300], defaultCloseOperation : WindowConstants.EXIT_ON_CLOSE) {
      mainPanel()
   }

myframe.setVisible(true)
The output of the above program would remain the same as the earlier example.
DOM Builder
The DOM builder can be used for parsing HTML, XHTML and XML and converting it into a W3C DOM tree.
The following example shows how the DOM builder can be used.
String records = '''
   <library>

      <Student>
         <StudentName division = 'A'>Joe</StudentName>
         <StudentID>1</StudentID>
      </Student>

      <Student>
         <StudentName division = 'B'>John</StudentName>
         <StudentID>2</StudentID>
      </Student>

      <Student>
         <StudentName division = 'C'>Mark</StudentName>
         <StudentID>3</StudentID>
      </Student>

   </library>'''

def rd = new StringReader(records)
def doc = groovy.xml.DOMBuilder.parse(rd)
JsonBuilder
The JsonBuilder is used for creating json type objects.
The following example shows how the Json builder can be used.
def builder = new groovy.json.JsonBuilder()

def root = builder.students {
   student {
      studentname 'Joe'
      studentid '1'

      Marks(
         Subject1: 10,
         Subject2: 20,
         Subject3:30,
      )
   }
}
println(builder.toString());
The output of the above program is given below. The output clearlt shows that the Jsonbuilder was able to build the json object out of a structed set of nodes.
{"students":{"student":{"studentname":"Joe","studentid":"1","Marks":{"Subject1":10,
"S ubject2":20,"Subject3":30}}}}
The jsonbuilder can also take in a list and convert it to a json object. The following example shows how this can be accomplished.
def builder = new groovy.json.JsonBuilder()
def lst = builder([1, 2, 3])
println(builder.toString());
The output of the above program is given below.
[1,2,3]
The jsonBuilder can also be used for classes. The following example shows how objects of a class can become inputs to the json builder.
def builder = new groovy.json.JsonBuilder()

class Student {
   String name
}

def studentlist = [new Student (name: "Joe"), new Student (name: "Mark"),
   new Student (name: "John")]

builder studentlist, { Student student ->name student.name}
println(builder)
The output of the above program is given below.
[{"name":"Joe"},{"name":"Mark"},{"name":"John"}]
NodeBuilder
NodeBuilder is used for creating nested trees of Node objects for handling arbitrary data. An example of the usage of a Nodebuilder is shown below.
def nodeBuilder = new NodeBuilder()

def studentlist = nodeBuilder.userlist {
   user(id: '1', studentname: 'John', Subject: 'Chemistry')
   user(id: '2', studentname: 'Joe', Subject: 'Maths')
   user(id: '3', studentname: 'Mark', Subject: 'Physics')
}

println(studentlist)
FileTreeBuilder
FileTreeBuilder is a builder for generating a file directory structure from a specification. Following is an example of how the FileTreeBuilder can be used.
tmpDir = File.createTempDir()
def fileTreeBuilder = new FileTreeBuilder(tmpDir)

fileTreeBuilder.dir('main') {
   dir('submain') {
      dir('Tutorial') {
        file('Sample.txt', 'println "Hello World"')
      }
   }
}
From the execution of the above code a file called sample.txt will be created in the folder main/submain/Tutorial. And the sample.txt file will have the text of Hello World.
