- FuelPHP - Home
- FuelPHP - Introduction
- FuelPHP - Installation
- FuelPHP - Architecture Overview
- FuelPHP - Simple Web Application
- FuelPHP - Configuration
- FuelPHP - Controllers
- FuelPHP - Routing
- FuelPHP - Requests & Response
- FuelPHP - Views
- FuelPHP - Presenters
- FuelPHP - Models & Database
- FuelPHP - Form Programming
- FuelPHP - Validation
- Advanced Form Programming
- FuelPHP - File Uploading
- FuelPHP - Ajax
- FuelPHP - HMVC Request
- FuelPHP - Themes
- FuelPHP - Modules
- FuelPHP - Packages
- Cookie & Session Management
- FuelPHP - Events
- FuelPHP - Email Management
- FuelPHP - Profiler
- Error Handling & Debugging
- FuelPHP - Unit Testing
- Complete Working Example
- FuelPHP Useful Resources
- FuelPHP - Quick Guide
- FuelPHP - Useful Resources
- FuelPHP - Discussion
FuelPHP - Complete Working Example
In this chapter, we will learn how to create a complete MVC based BookStore application in FuelPHP.
Step 1: Create a project
Create a new project named BookStore in FuelPHP using the following command.
oil create bookstore
Step 2: Create a layout
Create a new layout for our application. Create a file, layout.php at location fuel/app/views/layout.php. The code is as follows,
fuel/app/views/layout.php
<!DOCTYPE html>
<html lang = "en">
   <head>
      <meta charset = "utf-8">
      <meta http-equiv = "X-UA-Compatible" content = "IE = edge">
      <meta name = "viewport" content = "width = device-width, initial-scale = 1">
      <title><?php echo $title; ?></title>

      <!-- Bootstrap core CSS -->
      <link href = "/assets/css/bootstrap.min.css" rel = "stylesheet">
      <script src = "https://ajax.googleapis.com/ajax/libs/jquery/3.2.1/jquery.min.js">
      </script>
      <script src = "/assets/js/bootstrap.min.js"></script>
   </head>

   <body>
      <nav class = "navbar navbar-inverse navbar-fixed-top">
         <div class = "container">
            <div class = "navbar-header">

               <button type = "button" class = "navbar-toggle collapsed"
                  datatoggle = "collapse" data-target = "#navbar"
                  aria-expanded = "false" ariacontrols = "navbar">
                  <span class=  "sr-only">Toggle navigation</span>
                  <span class = "icon-bar"></span>
                  <span class = "icon-bar"></span>
                  <span class = "icon-bar"></span>
               </button>
               <a class = "navbar-brand" href = "#">FuelPHP Sample</a>
            </div>

            <div id = "navbar" class = "collapse navbar-collapse">
               <ul class = "nav navbar-nav">
                  <li class = "active"><a href = "/book/index">Home</a></li>
                  <li><a href = "/book/add">Add book</a></li>
               </ul>
            </div><!--/.nav-collapse -->
         </div>
      </nav>

      <div class = "container">
         <div class = "starter-template" style = "padding: 50px 0 0 0;">
            <?php echo $content; ?>
         </div>

      </div><!-- /.container -->
   </body>

</html>
Here, we are using bootstrap template. FuelPHP has first class support for bootstrap templates. We have created two variables, title and content. title is used to specify the current page's title and content is used to specify the current page details.
step 3: Create a Controller
Create a new controller, Controller_Book to show, add, edit, and delete the book. Create a new file, fuel/app/classes/controller/book.php and place the following code.
fuel/app/classes/controller/book.php
<?php
   class Controller_Book extends Controller_Template {
      public $template = 'layout';
      public function action_index() {

         // Create the view object
         $view = View::forge('book/index');

         // set the template variables
         $this->template->title = "Book index page";
         $this->template->content = $view;
      }
   }
Here, we have created the book controller by inheriting template controller and set the default template as fuel/app/views/layout.php.
step 4: Create the index view
Create a folder, book in views directory under fuel/app/views folder. Then, create a file index.php inside the book folder and add the following code,
fuel/app/views/index.php
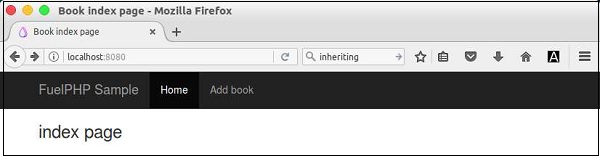
<h3>index page</h3>
As of now, we have created a basic book controller.
step 5: Modify the default route
Update the default route to set the home page of the application to book controller. Open the default routing configuration file, fuel/app/config/routes.php and change it as follows.
fuel/app/config/routes.php
<?php
   return array (
      '_root_'  => 'book/index',  // The default route
      '_404_'   => 'welcome/404', // The main 404 route

      'hello(/:name)?' => array('welcome/hello', 'name' => 'hello'),
   );
Now, requesting the URL, http://localhost:8080/ will return the index page of the book controller as follows,
step 6: Create database
Create a new database in MySQL server, using the following command,
create database tutorialspoint_bookdb
Then, create a table inside the database using the following command,
CREATE TABLE book (
   id INT PRIMARY KEY AUTO_INCREMENT,
   title VARCHAR(80) NOT NULL,
   author VARCHAR(80) NOT NULL,
   price DECIMAL(10, 2) NOT NULL
);
Insert some sample record into the table using the following SQL statement.
INSERT
INTO
   book(title,
   author,
   price)
VALUES(
   'The C Programming Language',
   'Dennie Ritchie',
   25.00
),(
   'The C++ Programming Language',
   'Bjarne Stroustrup',
   80.00
),(
   'C Primer Plus (5th Edition)',
   'Stephen Prata',
   45.00
),('Modern PHP', 'Josh Lockhart', 10.00),(
   'Learning PHP, MySQL & JavaScript, 4th Edition',
   'Robin Nixon',
   30.00
)
step 7: Configure database
Configure the database using database configuration file, db.php located at fuel/app/config.
fuel/app/config/db.php
<?php
   return array (
      'development' => array (
         'type'           => 'mysqli',
         'connection'     => array (
            'hostname'       => 'localhost',
            'port'           => '3306',
            'database'       => 'tutorialspoint_bookdb',
            'username'       => 'root',
            'password'       => 'password',
            'persistent'     => false,
            'compress'       => false,
         ),
         'identifier'     => '`',
         'table_prefix'   => '',
         'charset'        => 'utf8',
         'enable_cache'   => true,
         'profiling'      => false,
         'readonly'       => false,
      ),
      'production' => array (
         'type'           => 'mysqli',
         'connection'     => array (
            'hostname'       => 'localhost',
            'port'           => '3306',
            'database'       => 'tutorialspoint_bookdb',
            'username'       => 'root',
            'password'       => 'password',
            'persistent'     => false,
            'compress'       => false,
         ),
         'identifier'     => '`',
         'table_prefix'   => '',
         'charset'        => 'utf8',
         'enable_cache'   => true,
         'profiling'      => false,
         'readonly'       => false,
      ),
   );
step 8: Include Orm package
Update the main configuration file to include ORM package. It is located at fuel/app/config/.
fuel/app/config/config.php
'always_load' => array (
   'packages' => array (
      'orm'
   ),
),
step 9: Create a model
Create a book model in book.php located at fuel/app/classes/model. It is defined as follows −
fuel/app/classes/model/book.php
<?php
   class Model_Book extends Orm\Model {
      protected static $_connection = 'production';
      protected static $_table_name = 'book';
      protected static $_primary_key = array('id');

      protected static $_properties = array (
         'id',
         'title' => array (
            'data_type' => 'varchar',
            'label' => 'Book title',
            'validation' => array (
               'required',
               'min_length' => array(3),
               'max_length' => array(80)
            ),

            'form' => array (
               'type' => 'text'
            ),
         ),
         'author' => array (
            'data_type' => 'varchar',
            'label' => 'Book author',
            'validation' => array (
               'required',
            ),
            'form' => array (
               'type' => 'text'
            ),
         ),
         'price' => array (
            'data_type' => 'decimal',
            'label' => 'Book price',
            'validation' => array (
               'required',
            ),
            'form' => array (
               'type' => 'text'
            ),
         ),
      );
      protected static $_observers = array('Orm\\Observer_Validation' => array (
         'events' => array('before_save')
      ));
   }
Here, we have specified the database details as properties of the model. It has validation details as well.
step 10: Display books
Update the index action in book controller to list the available books in the database.
fuel/app/classes/controller/book.php
<?php
   class Controller_Book extends Controller_Template {
      public $template = 'layout';
      public function action_index() {

         // Create the view object
         $view = View::forge('book/index');

         // fetch the book from database and set it to the view
         $books = Model_Book::find('all');
         $view->set('books', $books);

         // set the template variables
         $this->template->title = "Book index page";
         $this->template->content = $view;
      }
   }
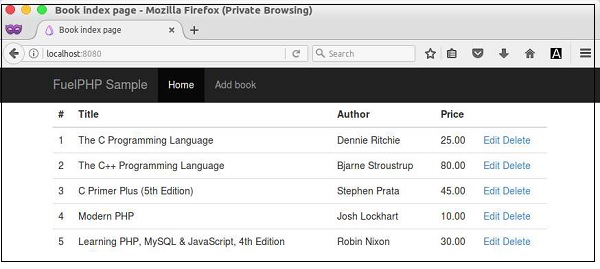
Here, we have used the orm to fetch the book details from the database and then passed the book details to views.
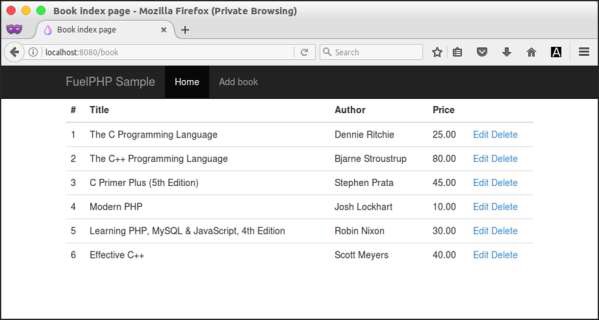
step 11: Update index view
Update the view file index.php located at fuel/app/views/book. The complete updated code is as follows,
fuel/app/views/book/index.php
<table class = "table">
   <thead>
      <tr>
         <th>#</th>
         <th>Title</th>
         <th>Author</th>
         <th>Price</th>
         <th></th>
      </tr>
   </thead>

   <tbody>
      <?php
         foreach($books as $book) {
      ?>

      <tr>
         <td><?php echo $book['id']; ?></td>
         <td><?php echo $book['title']; ?></td>
         <td><?php echo $book['author']; ?></td>
         <td><?php echo $book['price']; ?></td>
         <td>
            <a href = "/book/edit/<?php echo $book['id']; ?>">Edit</a>
            <a href = "/book/delete/<?php echo $book['id']; ?>">Delete</a>
         </td>
      </tr>

      <?php
      }
      ?>
   </tbody>
</table>
<ul>
</ul>
Now, requesting the URL, http://localhost:8080/ will show the page as follows −
step 12: Create action to add book
Create the functionality to add a new book into the bookstore. Create a new action, action_add in the book controller as follows,
public function action_add() {

   // create a new fieldset and add book model
   $fieldset = Fieldset::forge('book')->add_model('Model_Book');

   // get form from fieldset
   $form = $fieldset->form();

   // add submit button to the form
   $form->add('Submit', '', array('type' => 'submit', 'value' => 'Submit'));

   // build the form  and set the current page as action
   $formHtml = $fieldset->build(Uri::create('book/add'));
   $view = View::forge('book/add');
   $view->set('form', $formHtml, false);

   if (Input::param() != array()) {
      try {
         $book = Model_Book::forge();
         $book->title = Input::param('title');
         $book->author = Input::param('author');
         $book->price = Input::param('price');
         $book->save();
         Response::redirect('book');
      } catch (Orm\ValidationFailed $e) {
         $view->set('errors', $e->getMessage(), false);
      }
   }
   $this->template->title = "Book add page";
   $this->template->content = $view; }
Here the following two processes are being performed,
Building the book form to add book using Fieldset methods and Book model.
Processing the book form, when the user enters the book information and submitted back the form. It can be found by checking the Input::param() method for any submitted data. Processing the form involves the following steps −
Gather the book information.
Validate the book information. We have already set the validation to be called before save method. If the validation fails, it will throw Orm\ValidationFailed exception.
Store the book information into the database.
Redirect the user to index page on success. Otherwise, show the form again.
We are doing both, showing the form as well as processing the form in the same action. When the user calls the action for the first time, it will show the form. When the user enters the book information and submits the data, then it will process the form.
step 13: Create the view for add book action
Create the view for add book action. Create a new file, fuel/app/views/book/add.php and enter the following code,
<style>
   #form table {
      width: 90%;
   }
   #form table tr {
      width: 90%
   }
   #form table tr td {
      width: 50%
   }
   #form input[type = text], select {
      width: 100%;
      padding: 12px 20px;
      margin: 8px 0;
      display: inline-block;
      border: 1px solid #ccc;
      border-radius: 4px;
      box-sizing: border-box;
   }
   #form input[type = submit] {
      width: 100%;
      background-color: #3c3c3c;
      color: white;
      padding: 14px 20px;
      margin: 8px 0;
      border: none;
      border-radius: 4px;
      cursor: pointer;
   }
   #form div {
      border-radius: 5px;
      background-color: #f2f2f2;
      padding: 20px;
   }
</style>

<div id = "form">
   <h2>Book form</h2>

   <?php
      if(isset($errors)) {
         echo $errors;
      }
      echo $form;
   ?>
</div>
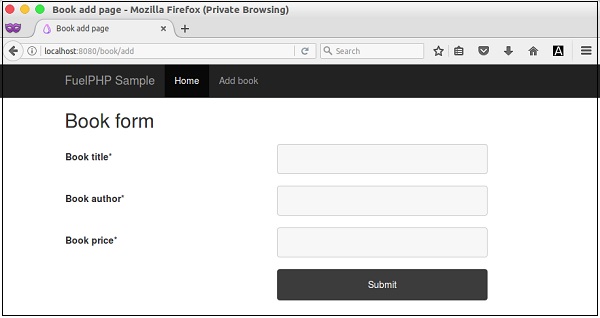
Here, we are just showing the form created in the action method. In addition, we are showing the errors, if any.
step 14: Checking the add book action
Requesting the url, http://localhost:8080/book/add or clicking the Add book navigation link, will show the form as follows,
Form
Form with data
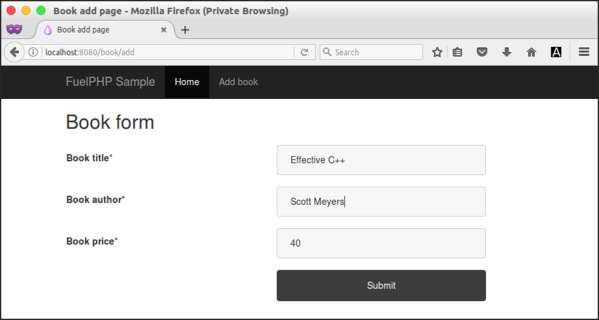
After entering the book information and submitting the page, the book information will be stored into the database and the page gets redirected to index page as follows.
Book list with newly added book
step 15: Creating action to edit book
Create the functionality to edit and update the existing book information. Create a new action, action_edit in the book controller as follows.
public function action_edit($id = false) {
   if(!($book = Model_Book::find($id))) {
      throw new HttpNotFoundException();
   }

   // create a new fieldset and add book model
   $fieldset = Fieldset::forge('book')->add_model('Model_Book');
   $fieldset->populate($book);

   // get form from fieldset
   $form = $fieldset->form();

   // add submit button to the form
   $form->add('Submit', '', array('type' => 'submit', 'value' => 'Submit'));

   // build the form  and set the current page as action
   $formHtml = $fieldset->build(Uri::create('book/edit/' . $id));
   $view = View::forge('book/add');
   $view->set('form', $formHtml, false);

   if (Input::param() != array()) {
      try {
         $book->title = Input::param('title');
         $book->author = Input::param('author');
         $book->price = Input::param('price');
         $book->save();
         Response::redirect('book');
      } catch (Orm\ValidationFailed $e) {
         $view->set('errors', $e->getMessage(), false);
      }
   }
   $this->template->title = "Book edit page";
   $this->template->content = $view;
}
It is similar to add action, except it searches the requested book by id before processing the page. If any book information is found in the database, it will proceed and show the book information in the form. Otherwise, it will throw file not found exception and exit.
step 16: Create the view for edit action
Create the view for edit book action. Here, we are using the same view used for add action.
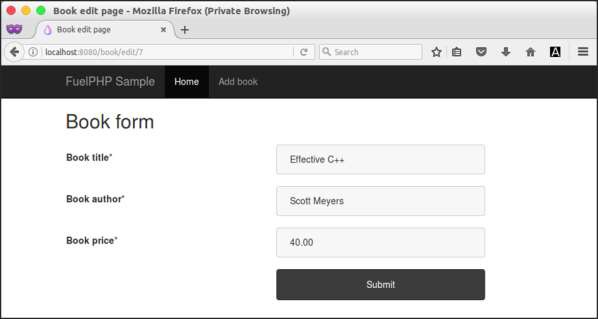
step 17: Checking the edit book action.
Click the edit link of any book in the book listing page, it will show the corresponding book form as follows −
Form with book details
step 18: Create action to delete book
Create the functionality to delete book from the bookstore. Create a new action, action_delete in the book controller as follows,
public function action_delete($id = null) {
   if ( ! ($book = Model_Book::find($id))) {
      throw new HttpNotFoundException();

   } else {
      $book->delete();
   }
   Response::redirect('book');
}
Here, we are checking for the existence of book in the database using the supplied book id. If the book is found, then it is deleted and redirected to index page. Otherwise, a page not found information will be shown.
step 19: Checking the delete action
Check the delete action by clicking the delete link in the book listing page. It will delete the requested book and then again be redirected to the index page.
Finally, all the functionalities to add, edit, delete, and list the book information is created.
FuelPHP is simple, flexible, scalable, and easily configurable compared to other MVC based PHP frameworks. It provides all the features of the modern MVC framework. It can be used as is or can be changed completely to suit our needs. Above all, it is a great choice for web development.
