
Article Categories
- All Categories
-
 Data Structure
-
 Networking
-
 RDBMS
RDBMS
-
 Operating System
-
 Java
Java
-
 MS Excel
-
 iOS
iOS
-
 HTML
HTML
-
 CSS
CSS
-
 Android
-
 Python
-
 C Programming
-
 C++
C++
-
 C#
C#
-
 MongoDB
-
 MySQL
MySQL
-
 Javascript
-
 PHP
PHP
-
 Economics & Finance
Explain JMeter installation in macOS
Apache JMeter is a popular open-source tool for performance testing and load testing of web applications. Installing JMeter on macOS is straightforward and can be accomplished by downloading the binary distribution and running it from the command line.
Prerequisites
Before installing JMeter, ensure that Java 8 or later is installed on your macOS system. You can verify your Java installation by running the following command in Terminal:
java -version
Step-by-Step Installation
Step 1 − Download JMeter
Navigate to the official Apache JMeter download page:
https://jmeter.apache.org/download_jmeter.cgi

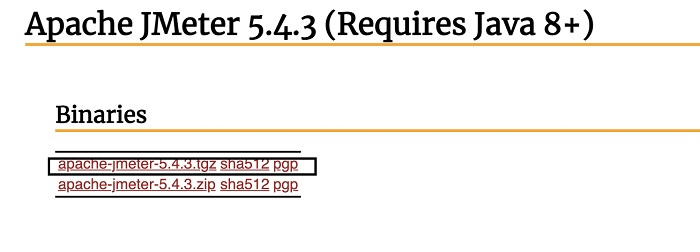
Step 2 − Select Binary Distribution
In the Apache JMeter section, locate the latest version and click on the .tgz file link under the Binaries section to download the compressed archive:
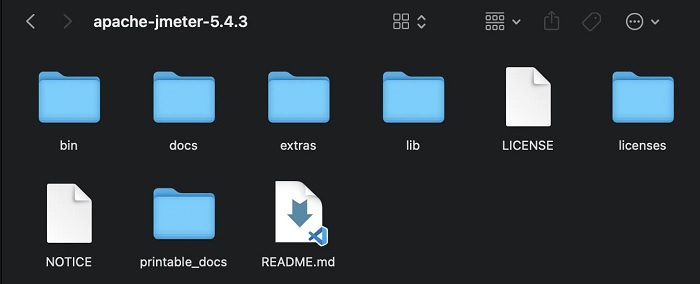
Step 3 − Extract the Archive
Once the download is complete, double-click the downloaded .tgz file to extract it. This creates a folder named apache-jmeter-<version> (e.g., apache-jmeter-5.4.3) containing the JMeter installation files:
Step 4 − Launch JMeter
Open Terminal and navigate to the bin directory within the extracted JMeter folder. Run the following command to start JMeter:
cd /path/to/apache-jmeter-5.4.3/bin
sh jmeter.sh
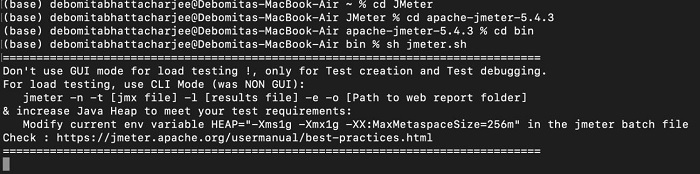
Alternatively, you can run JMeter directly without changing directories:
sh /path/to/apache-jmeter-5.4.3/bin/jmeter.sh
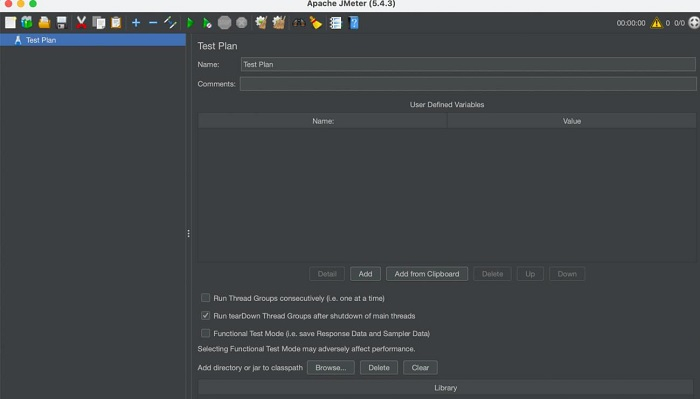
Step 5 − Verify Installation
After executing the command successfully, the JMeter GUI should launch, displaying the main interface:
Alternative Installation Methods
For easier management, you can also install JMeter using Homebrew:
brew install jmeter
After installation via Homebrew, you can start JMeter by simply running:
jmeter
Conclusion
Installing JMeter on macOS involves downloading the binary distribution, extracting it, and running the startup script from the bin directory. Once installed, JMeter provides a powerful GUI for creating and executing performance tests on web applications and services.

7K+ Views
