
- Eclipse - Home
- Eclipse - Overview
- Eclipse - Installation
- Eclipse - Explore Windows
- Eclipse - Explore Menus
- Eclipse - Explore Views
- Eclipse - Perspectives
- Eclipse - Workspaces
- Eclipse - Create Java Project
- Eclipse - Create Java Package
- Eclipse - Create Java Class
- Eclipse - Create Java Interface
- Eclipse - Create XML File
- Eclipse - Java Build Path
- Eclipse - Run Configuration
- Eclipse - Running Program
- Eclipse - Create Jar Files
- Eclipse - Close Project
- Eclipse - Reopen Project
- Eclipse - Build Project
- Eclipse - Debug Configuration
- Eclipse - Debugging Program
- Eclipse - Preferences
- Eclipse - Content Assist
- Eclipse - Quick Fix
- Eclipse - Hover Help
- Eclipse - Search Menu
- Eclipse - Navigation
- Eclipse - Refactoring
- Eclipse - Add Bookmarks
- Eclipse - Task Management
- Eclipse - Install Plugins
- Eclipse - Code Templates
- Eclipse - Shortcuts
- Eclipse - Restart Option
- Eclipse - Tips & Tricks
- Eclipse - Web Browsers
Eclipse - Useful Resources
Eclipse - Refactoring
Refactoring using Eclipse
Renaming a class that is used widely throughout a project could take a lot of time but the Eclipse refactoring wizard makes the job easier by automatically detecting all dependencies on the class being renamed and modifying them also.
The refactor menu can be opened by −
Right clicking on a Java element in the Package Explorer view and selecting Refactor menu item.
Right clicking on a Java element in the Java editor and selecting Refactor menu item.
Selecting a Java element in either the Package Explorer view or Java Editor and clicking Shift + Alt + T.
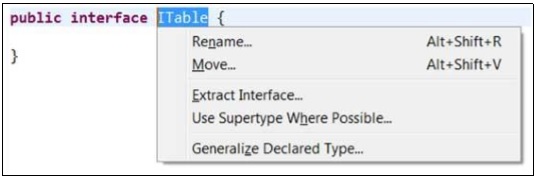
The refactor menu shows all the possible changes that are supported on the selected Java element. To rename a class, select the Rename menu item.
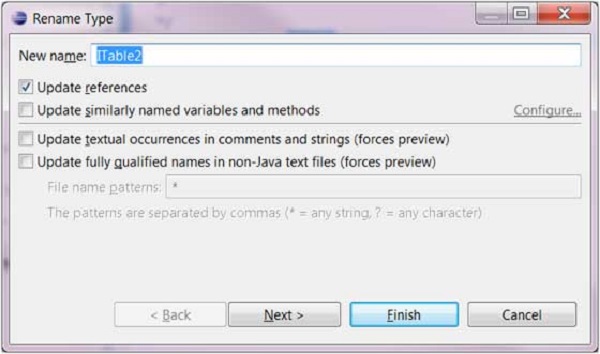
Click on the Next button to see a preview of the changes (if available). Then click on Finish to get the wizard to do its work.
