
- Eclipse - Home
- Eclipse - Overview
- Eclipse - Installation
- Eclipse - Explore Windows
- Eclipse - Explore Menus
- Eclipse - Explore Views
- Eclipse - Perspectives
- Eclipse - Workspaces
- Eclipse - Create Java Project
- Eclipse - Create Java Package
- Eclipse - Create Java Class
- Eclipse - Create Java Interface
- Eclipse - Create XML File
- Eclipse - Java Build Path
- Eclipse - Run Configuration
- Eclipse - Running Program
- Eclipse - Create Jar Files
- Eclipse - Close Project
- Eclipse - Reopen Project
- Eclipse - Build Project
- Eclipse - Debug Configuration
- Eclipse - Debugging Program
- Eclipse - Preferences
- Eclipse - Content Assist
- Eclipse - Quick Fix
- Eclipse - Hover Help
- Eclipse - Search Menu
- Eclipse - Navigation
- Eclipse - Refactoring
- Eclipse - Add Bookmarks
- Eclipse - Task Management
- Eclipse - Install Plugins
- Eclipse - Code Templates
- Eclipse - Shortcuts
- Eclipse - Restart Option
- Eclipse - Tips & Tricks
- Eclipse - Web Browsers
Eclipse - Useful Resources
Eclipse - Create Jar Files
Opening the Jar File wizard
The Jar File wizard can be used to export the content of a project into a jar file. To bring up the Jar File wizard −
In the Package Explorer select the items that you want to export. If you want to export all the classes and resources in the project just select the project.
Click on the File menu and select Export.
In the filter text box of the first page of the export wizard type in
JAR
.
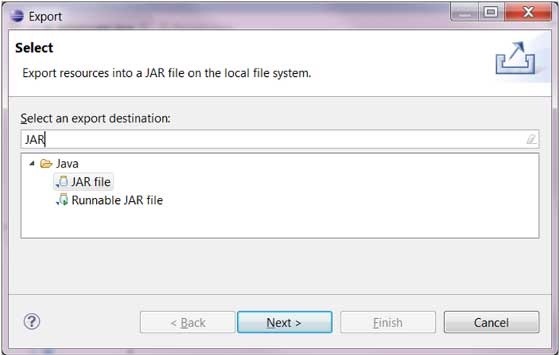
Under the Java category select JAR file.
Click on Next.
Using the Jar File wizard
In the JAR File Specification page −
Enter the JAR file name and folder.
The default is to export only the classes. To export the source code also, click on the
Export Java source files and resources
check box.
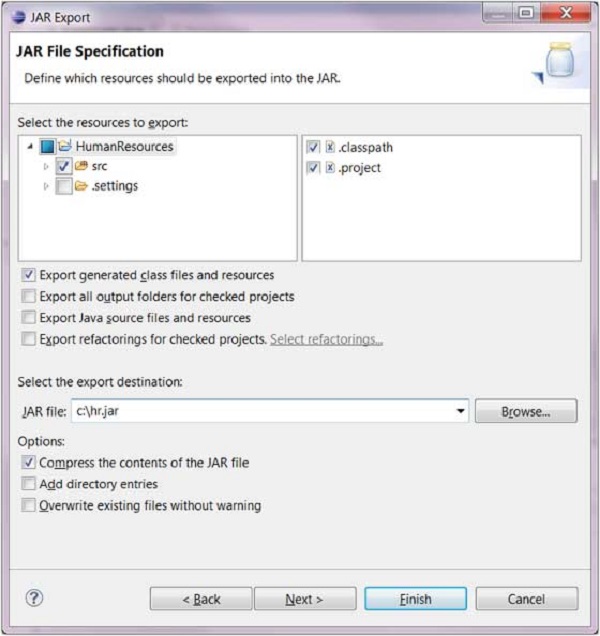
Click on Next to change the JAR packaging options.
Click on Next to change the JAR Manifest specification.
Click on Finish.
