- Docker - Home
- Docker - Overview
- Docker - Installing on Linux
- Docker - Installation
- Docker - Hub
- Docker - Images
- Docker - Containers
- Docker - Registries
- Docker - Compose
- Docker - Working With Containers
- Docker - Architecture
- Docker - Layers
- Docker - Container & Hosts
- Docker - Configuration
- Docker - Containers & Shells
- Docker - Dockerfile
- Docker - Building Files
- Docker - Public Repositories
- Docker - Managing Ports
- Docker - Web Server
- Docker - Commands
- Docker - Container Linking
- Docker - Data Storage
- Docker - Volumes
- Docker - Networking
- Docker - Security
- Docker - Toolbox
- Docker - Cloud
- Docker - Build Cloud
- Docker - Logging
- Docker - Continuous Integration
- Docker - Kubernetes Architecture
- Docker - Working of Kubernetes
- Docker - Generative AI
- Docker - Hosting
- Docker - Best Practices
- Docker - Setting Node.js
- Docker - Setting MongoDB
- Docker - Setting NGINX
- Docker - Setting ASP.Net
- Docker - Setting MySQL
- Docker - Setting Go
- Docker - Setting Rust
- Docker - Setting Apache
- Docker - Setting MariaDB
- Docker - Setting Jupyter
- Docker - Setting Portainer
- Docker - Setting Rstudio
- Docker - Setting Plex
- Docker Setting - Flame
- Docker Setting - PostgreSql
- Docker Setting - Mosquitto
- Docker Setting - Grafana
- Docker Setting - Nextcloud
- Docker Setting - Pawns
- Docker Setting - Ubuntu
- Docker Setting - RabbitMQ
- Docker - Setting Python
- Docker - Setting Java
- Docker - Setting Redis
- Docker - Setting Alpine
- Docker - Setting BusyBox
- Docker Setting - Traefik
- Docker Setting - WordPress
- Docker Useful Resources
- Docker - Quick Guide
- Docker - Useful Resources
- Docker - Discussion
Docker - Toolbox
Docker Toolbox is a legacy solution supported by Docker for older Windows and macOS systems that couldn't run Docker Desktop natively. It packs in various tools, including Docker Machine for creating Docker hosts in Virtual Machines, the Docker Engine, which is the core runtime for containers; Docker Compose to define and run multi-container apps; and Kitematic for GUI management on Docker.
Although Docker Toolbox did its job in its time, it is deprecated and no longer supported. Docker recommends Docker Desktop on more recent operating systems it supports because the experience of working with containers is much easier and more efficient.
Docker Toolbox contains the following tools −
- Docker Machine
- Docker Engine
- Docker Compose
- Kinematic
- Docker Quickstart Terminal App
- Oracle VirtualBox
How to Install Docker Toolbox in Windows?
Lets have a look at all the necessary steps required to install the Docker toolbox in Windows operating systems.
Step 1: Check System Configuration
Before diving in, make sure your system is meeting these requirements −
1. Operating System − 64-bit Windows 7 or later.
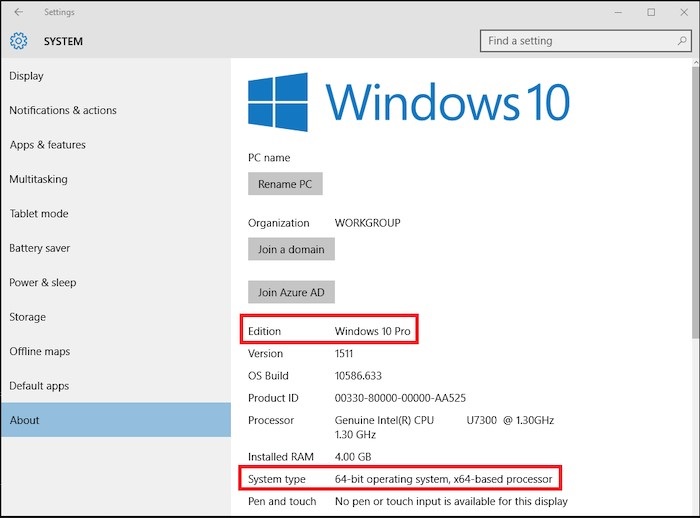
2. Hardware Virtualization − This should be enabled in your computer's BIOS.
To check if it's enabled: Open Task Manager, select the "Performance" tab, and then look for "CPU."
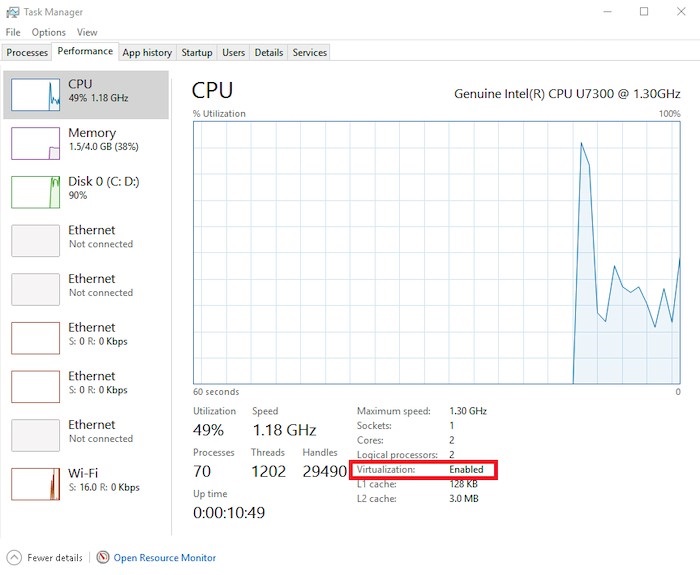
Alternatively, click on Run as Administrator from the Command Prompt Menu item and set the directory to C:\. Then, run coreinfo.exe -v.
If Virtualization is disabled, follow the instructions from your manufacturer to turn it on in BIOS.
Step 2. Install Docker Toolbox
Download − Download the latest installer from the official Docker website. Please make sure that you are installing the latest release of the Docker Toolbox. You can find the list of releases in Dockers GitHub repository.
Run Installer − Next, you can Double-click the downloaded .exe file and follow the on-screen instructions. You may accept default settings unless you have a pre-existing VirtualBox installation. If you already have a VirtualBox installed and running, please shut down it before you start the installation process.
You can follow the below steps for completing the Docker Toolbox installation −
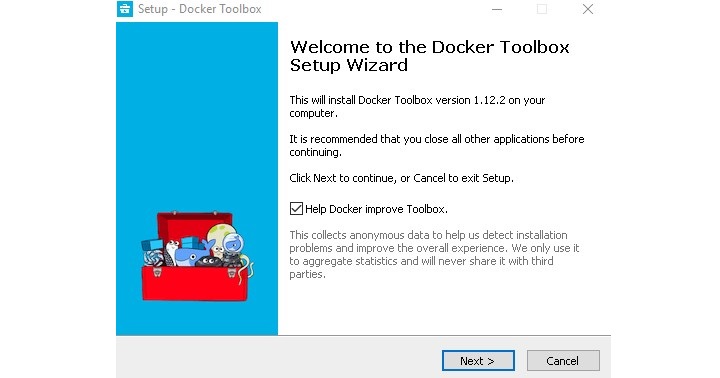
Double-click the .exe file and open the installer. Click Yes in the Windows security dialog box which will allow the program to make changes to your PC.
When the Docker Toolbox setup wizard starts, click the Next button.
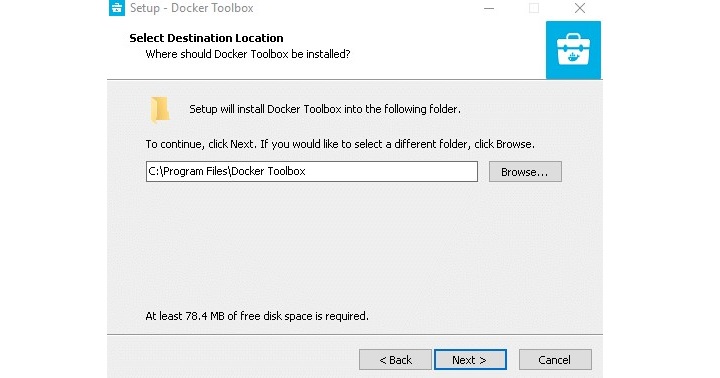
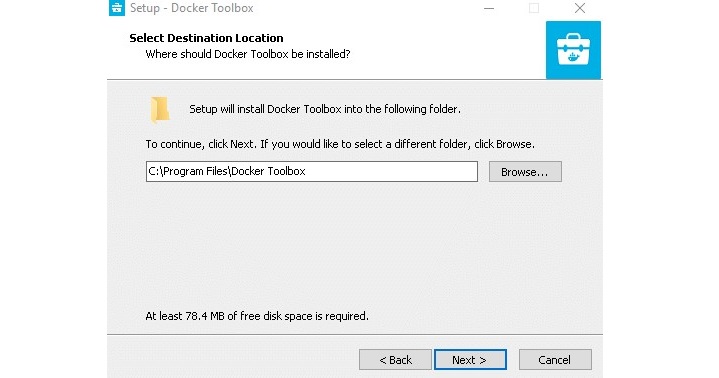
Select the local folder for Docker Toolbox installation. Click the Next button.
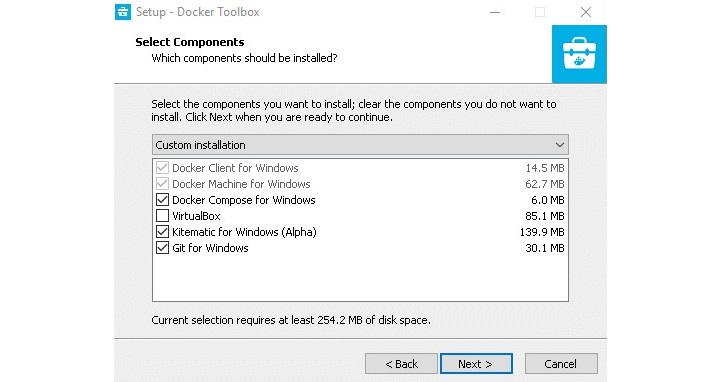
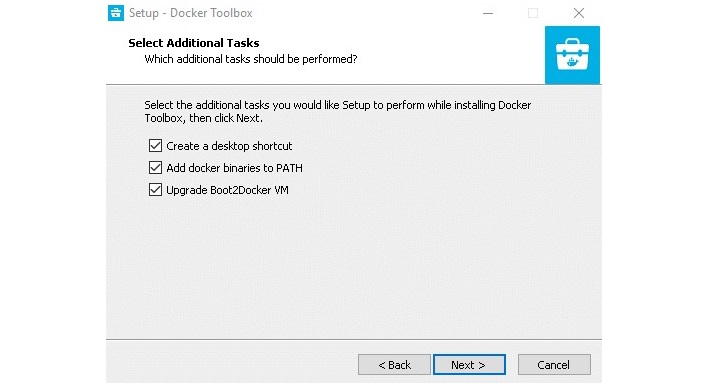
Verify the components to be installed (Git for Windows is recommended; you can uncheck VirtualBox if already installed). Click Next.
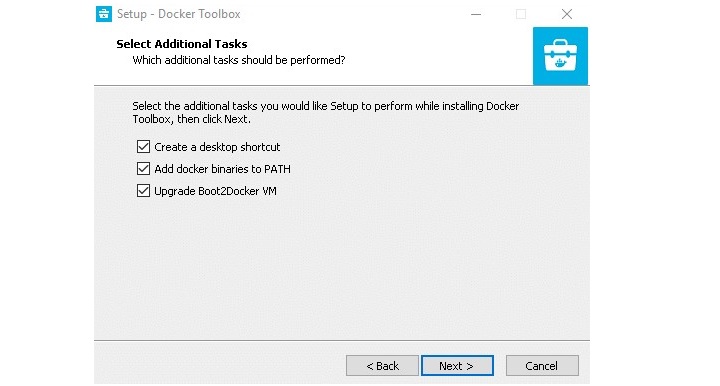
You can accept all the default options and click the Next button.
Next, you should verify that all selected components will be installed. Click Back to change any settings.
Now, you can click on the Install button to finish the installation. In case Windows asks you about permitting changes to your PC, you can click Yes to allow it to make the necessary changes.
Once all the components are installed successfully, the wizard will notify that the installation was successful. You can uncheck View Shortcuts in File Explorer and click on the Finish button.
Step 3: Verify The Installation
You can follow the below steps to verify the installation.
If you go to your desktop, it should have the icons for these 3 applications −
- Docker Quickstart Terminal
- Kitematic
- Oracle VM VirtualBox.
Next, you can launch the Docker Quickstart Terminal. This will start the creation of the Docker machine and all its components.
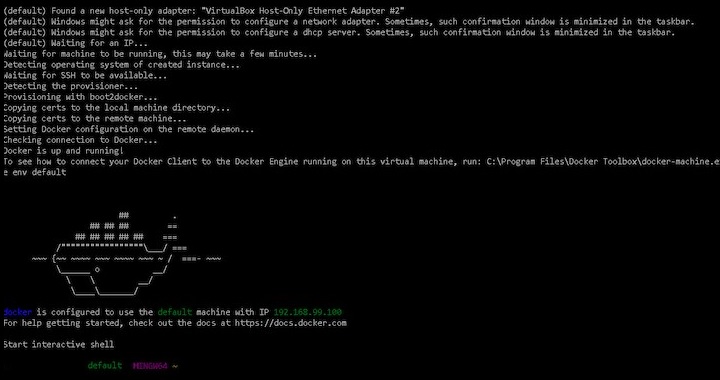
You can click near the $ symbol to activate the terminal and type the below command −
$ docker run hello-world
The above command will pull and run the Hello world container. It will also display a confirmation message in the terminal. This proves that Docker was successfully installed in your system.
Conclusion
While Docker Toolbox is no longer the latest and best way to run Docker on your Windows system, it still remains an option if you're running older hardware or have legacy compatibility requirements. Using this step-by-step guide, you will be able to successfully complete the installation process and be left with a fully functional Docker environment running in your system. Be aware, though, that if your system allows, upgrade to Docker Desktop for a more streamlined and up-to-date Docker experience.
FAQs on Docker Toolbox
1. Is Docker Toolbox still supported?
Docker Toolbox is no longer maintained or supported by Docker. It was a tool developed for older systems that can't natively run Docker Desktop. You should probably look for the Docker Desktop migration for a far better experience in case your system supports it.
2. What is the difference between Docker Toolbox and Docker Desktop?
Docker Toolbox is a more legacy set of binaries, aimed at older Windows and early macOS systems; it uses VirtualBox to run Docker in a virtual machine. Docker Desktop is a more recent application, with better integration for the latest major releases of operating systems and native UI and performance.
3. How do I update the Docker Toolbox?
Docker Toolbox does not receive updates itself anymore because it is deprecated. However, the big pieces of it, like Docker Engine or Compose, can be updated by their respective update commands within the Docker Toolbox.
4. Why am I getting errors related to VirtualBox when using Docker Toolbox?
Docker Toolbox relies a lot on VirtualBox to create and manage the virtual machine where Docker containers are executed. Most of the problems surrounding VirtualBox can either be fixed by updating VirtualBox itself or turning on hardware virtualization in the BIOS.
5. Can I use the Docker Toolbox on Windows 10 Home?
While it is possible to make Docker Toolbox work in Windows 10 Home technically, it is not officially supported. Even though it may need to enable Hyper-V or WSL 2, Docker Desktop for Windows supports a much better experience using Docker on Windows 10 Home.
