
- Android - Home
- Android - Overview
- Android - Environment Setup
- Android - Architecture
- Android - Application Components
- Android - Hello World Example
- Android - Resources
- Android - Activities
- Android - Services
- Android - Broadcast Receivers
- Android - Content Providers
- Android - Fragments
- Android - Intents/Filters
- Android - UI Layouts
- Android - UI Controls
- Android - Event Handling
- Android - Styles and Themes
- Android - Custom Components
- Android Advanced Concepts
- Android - Drag and Drop
- Android - Notifications
- Location Based Services
- Android - Sending Email
- Android - Sending SMS
- Android - Phone Calls
- Publishing Android Application
- Android Useful Examples
- Android - Alert Dialoges
- Android - Animations
- Android - Audio Capture
- Android - AudioManager
- Android - Auto Complete
- Android - Best Practices
- Android - Bluetooth
- Android - Camera
- Android - Clipboard
- Android - Custom Fonts
- Android - Data Backup
- Android - Developer Tools
- Android - Emulator
- Android - Facebook Integration
- Android - Gestures
- Android - Google Maps
- Android - Image Effects
- Android - ImageSwitcher
- Android - Internal Storage
- Android - JetPlayer
- Android - JSON Parser
- Android - Linkedin Integration
- Android - Loading Spinner
- Android - Localization
- Android - Login Screen
- Android - MediaPlayer
- Android - Multitouch
- Android - Navigation
- Android - Network Connection
- Android - NFC Guide
- Android - PHP/MySQL
- Android - Progress Circle
- Android - ProgressBar
- Android - Push Notification
- Android - RenderScript
- Android - RSS Reader
- Android - Screen Cast
- Android - SDK Manager
- Android - Sensors
- Android - Session Management
- Android - Shared Preferences
- Android - SIP Protocol
- Android - Spelling Checker
- Android - SQLite Database
- Android - Support Library
- Android - Testing
- Android - Text to Speech
- Android - TextureView
- Android - Twitter Integration
- Android - UI Design
- Android - UI Patterns
- Android - UI Testing
- Android - WebView Layout
- Android - Wi-Fi
- Android - Widgets
- Android - XML Parsers
- Android Useful Resources
- Android - Questions and Answers
- Android - Useful Resources
- Android - Discussion
Android - SQLite Database
SQLite is a opensource SQL database that stores data to a text file on a device. Android comes in with built in SQLite database implementation.
SQLite supports all the relational database features. In order to access this database, you don't need to establish any kind of connections for it like JDBC,ODBC e.t.c
Database - Package
The main package is android.database.sqlite that contains the classes to manage your own databases
Database - Creation
In order to create a database you just need to call this method openOrCreateDatabase with your database name and mode as a parameter. It returns an instance of SQLite database which you have to receive in your own object.Its syntax is given below
SQLiteDatabase mydatabase = openOrCreateDatabase("your database name",MODE_PRIVATE,null);
Apart from this , there are other functions available in the database package , that does this job. They are listed below
| Sr.No | Method & Description |
|---|---|
| 1 |
openDatabase(String path, SQLiteDatabase.CursorFactory factory, int flags, DatabaseErrorHandler errorHandler) This method only opens the existing database with the appropriate flag mode. The common flags mode could be OPEN_READWRITE OPEN_READONLY |
| 2 |
openDatabase(String path, SQLiteDatabase.CursorFactory factory, int flags) It is similar to the above method as it also opens the existing database but it does not define any handler to handle the errors of databases |
| 3 |
openOrCreateDatabase(String path, SQLiteDatabase.CursorFactory factory) It not only opens but create the database if it not exists. This method is equivalent to openDatabase method. |
| 4 |
openOrCreateDatabase(File file, SQLiteDatabase.CursorFactory factory) This method is similar to above method but it takes the File object as a path rather then a string. It is equivalent to file.getPath() |
Database - Insertion
we can create table or insert data into table using execSQL method defined in SQLiteDatabase class. Its syntax is given below
mydatabase.execSQL("CREATE TABLE IF NOT EXISTS TutorialsPoint(Username VARCHAR,Password VARCHAR);");
mydatabase.execSQL("INSERT INTO TutorialsPoint VALUES('admin','admin');");
This will insert some values into our table in our database. Another method that also does the same job but take some additional parameter is given below
| Sr.No | Method & Description |
|---|---|
| 1 |
execSQL(String sql, Object[] bindArgs) This method not only insert data , but also used to update or modify already existing data in database using bind arguments |
Database - Fetching
We can retrieve anything from database using an object of the Cursor class. We will call a method of this class called rawQuery and it will return a resultset with the cursor pointing to the table. We can move the cursor forward and retrieve the data.
Cursor resultSet = mydatbase.rawQuery("Select * from TutorialsPoint",null);
resultSet.moveToFirst();
String username = resultSet.getString(0);
String password = resultSet.getString(1);
There are other functions available in the Cursor class that allows us to effectively retrieve the data. That includes
| Sr.No | Method & Description |
|---|---|
| 1 |
getColumnCount() This method return the total number of columns of the table. |
| 2 |
getColumnIndex(String columnName) This method returns the index number of a column by specifying the name of the column |
| 3 |
getColumnName(int columnIndex) This method returns the name of the column by specifying the index of the column |
| 4 |
getColumnNames() This method returns the array of all the column names of the table. |
| 5 |
getCount() This method returns the total number of rows in the cursor |
| 6 |
getPosition() This method returns the current position of the cursor in the table |
| 7 |
isClosed() This method returns true if the cursor is closed and return false otherwise |
Database - Helper class
For managing all the operations related to the database , an helper class has been given and is called SQLiteOpenHelper. It automatically manages the creation and update of the database. Its syntax is given below
public class DBHelper extends SQLiteOpenHelper {
   public DBHelper(){
      super(context,DATABASE_NAME,null,1);
   }
   public void onCreate(SQLiteDatabase db) {}
   public void onUpgrade(SQLiteDatabase database, int oldVersion, int newVersion) {}
}
Example
Here is an example demonstrating the use of SQLite Database. It creates a basic contacts applications that allows insertion, deletion and modification of contacts.
To experiment with this example, you need to run this on an actual device on which camera is supported.
| Steps | Description |
|---|---|
| 1 | You will use Android studio to create an Android application under a package com.example.sairamkrishna.myapplication. |
| 2 | Modify src/MainActivity.java file to get references of all the XML components and populate the contacts on listView. |
| 3 | Create new src/DBHelper.java that will manage the database work |
| 4 | Create a new Activity as DisplayContact.java that will display the contact on the screen |
| 5 | Modify the res/layout/activity_main to add respective XML components |
| 6 | Modify the res/layout/activity_display_contact.xml to add respective XML components |
| 7 | Modify the res/values/string.xml to add necessary string components |
| 8 | Modify the res/menu/display_contact.xml to add necessary menu components |
| 9 | Create a new menu as res/menu/mainmenu.xml to add the insert contact option |
| 10 | Run the application and choose a running android device and install the application on it and verify the results. |
Following is the content of the modified MainActivity.java.
package com.example.sairamkrishna.myapplication;

import android.content.Context;
import android.content.Intent;
import android.support.v7.app.ActionBarActivity;
import android.os.Bundle;

import android.view.KeyEvent;
import android.view.Menu;
import android.view.MenuItem;
import android.view.View;

import android.widget.AdapterView;
import android.widget.ArrayAdapter;
import android.widget.AdapterView.OnItemClickListener;
import android.widget.ListView;

import java.util.ArrayList;
import java.util.List;

public class MainActivity extends ActionBarActivity {
   public final static String EXTRA_MESSAGE = "MESSAGE";
   private ListView obj;
   DBHelper mydb;

   @Override
   protected void onCreate(Bundle savedInstanceState) {
      super.onCreate(savedInstanceState);
      setContentView(R.layout.activity_main);

      mydb = new DBHelper(this);
      ArrayList array_list = mydb.getAllCotacts();
      ArrayAdapter arrayAdapter=new ArrayAdapter(this,android.R.layout.simple_list_item_1, array_list);

      obj = (ListView)findViewById(R.id.listView1);
      obj.setAdapter(arrayAdapter);
      obj.setOnItemClickListener(new OnItemClickListener(){
         @Override
         public void onItemClick(AdapterView<?> arg0, View arg1, int arg2,long arg3) {
            // TODO Auto-generated method stub
            int id_To_Search = arg2 + 1;

            Bundle dataBundle = new Bundle();
            dataBundle.putInt("id", id_To_Search);

            Intent intent = new Intent(getApplicationContext(),DisplayContact.class);

            intent.putExtras(dataBundle);
            startActivity(intent);
         }
      });
   }

   @Override
   public boolean onCreateOptionsMenu(Menu menu) {
      // Inflate the menu; this adds items to the action bar if it is present.
      getMenuInflater().inflate(R.menu.menu_main, menu);
      return true;
   }

   @Override
   public boolean onOptionsItemSelected(MenuItem item){
      super.onOptionsItemSelected(item);

      switch(item.getItemId()) {
         case R.id.item1:Bundle dataBundle = new Bundle();
         dataBundle.putInt("id", 0);

         Intent intent = new Intent(getApplicationContext(),DisplayContact.class);
         intent.putExtras(dataBundle);

         startActivity(intent);
         return true;
         default:
         return super.onOptionsItemSelected(item);
      }
   }

   public boolean onKeyDown(int keycode, KeyEvent event) {
      if (keycode == KeyEvent.KEYCODE_BACK) {
         moveTaskToBack(true);
      }
      return super.onKeyDown(keycode, event);
   }
}
Following is the modified content of display contact activity DisplayContact.java
package com.example.sairamkrishna.myapplication;

import android.os.Bundle;
import android.app.Activity;
import android.app.AlertDialog;

import android.content.DialogInterface;
import android.content.Intent;
import android.database.Cursor;

import android.view.Menu;
import android.view.MenuItem;
import android.view.View;

import android.widget.Button;
import android.widget.TextView;
import android.widget.Toast;

public class DisplayContact extends Activity {
   int from_Where_I_Am_Coming = 0;
   private DBHelper mydb ;

   TextView name ;
   TextView phone;
   TextView email;
   TextView street;
   TextView place;
   int id_To_Update = 0;

   @Override
   protected void onCreate(Bundle savedInstanceState) {
      super.onCreate(savedInstanceState);
      setContentView(R.layout.activity_display_contact);
      name = (TextView) findViewById(R.id.editTextName);
      phone = (TextView) findViewById(R.id.editTextPhone);
      email = (TextView) findViewById(R.id.editTextStreet);
      street = (TextView) findViewById(R.id.editTextEmail);
      place = (TextView) findViewById(R.id.editTextCity);

      mydb = new DBHelper(this);

      Bundle extras = getIntent().getExtras();
      if(extras !=null) {
         int Value = extras.getInt("id");

         if(Value>0){
            //means this is the view part not the add contact part.
            Cursor rs = mydb.getData(Value);
            id_To_Update = Value;
            rs.moveToFirst();

            String nam = rs.getString(rs.getColumnIndex(DBHelper.CONTACTS_COLUMN_NAME));
            String phon = rs.getString(rs.getColumnIndex(DBHelper.CONTACTS_COLUMN_PHONE));
            String emai = rs.getString(rs.getColumnIndex(DBHelper.CONTACTS_COLUMN_EMAIL));
            String stree = rs.getString(rs.getColumnIndex(DBHelper.CONTACTS_COLUMN_STREET));
            String plac = rs.getString(rs.getColumnIndex(DBHelper.CONTACTS_COLUMN_CITY));

            if (!rs.isClosed())  {
               rs.close();
            }
            Button b = (Button)findViewById(R.id.button1);
            b.setVisibility(View.INVISIBLE);

            name.setText((CharSequence)nam);
            name.setFocusable(false);
            name.setClickable(false);

            phone.setText((CharSequence)phon);
            phone.setFocusable(false);
            phone.setClickable(false);

            email.setText((CharSequence)emai);
            email.setFocusable(false);
            email.setClickable(false);

            street.setText((CharSequence)stree);
            street.setFocusable(false);
            street.setClickable(false);

            place.setText((CharSequence)plac);
            place.setFocusable(false);
            place.setClickable(false);
         }
      }
   }

   @Override
   public boolean onCreateOptionsMenu(Menu menu) {
      // Inflate the menu; this adds items to the action bar if it is present.
      Bundle extras = getIntent().getExtras();

      if(extras !=null) {
         int Value = extras.getInt("id");
         if(Value>0){
            getMenuInflater().inflate(R.menu.display_contact, menu);
         } else{
            getMenuInflater().inflate(R.menu.menu_main menu);
         }
      }
      return true;
   }

   public boolean onOptionsItemSelected(MenuItem item) {
      super.onOptionsItemSelected(item);
      switch(item.getItemId()) {
         case R.id.Edit_Contact:
         Button b = (Button)findViewById(R.id.button1);
         b.setVisibility(View.VISIBLE);
         name.setEnabled(true);
         name.setFocusableInTouchMode(true);
         name.setClickable(true);

         phone.setEnabled(true);
         phone.setFocusableInTouchMode(true);
         phone.setClickable(true);

         email.setEnabled(true);
         email.setFocusableInTouchMode(true);
         email.setClickable(true);

         street.setEnabled(true);
         street.setFocusableInTouchMode(true);
         street.setClickable(true);

         place.setEnabled(true);
         place.setFocusableInTouchMode(true);
         place.setClickable(true);

         return true;
         case R.id.Delete_Contact:

         AlertDialog.Builder builder = new AlertDialog.Builder(this);
         builder.setMessage(R.string.deleteContact)
            .setPositiveButton(R.string.yes, new DialogInterface.OnClickListener() {
               public void onClick(DialogInterface dialog, int id) {
                  mydb.deleteContact(id_To_Update);
                  Toast.makeText(getApplicationContext(), "Deleted Successfully",
                     Toast.LENGTH_SHORT).show();
                  Intent intent = new Intent(getApplicationContext(),MainActivity.class);
                  startActivity(intent);
               }
         })
         .setNegativeButton(R.string.no, new DialogInterface.OnClickListener() {
            public void onClick(DialogInterface dialog, int id) {
               // User cancelled the dialog
            }
         });

         AlertDialog d = builder.create();
         d.setTitle("Are you sure");
         d.show();

         return true;
         default:
         return super.onOptionsItemSelected(item);

      }
   }

   public void run(View view) {
      Bundle extras = getIntent().getExtras();
      if(extras !=null) {
         int Value = extras.getInt("id");
         if(Value>0){
            if(mydb.updateContact(id_To_Update,name.getText().toString(),
               phone.getText().toString(), email.getText().toString(),
				   street.getText().toString(), place.getText().toString())){
               Toast.makeText(getApplicationContext(), "Updated", Toast.LENGTH_SHORT).show();
               Intent intent = new Intent(getApplicationContext(),MainActivity.class);
               startActivity(intent);
            } else{
               Toast.makeText(getApplicationContext(), "not Updated", Toast.LENGTH_SHORT).show();
            }
         } else{
            if(mydb.insertContact(name.getText().toString(), phone.getText().toString(),
				   email.getText().toString(), street.getText().toString(),
				   place.getText().toString())){
                  Toast.makeText(getApplicationContext(), "done",
						   Toast.LENGTH_SHORT).show();
            } else{
               Toast.makeText(getApplicationContext(), "not done",
					   Toast.LENGTH_SHORT).show();
            }
            Intent intent = new Intent(getApplicationContext(),MainActivity.class);
            startActivity(intent);
         }
      }
   }
}
Following is the content of Database class DBHelper.java
package com.example.sairamkrishna.myapplication;

import java.util.ArrayList;
import java.util.HashMap;
import java.util.Hashtable;
import android.content.ContentValues;
import android.content.Context;
import android.database.Cursor;
import android.database.DatabaseUtils;
import android.database.sqlite.SQLiteOpenHelper;
import android.database.sqlite.SQLiteDatabase;

public class DBHelper extends SQLiteOpenHelper {

   public static final String DATABASE_NAME = "MyDBName.db";
   public static final String CONTACTS_TABLE_NAME = "contacts";
   public static final String CONTACTS_COLUMN_ID = "id";
   public static final String CONTACTS_COLUMN_NAME = "name";
   public static final String CONTACTS_COLUMN_EMAIL = "email";
   public static final String CONTACTS_COLUMN_STREET = "street";
   public static final String CONTACTS_COLUMN_CITY = "place";
   public static final String CONTACTS_COLUMN_PHONE = "phone";
   private HashMap hp;

   public DBHelper(Context context) {
      super(context, DATABASE_NAME , null, 1);
   }

   @Override
   public void onCreate(SQLiteDatabase db) {
      // TODO Auto-generated method stub
      db.execSQL(
         "create table contacts " +
         "(id integer primary key, name text,phone text,email text, street text,place text)"
      );
   }

   @Override
   public void onUpgrade(SQLiteDatabase db, int oldVersion, int newVersion) {
      // TODO Auto-generated method stub
      db.execSQL("DROP TABLE IF EXISTS contacts");
      onCreate(db);
   }

   public boolean insertContact (String name, String phone, String email, String street,String place) {
      SQLiteDatabase db = this.getWritableDatabase();
      ContentValues contentValues = new ContentValues();
      contentValues.put("name", name);
      contentValues.put("phone", phone);
      contentValues.put("email", email);
      contentValues.put("street", street);
      contentValues.put("place", place);
      db.insert("contacts", null, contentValues);
      return true;
   }

   public Cursor getData(int id) {
      SQLiteDatabase db = this.getReadableDatabase();
      Cursor res =  db.rawQuery( "select * from contacts where id="+id+"", null );
      return res;
   }

   public int numberOfRows(){
      SQLiteDatabase db = this.getReadableDatabase();
      int numRows = (int) DatabaseUtils.queryNumEntries(db, CONTACTS_TABLE_NAME);
      return numRows;
   }

   public boolean updateContact (Integer id, String name, String phone, String email, String street,String place) {
      SQLiteDatabase db = this.getWritableDatabase();
      ContentValues contentValues = new ContentValues();
      contentValues.put("name", name);
      contentValues.put("phone", phone);
      contentValues.put("email", email);
      contentValues.put("street", street);
      contentValues.put("place", place);
      db.update("contacts", contentValues, "id = ? ", new String[] { Integer.toString(id) } );
      return true;
   }

   public Integer deleteContact (Integer id) {
      SQLiteDatabase db = this.getWritableDatabase();
      return db.delete("contacts",
      "id = ? ",
      new String[] { Integer.toString(id) });
   }

   public ArrayList<String> getAllCotacts() {
      ArrayList<String> array_list = new ArrayList<String>();

      //hp = new HashMap();
      SQLiteDatabase db = this.getReadableDatabase();
      Cursor res =  db.rawQuery( "select * from contacts", null );
      res.moveToFirst();

      while(res.isAfterLast() == false){
         array_list.add(res.getString(res.getColumnIndex(CONTACTS_COLUMN_NAME)));
         res.moveToNext();
      }
      return array_list;
   }
}
Following is the content of the res/layout/activity_main.xml
<?xml version="1.0" encoding="utf-8"?>
<RelativeLayout xmlns:android="http://schemas.android.com/apk/res/android"
   xmlns:tools="http://schemas.android.com/tools" android:layout_width="match_parent"
   android:layout_height="match_parent"
   android:paddingLeft="@dimen/activity_horizontal_margin"
   android:paddingRight="@dimen/activity_horizontal_margin"
   android:paddingTop="@dimen/activity_vertical_margin"
   android:paddingBottom="@dimen/activity_vertical_margin" tools:context=".MainActivity">

   <TextView
      android:layout_width="wrap_content"
      android:layout_height="wrap_content"
      android:id="@+id/textView"
      android:layout_alignParentTop="true"
      android:layout_centerHorizontal="true"
      android:textSize="30dp"
      android:text="Data Base" />

   <TextView
      android:layout_width="wrap_content"
      android:layout_height="wrap_content"
      android:text="Tutorials Point"
      android:id="@+id/textView2"
      android:layout_below="@+id/textView"
      android:layout_centerHorizontal="true"
      android:textSize="35dp"
      android:textColor="#ff16ff01" />

   <ImageView
      android:layout_width="wrap_content"
      android:layout_height="wrap_content"
      android:id="@+id/imageView"
      android:layout_below="@+id/textView2"
      android:layout_centerHorizontal="true"
      android:src="@drawable/logo"/>

   <ScrollView
      android:layout_width="wrap_content"
      android:layout_height="wrap_content"
      android:id="@+id/scrollView"
      android:layout_below="@+id/imageView"
      android:layout_alignParentLeft="true"
      android:layout_alignParentStart="true"
      android:layout_alignParentBottom="true"
      android:layout_alignParentRight="true"
      android:layout_alignParentEnd="true">

      <ListView
         android:id="@+id/listView1"
         android:layout_width="match_parent"
         android:layout_height="wrap_content"
         android:layout_centerHorizontal="true"
         android:layout_centerVertical="true" >
      </ListView>

   </ScrollView>

</RelativeLayout>
Following is the content of the res/layout/activity_display_contact.xml
<?xml version="1.0" encoding="utf-8"?>
<ScrollView xmlns:android="http://schemas.android.com/apk/res/android"
   xmlns:tools="http://schemas.android.com/tools"
   android:id="@+id/scrollView1"
   android:layout_width="match_parent"
   android:layout_height="wrap_content"
   tools:context=".DisplayContact" >

   <RelativeLayout
      android:layout_width="match_parent"
      android:layout_height="370dp"
      android:paddingBottom="@dimen/activity_vertical_margin"
      android:paddingLeft="@dimen/activity_horizontal_margin"
      android:paddingRight="@dimen/activity_horizontal_margin"
      android:paddingTop="@dimen/activity_vertical_margin">

      <EditText
         android:id="@+id/editTextName"
         android:layout_width="wrap_content"
         android:layout_height="wrap_content"
         android:layout_alignParentLeft="true"
         android:layout_marginTop="5dp"
         android:layout_marginLeft="82dp"
         android:ems="10"
         android:inputType="text" >
      </EditText>

      <EditText
         android:id="@+id/editTextEmail"
         android:layout_width="wrap_content"
         android:layout_height="wrap_content"
         android:layout_alignLeft="@+id/editTextStreet"
         android:layout_below="@+id/editTextStreet"
         android:layout_marginTop="22dp"
         android:ems="10"
         android:inputType="textEmailAddress" />

      <TextView
         android:id="@+id/textView1"
         android:layout_width="wrap_content"
         android:layout_height="wrap_content"
         android:layout_alignBottom="@+id/editTextName"
         android:layout_alignParentLeft="true"
         android:text="@string/name"
         android:textAppearance="?android:attr/textAppearanceMedium" />

      <Button
         android:id="@+id/button1"
         android:layout_width="wrap_content"
         android:layout_height="wrap_content"
         android:layout_alignLeft="@+id/editTextCity"
         android:layout_alignParentBottom="true"
         android:layout_marginBottom="28dp"
         android:onClick="run"
         android:text="@string/save" />

      <TextView
         android:id="@+id/textView2"
         android:layout_width="wrap_content"
         android:layout_height="wrap_content"
         android:layout_alignBottom="@+id/editTextEmail"
         android:layout_alignLeft="@+id/textView1"
         android:text="@string/email"
         android:textAppearance="?android:attr/textAppearanceMedium" />

      <TextView
         android:id="@+id/textView5"
         android:layout_width="wrap_content"
         android:layout_height="wrap_content"
         android:layout_alignBottom="@+id/editTextPhone"
         android:layout_alignLeft="@+id/textView1"
         android:text="@string/phone"
         android:textAppearance="?android:attr/textAppearanceMedium" />

      <TextView
         android:id="@+id/textView4"
         android:layout_width="wrap_content"
         android:layout_height="wrap_content"
         android:layout_above="@+id/editTextEmail"
         android:layout_alignLeft="@+id/textView5"
         android:text="@string/street"
         android:textAppearance="?android:attr/textAppearanceMedium" />

      <EditText
         android:id="@+id/editTextCity"
         android:layout_width="wrap_content"
         android:layout_height="wrap_content"
         android:layout_alignRight="@+id/editTextName"
         android:layout_below="@+id/editTextEmail"
         android:layout_marginTop="30dp"
         android:ems="10"
         android:inputType="text" />

      <TextView
         android:id="@+id/textView3"
         android:layout_width="wrap_content"
         android:layout_height="wrap_content"
         android:layout_alignBaseline="@+id/editTextCity"
         android:layout_alignBottom="@+id/editTextCity"
         android:layout_alignParentLeft="true"
         android:layout_toLeftOf="@+id/editTextEmail"
         android:text="@string/country"
         android:textAppearance="?android:attr/textAppearanceMedium" />

      <EditText
         android:id="@+id/editTextStreet"
         android:layout_width="wrap_content"
         android:layout_height="wrap_content"
         android:layout_alignLeft="@+id/editTextName"
         android:layout_below="@+id/editTextPhone"
         android:ems="10"
         android:inputType="text" >

         <requestFocus />
      </EditText>

      <EditText
         android:id="@+id/editTextPhone"
         android:layout_width="wrap_content"
         android:layout_height="wrap_content"
         android:layout_alignLeft="@+id/editTextStreet"
         android:layout_below="@+id/editTextName"
         android:ems="10"
         android:inputType="phone|text" />

   </RelativeLayout>
</ScrollView>
Following is the content of the res/value/string.xml
<?xml version="1.0" encoding="utf-8"?>
<resources>
   <string name="app_name">Address Book</string>
   <string name="action_settings">Settings</string>
   <string name="hello_world">Hello world!</string>
   <string name="Add_New">Add New</string>
   <string name="edit">Edit Contact</string>
   <string name="delete">Delete Contact</string>
   <string name="title_activity_display_contact">DisplayContact</string>
   <string name="name">Name</string>
   <string name="phone">Phone</string>
   <string name="email">Email</string>
   <string name="street">Street</string>
   <string name="country">City/State/Zip</string>
   <string name="save">Save Contact</string>
   <string name="deleteContact">Are you sure, you want to delete it.</string>
   <string name="yes">Yes</string>
   <string name="no">No</string>
</resources>
Following is the content of the res/menu/main_menu.xml
<?xml version="1.0" encoding="utf-8"?>
<menu xmlns:android="http://schemas.android.com/apk/res/android" >

   <item android:id="@+id/item1"
      android:icon="@drawable/add"
      android:title="@string/Add_New" >
   </item>

</menu>
Following is the content of the res/menu/display_contact.xml
<?xml version="1.0" encoding="utf-8"?>
<menu xmlns:android="http://schemas.android.com/apk/res/android" >
   <item
      android:id="@+id/Edit_Contact"
      android:orderInCategory="100"
      android:title="@string/edit"/>

   <item
      android:id="@+id/Delete_Contact"
      android:orderInCategory="100"
      android:title="@string/delete"/>

</menu>
This is the defualt AndroidManifest.xml of this project
<?xml version="1.0" encoding="utf-8"?>
<manifest xmlns:android="http://schemas.android.com/apk/res/android"
   package="com.example.sairamkrishna.myapplication" >

   <application
      android:allowBackup="true"
      android:icon="@mipmap/ic_launcher"
      android:label="@string/app_name"
      android:theme="@style/AppTheme" >

      <activity
         android:name=".MainActivity"
         android:label="@string/app_name" >

         <intent-filter>
            <action android:name="android.intent.action.MAIN" />
            <category android:name="android.intent.category.LAUNCHER" />
         </intent-filter>

      </activity>

      <activity android:name=".DisplayContact"/>

   </application>
</manifest>
Let's try to run your application. I assume you have connected your actual Android Mobile device with your computer. To run the app from Android studio , open one of your project's activity files and click Run  icon from the tool bar. Before starting your application,Android studio will display following window to select an option where you want to run your Android application.

Select your mobile device as an option and then check your mobile device which will display following screen −
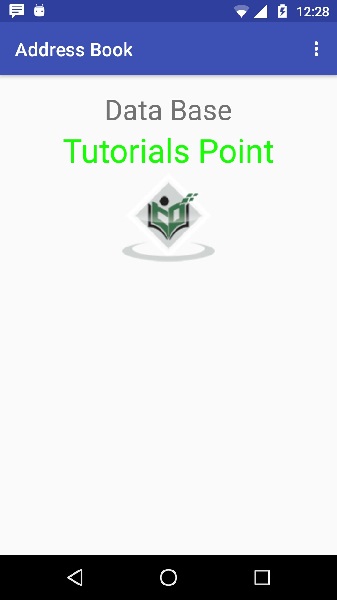
Now open your optional menu, it will show as below image: Optional menu appears different places on different versions
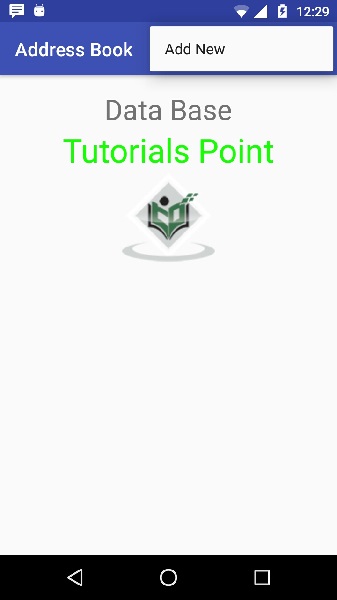
Click on the add button of the menu screen to add a new contact. It will display the following screen −
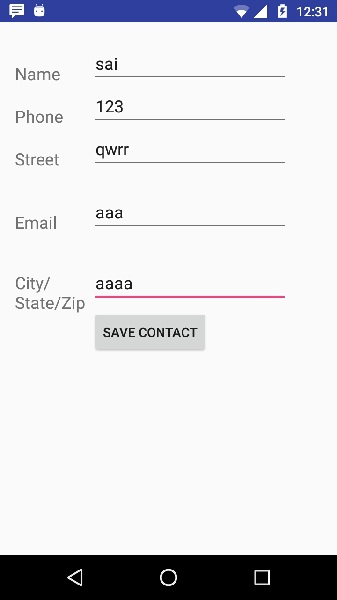
It will display the following fields. Please enter the required information and click on save contact. It will bring you back to main screen.
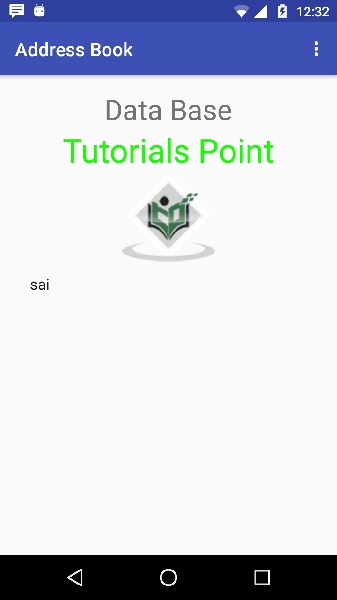
Now our contact sai has been added.In order to see that where is your database is created. Open your android studio, connect your mobile. Go tools/android/android device monitor. Now browse the file explorer tab. Now browse this folder /data/data/<your.package.name>/databases<database-name>.
