- Android - Home
- Android - Overview
- Android - Environment Setup
- Android - Architecture
- Android - Application Components
- Android - Hello World Example
- Android - Resources
- Android - Activities
- Android - Services
- Android - Broadcast Receivers
- Android - Content Providers
- Android - Fragments
- Android - Intents/Filters
- Android - UI Layouts
- Android - UI Controls
- Android - Event Handling
- Android - Styles and Themes
- Android - Custom Components
- Android Advanced Concepts
- Android - Drag and Drop
- Android - Notifications
- Location Based Services
- Android - Sending Email
- Android - Sending SMS
- Android - Phone Calls
- Publishing Android Application
- Android Useful Examples
- Android - Alert Dialoges
- Android - Animations
- Android - Audio Capture
- Android - AudioManager
- Android - Auto Complete
- Android - Best Practices
- Android - Bluetooth
- Android - Camera
- Android - Clipboard
- Android - Custom Fonts
- Android - Data Backup
- Android - Developer Tools
- Android - Emulator
- Android - Facebook Integration
- Android - Gestures
- Android - Google Maps
- Android - Image Effects
- Android - ImageSwitcher
- Android - Internal Storage
- Android - JetPlayer
- Android - JSON Parser
- Android - Linkedin Integration
- Android - Loading Spinner
- Android - Localization
- Android - Login Screen
- Android - MediaPlayer
- Android - Multitouch
- Android - Navigation
- Android - Network Connection
- Android - NFC Guide
- Android - PHP/MySQL
- Android - Progress Circle
- Android - ProgressBar
- Android - Push Notification
- Android - RenderScript
- Android - RSS Reader
- Android - Screen Cast
- Android - SDK Manager
- Android - Sensors
- Android - Session Management
- Android - Shared Preferences
- Android - SIP Protocol
- Android - Spelling Checker
- Android - SQLite Database
- Android - Support Library
- Android - Testing
- Android - Text to Speech
- Android - TextureView
- Android - Twitter Integration
- Android - UI Design
- Android - UI Patterns
- Android - UI Testing
- Android - WebView Layout
- Android - Wi-Fi
- Android - Widgets
- Android - XML Parsers
- Android Useful Resources
- Android - Questions and Answers
- Android - Useful Resources
- Android - Discussion
Android - Progress Circle
The easiest way to make a progress circle is using through a class called ProgressDialog. The loading bar can also be made through that class. The only logical difference between bar and circle is , that the former is used when you know the total time for waiting for a particular task whereas the later is used when you don't know the waiting time.
In order to this , you need to instantiate an object of this class. Its syntax is.
ProgressDialog progress = new ProgressDialog(this);
Now you can set some properties of this dialog. Such as, its style,its text e.t.c
progress.setMessage("Downloading Music :) ");
progress.setProgressStyle(ProgressDialog.STYLE_SPINNER);
progress.setIndeterminate(true);
Apart from these methods, there are other methods that are provided by the ProgressDialog class.
| Sr.No | Classes & Description |
|---|---|
| 1 |
getMax() This methods returns the maximum value of the progress |
| 2 |
incrementProgressBy(int diff) This method increment the progress bar by the difference of value passed as a parameter |
| 3 |
setIndeterminate(boolean indeterminate) This method set the progress indicator as determinate or indeterminate |
| 4 |
setMax(int max) This method set the maximum value of the progress dialog |
| 5 |
setProgress(int value) This method is used to update the progress dialog with some specific value |
| 6 |
show(Context context, CharSequence title, CharSequence message) This is a static method, used to display progress dialog |
Example
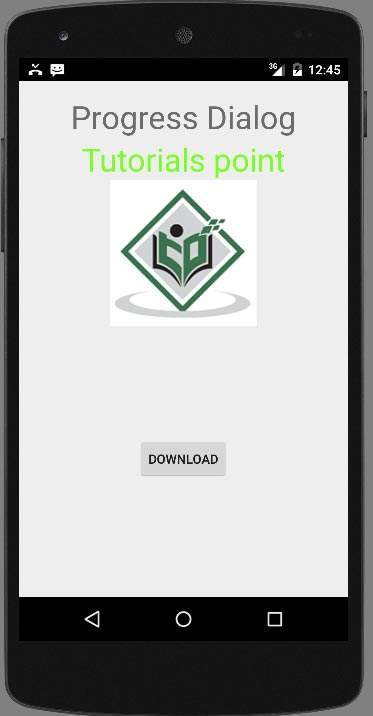
This example demonstrates the spinning use of the progress dialog. It display a spinning progress dialog on pressing the button.
To experiment with this example, you need to run this on an actual device on after developing the application according to the steps below.
| Steps | Description |
|---|---|
| 1 | You will use Android Studio to create an Android application under a package com.example.sairamkrishna.myapplication. |
| 2 | Modify src/MainActivity.java file to add progress code to display the spinning progress dialog. |
| 3 | Modify res/layout/activity_main.xml file to add respective XML code. |
| 4 | Run the application and choose a running android device and install the application on it and verify the results. |
Following is the content of the modified main activity file src/MainActivity.java.
package com.example.sairamkrishna.myapplication;

import android.app.ProgressDialog;
import android.app.Activity;
import android.os.Bundle;
import android.os.Handler;
import android.view.View;
import android.widget.Button;

public class MainActivity extends Activity {
   Button b1;
   private  ProgressDialog progressBar;
   private int progressBarStatus = 0;
   private Handler progressBarbHandler = new Handler();
   private long fileSize = 0;

   @Override
   protected void onCreate(Bundle savedInstanceState) {
      super.onCreate(savedInstanceState);
      setContentView(R.layout.activity_main);
      b1=(Button)findViewById(R.id.button);

      b1.setOnClickListener(new View.OnClickListener() {
         @Override
         public void onClick(View v) {
            progressBar = new ProgressDialog(v.getContext());
            progressBar.setCancelable(true);
            progressBar.setMessage("File downloading ...");
            progressBar.setProgressStyle(ProgressDialog.STYLE_SPINNER);
            progressBar.setProgress(0);
            progressBar.setMax(100);
            progressBar.show();
            progressBarStatus = 0;

            fileSize = 0;
            new Thread(new Runnable() {
               public void run() {
                  while (progressBarStatus < 100) {
                     progressBarStatus = downloadFile();

                     try {
                        Thread.sleep(1000);
                     } catch (InterruptedException e) {
                        e.printStackTrace();
                     }

                     progressBarbHandler.post(new Runnable() {
                        public void run() {
                           progressBar.setProgress(progressBarStatus);
                        }
                     });
                  }

                  if (progressBarStatus >= 100) {
                     try {
                        Thread.sleep(2000);
                     } catch (InterruptedException e) {
                        e.printStackTrace();
                     }
                     progressBar.dismiss();
                  }
               }
            }).start();
         }
      });
   }

   public int downloadFile() {
      while (fileSize <= 1000000) {
         fileSize++;

         if (fileSize == 100000) {
            return 10;
         }else if (fileSize == 200000) {
            return 20;
         }else if (fileSize == 300000) {
            return 30;
         }else if (fileSize == 400000) {
            return 40;
         }else if (fileSize == 500000) {
            return 50;
         }else if (fileSize == 700000) {
            return 70;
         }else if (fileSize == 800000) {
            return 80;
         }
      }
      return 100;
   }
}
Modify the content of res/layout/activity_main.xml to the following
In the following code abc indicates the logo of tutorialspoint.com
<?xml version="1.0" encoding="utf-8"?>
<RelativeLayout xmlns:android="http://schemas.android.com/apk/res/android"
   xmlns:tools="http://schemas.android.com/tools" android:layout_width="match_parent"
   android:layout_height="match_parent" android:paddingLeft="@dimen/activity_horizontal_margin"
   android:paddingRight="@dimen/activity_horizontal_margin"
   android:paddingTop="@dimen/activity_vertical_margin"
   android:paddingBottom="@dimen/activity_vertical_margin" tools:context=".MainActivity">

   <TextView android:text="Music Palyer" android:layout_width="wrap_content"
      android:layout_height="wrap_content"
      android:id="@+id/textview"
      android:textSize="35dp"
      android:layout_alignParentTop="true"
      android:layout_centerHorizontal="true" />

   <TextView
      android:layout_width="wrap_content"
      android:layout_height="wrap_content"
      android:text="Tutorials point"
      android:id="@+id/textView"
      android:layout_below="@+id/textview"
      android:layout_centerHorizontal="true"
      android:textColor="#ff7aff24"
      android:textSize="35dp" />

   <Button
      android:layout_width="wrap_content"
      android:layout_height="wrap_content"
      android:text="download"
      android:id="@+id/button"
      android:layout_alignParentBottom="true"
      android:layout_centerHorizontal="true"
      android:layout_marginBottom="112dp" />

   <ImageView
      android:layout_width="wrap_content"
      android:layout_height="wrap_content"
      android:id="@+id/imageView"
      android:src="@drawable/abc"
      android:layout_below="@+id/textView"
      android:layout_centerHorizontal="true" />

</RelativeLayout>
Modify the res/values/string.xml to the following
<resources>
   <string name="app_name">My Application</string>
</resources>
This is the default AndroidManifest.xml
<?xml version="1.0" encoding="utf-8"?>
<manifest xmlns:android="http://schemas.android.com/apk/res/android"
   package="com.example.sairamkrishna.myapplication" >

   <application
      android:allowBackup="true"
      android:icon="@drawable/ic_launcher"
      android:label="@string/app_name"
      android:theme="@style/AppTheme" >

      <activity
         android:name="com.example.sairamkrishna.myapplication.MainActivity"
         android:label="@string/app_name" >

         <intent-filter>
            <action android:name="android.intent.action.MAIN" />
            <category android:name="android.intent.category.LAUNCHER" />
         </intent-filter>
      </activity>

   </application>
</manifest>
Let's try to run your application. To run the app from android studio, open one of your project's activity files and click Run  icon from the toolbar. Before starting your application, Android studio will display following window to select an option where you want to run your Android application.
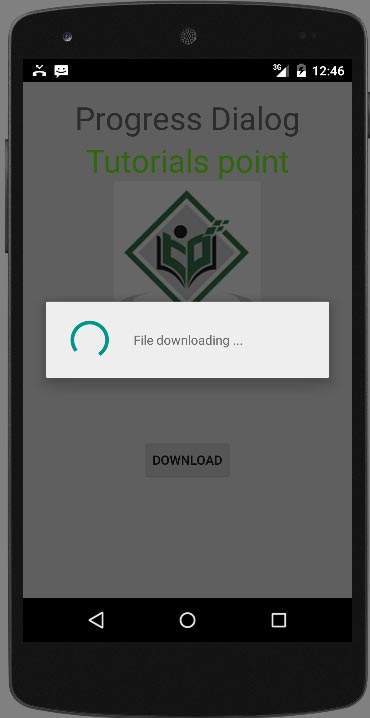
Just press the button to start the Progress Dialog. After pressing , following screen would appear.