- SAP NetWeaver Tutorial
- SAP NetWeaver - Home
- SAP NetWeaver - Introduction
- SAP NetWeaver - Architecture
- SAP NetWeaver - Components
- SAP NetWeaver - Release Details
- SAP NW - NW Version in ECC System
- SAP NetWeaver - Setting Up NW
- SAP NW - Installation Options
- Passing Parameters for Installation
- SAP NW - Transport Management
- Managing Background Jobs
- SAP NW - NW Business Client
- SAP NW - Service Configuration
- Business Client Installation
- NWBC Transaction & Navigation
- SAP Application based on NW
- SAP NetWeaver - Portal
- SAP NetWeaver - Create a System
- Enterprise Portal Roles & Group
- SAP NW - Knowledge Management
- SAP NW - KM Administration
- SAP NetWeaver - Developer Studio
- SAP NetWeaver - Web Content
- Process Integration Options
- SAP NetWeaver - Gateway
- SAP NetWeaver - Security
- SAP NetWeaver - PFCG Roles
- SAP NW - Authentication Methods
- SAP NW - Communication Security
- SAP NetWeaver Useful Resources
- SAP NW - Questions and Answers
- SAP NetWeaver - Quick Guide
- SAP NetWeaver - Useful Resources
- SAP NetWeaver - Discussion
SAP NetWeaver - Web Content
Web Content generated by the business users can be managed using the Web Page composer tool that allows business users to manage most of WCM tasks and creation of portal pages that can combine business applications with user-generated web and static content. Using the Web Page composer, you can blend business applications and user generated content.
Web Page Composer supports the professionals to create interactive portal pages. End users can easily access web content and applications in the portal.
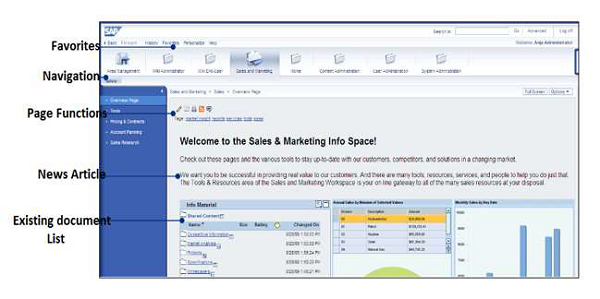
Following are the structural components of Web Page Composer page.
Navigation − WPC areas are integrated into the role-based navigation structure.
Favorites − The end user can save their favorite pages for quicker access.
Search − Search results include contextual information such as the relevant page and role.
Add an Article Using Web Page Composer
Step 1 − Navigate to Area Management → Content Editor → Article tab → Content
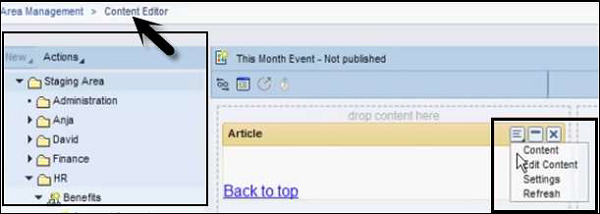
This opens the Content Editor window.
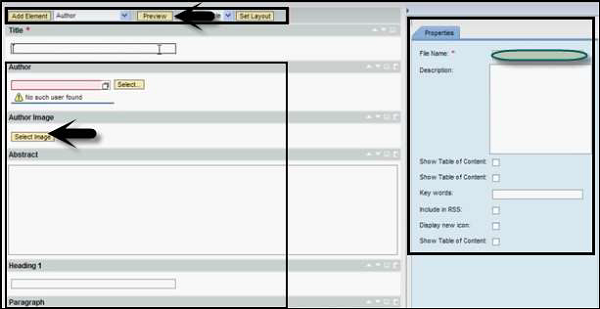
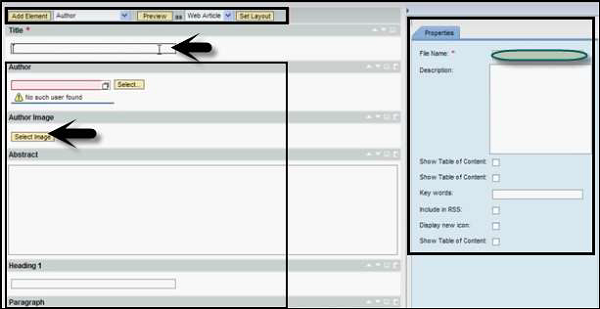
Step 2 − Add the following details to post an article in Enterprise Portal −
- Title of the Content
- Author
- Select Image
- Abstract
- Headers
- Paragraphs
Step 3 − To save and publish this article, click the save button.
Step 4 − To view this article, go to Article tab and click the Refresh button.
Step 5 − Go to Page content on the right side and mention how you want to publish this content on Enterprise Portal. Following are the available options −
- Article
- Banner
- Link List
- Paragraph
- RSS Link List
- Teaser
- URL View
Step 6 − To preview the published content, go to Article Editor → Preview button at the top.