- Quality Center Tutorial
- QC - Home
- QC - Introduction
- QC - Environment Setup
- QC - Server Side Configurations
- QC - Common Functionalities
- QC - Management
- QC - Requirements
- QC - Test Plan
- QC - Test Lab
- QTP - QC Integration
- QC - Defects
- QC - Dashboard Analysis
- QC - Project Customization
- QC Useful Resources
- QC - Questions and Answers
- QC - Quick Guide
- QC - Useful Resources
- QC - Discussion
Hp-QC - Test Execution
After creating a test set, scheduling, test execution comes into the picture. Upon execution, we compare the actual result against expected result and raise defects if any. Following are the steps for test execution.
Step 1 − Select the tests that you would like to execute and click Run Button. Three options would be shown to the user.
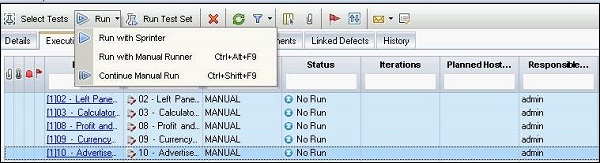
Step 2 − The First Option, "Run with Sprinter" is used only when sprinter is installed. Sprinter is a plugin within HP which assists the manual testers to execute tests with advanced options and settings.
Step 3 − The Second Option, "Run with Manual Runner" is the option for executing tests manually. The manual runner window opens as shown below.
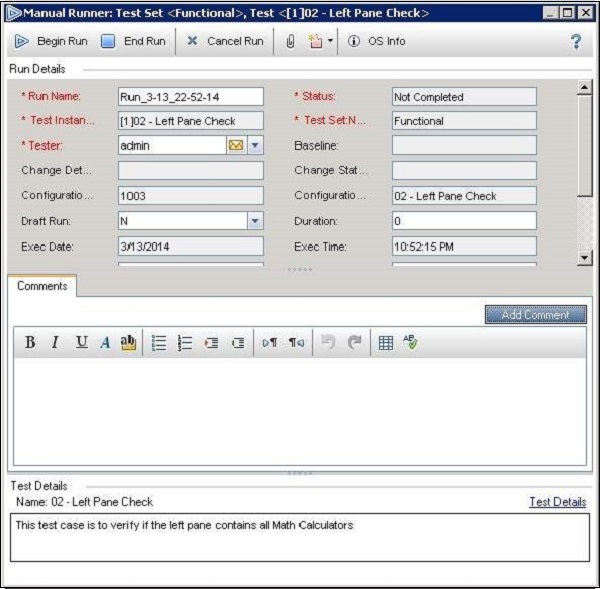
Let us now understand the functionalities in manual runner dialog.
Begin Run − Kick starts the execution of Manual Tests
End Run − User can exit the execution at any point by clicking on "End Run" button.
Cancel Run − User can cancel the execution at any point in time.
New Defect − A New Defect can be raised right from the Manual runner window
OS info − Gives detailed information about the Operating System
Step 4 − Click "Begin Run" and the Manual runner pops up with all the manual steps as shown below.
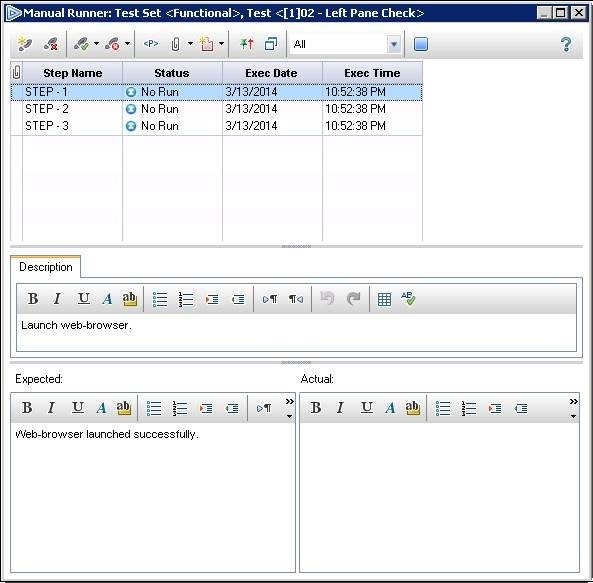
Following options are available during execution
Add Step − Tester can add steps at runtime.
Delete Step − Testers can remove a step at runtime if redundant.
Cancel Run − The execution will be cancelled
Pass Selected − The Selected Step will be marked as Pass.
Pass All − All the Steps in the test will be marked as Pass.
Fail SelectedFail Selected − The Selected Step will be marked as Fail.
Fail All − All the Steps in the test will be marked as Fail.
Parameters − Shows the list of parameters that was added as part of the test
Attach to Step − Enables user to attach a file to a particular step
Attach to Run − Enables user to attach a file on a test set level
Add Defect − Testers can add a defect by selecting the step and clicking on "Add a Defect"
Filter − Testers can filter based on the status like - completed, blocked etc.
End Run − Even while execution is in progress, testers can end the execution.
Description − Shows the description of that step.
Expected − Displays the expected result of that step.
Actual − Tester can fill in the actual result.
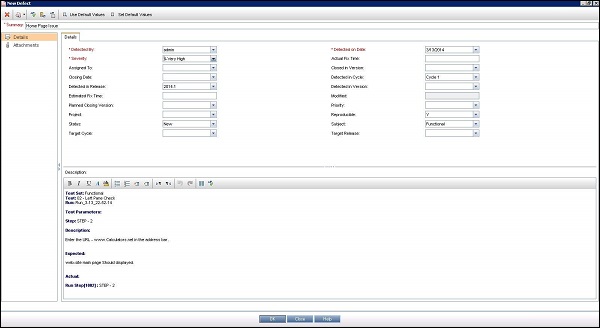
Step 5 − Raising Defects is just a click away while the execution in progress, which prepopulates the step details such as description and expected result which is very handy for testers and easy for developers to investigate. It saves a lot of time in posting the defect, however the details about the usage of defects will be dealt in defects module.