- Quality Center Tutorial
- QC - Home
- QC - Introduction
- QC - Environment Setup
- QC - Server Side Configurations
- QC - Common Functionalities
- QC - Management
- QC - Requirements
- QC - Test Plan
- QC - Test Lab
- QTP - QC Integration
- QC - Defects
- QC - Dashboard Analysis
- QC - Project Customization
- QC Useful Resources
- QC - Questions and Answers
- QC - Quick Guide
- QC - Useful Resources
- QC - Discussion
Hp-QC - Server Side Configurations
Once the HP-ALM is installed, we can continue to work with ALM only after creating domain, project, and users. In this chapter, we will discuss how to create Project, Domain and Users.
Creating Domain
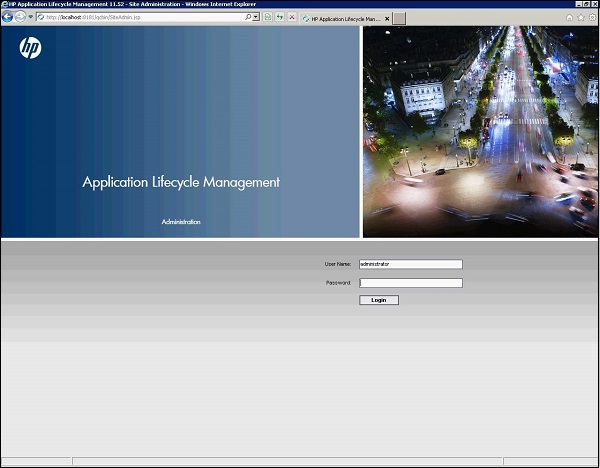
Step 1 − For creating a Domain, the first step is to get into Site Administrator Page. Launch QC using the URL - http://localhost:8181/qcbin/SiteAdmin.jsp and enter the Admin credentials that was set up while installing QC.
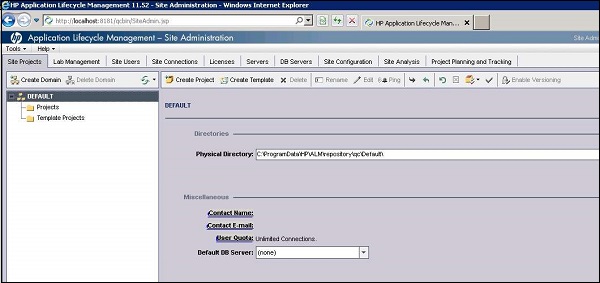
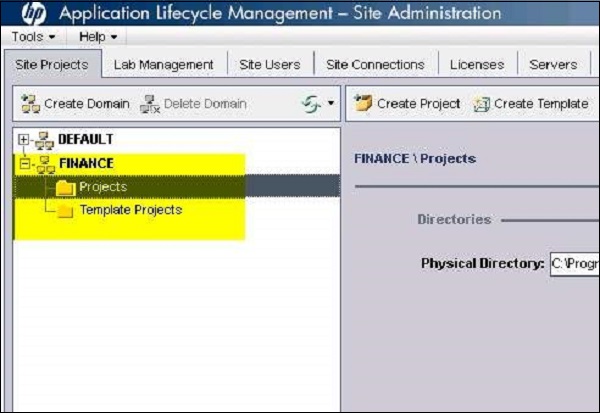
Step 2 − After logging into Site Admin page, we will land in Site Projects Tab as shown below. The next step from there is to create a Domain.
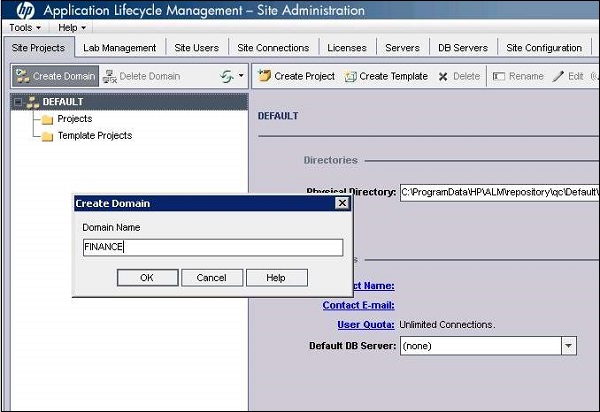
Step 3 − Click the 'Create Domain' button on the top-left corner. Enter Domain Name and click OK.
Step 4 − Domain would be created as shown below.
Creating Projects
Once a Domain is created, the next step is to create 'Projects'. Creating a Project takes us through a wizard and one should follow the steps given below to create 'Projects'
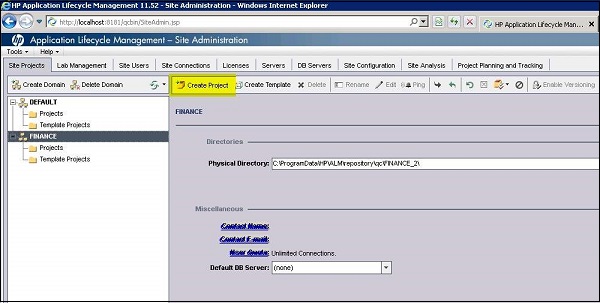
Step 1 − Select the Domain under which the project needs to be created and then click the "Create Projects" button as shown below.
Step 2 − The Create Project Wizard opens. Select "Create an Empty Project" and click "Next".

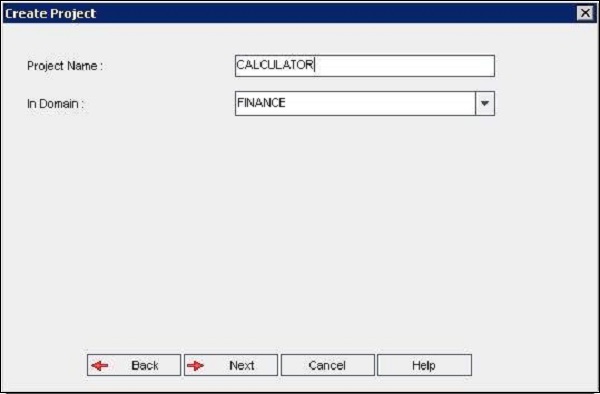
Step 3 − Enter the "Project Name" and select Domain and click "Next".
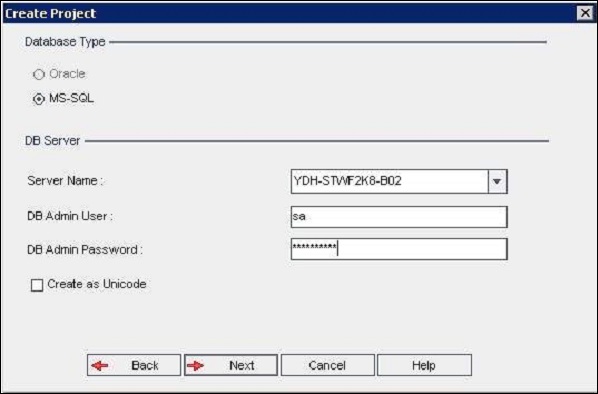
Step 4 − Enter the Database credentials and click "NEXT".
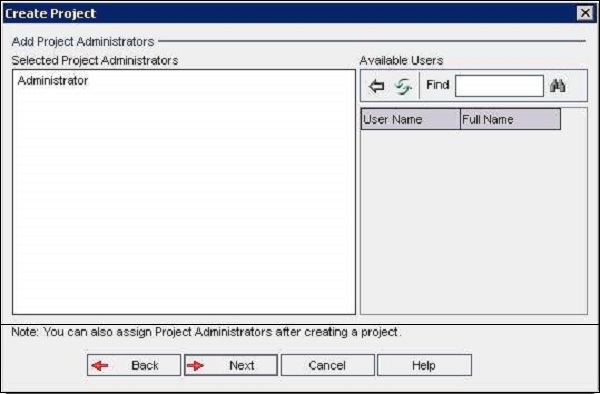
Step 5 − Select the Project Administrator user ID and click "NEXT".
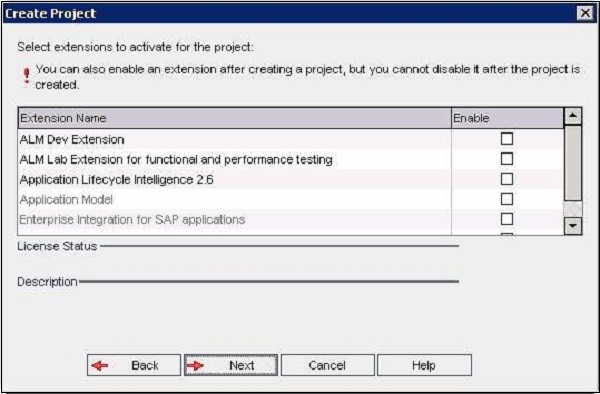
Step 6 − Select the extensions to activate the project and click "NEXT".
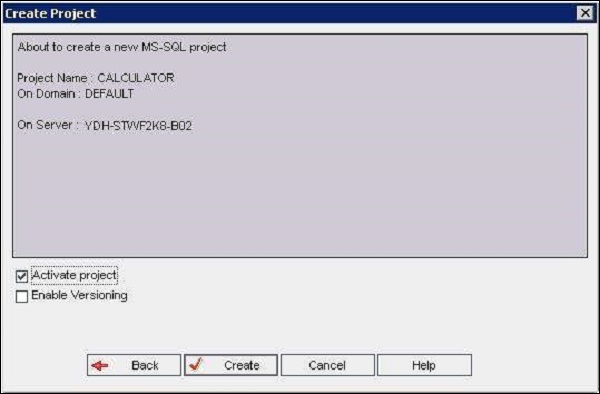
Step 7 − Check the Activate checkbox and enable Version controlling (if you want) and click "NEXT".
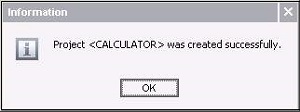
Step 8 − Upon clicking "Next", the project "Calculator" is created successfully. Click "OK" to see the created project in the Project Pane.
Creating Users
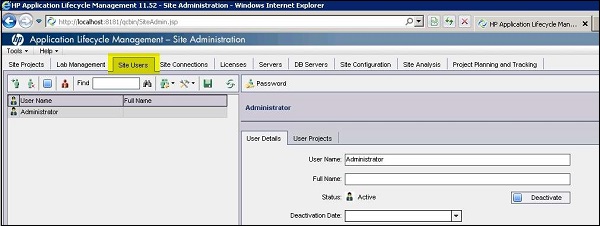
Step 1 − Select the Site Users Tab in "Site Admin" Page as shown below and click the "Add New User" button.
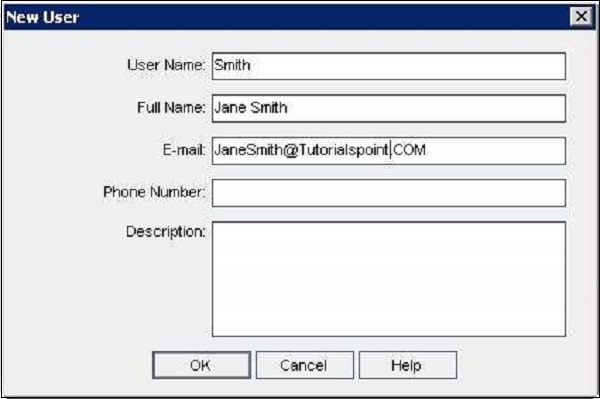
Step 2 − The New User window opens up. Fill the user details and click "OK".
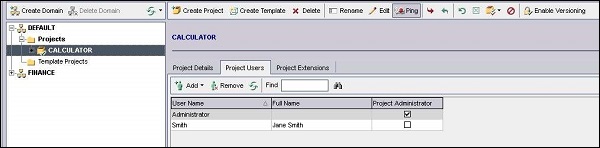
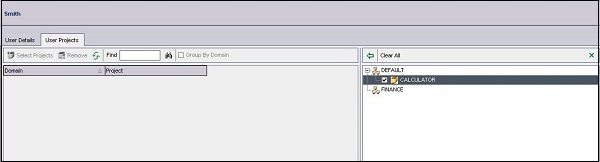
Step 3 − After Creating the user, give the user the project access that they need.
Step 4 − Verify the user list in "Project Users" Tab after giving the user the access to the project.