- Microsoft Visio Tutorial
- Microsoft Visio Resources
- Microsoft Visio - Quick Guide
- Microsoft Visio - Useful Resources
- Microsoft Visio - Discussion
Microsoft Visio - Rulers, Grids and Guides
Visio comes with visual aids to help align and structure the elements in the diagram so that it appears great both on-screen and in print. The main visual aids available include rulers, grids, and guides.
Rulers
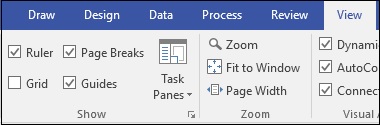
Rulers help in providing perspective to the elements in the diagram. They help orient the shapes to attain a consistent and clean look. Rulers can be switched off or on with a simple checkbox in the Show section of the View tab.
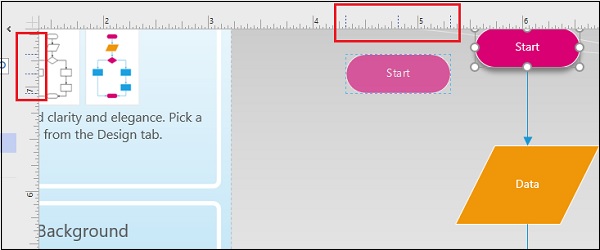
When you move a shape, you will notice that there are 3 dotted lines (shown in the following example in red rectangles) on both the vertical and horizontal rulers. These 3 dotted lines denote the left, middle, and right parts of the diagram. When you drag the shape vertically or horizontally, these 3 dotted lines help position the shape exactly at the place you need.
You can turn of the Ruler checkbox if you need some screen estate.
Guides
Just like rulers, guides help in orienting different shapes of the diagram properly. You can create any number of guides from both the vertical and horizontal rulers. To create a guide, simply drag a line from either the vertical or horizontal rulers.
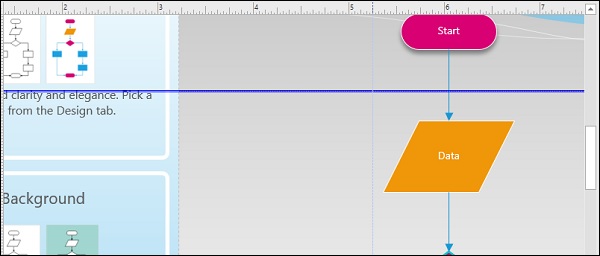
Guides are represented by lines, which appear thick when selected. You can delete a guide by simply selecting the guide and pressing the Delete key on the keyboard. Uncheck the Guides checkbox in the View tab to remove all the guides from view.
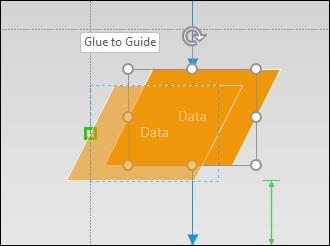
Dragging a shape onto a guide will enable you to snap the shape to the guide. When a shape is snapped to a guide, it moves along with the guide.
Grids not only help to align shapes within the drawing but can also be an important measurement tool. Grids comprise of square boxes of defined area, which can be adjusted. Therefore, grids help you have an estimate of the likely area occupied by the shape, which allows you to size the shapes as needed.
To turn grids on or off, simply check or uncheck the Grid checkbox in the View tab.
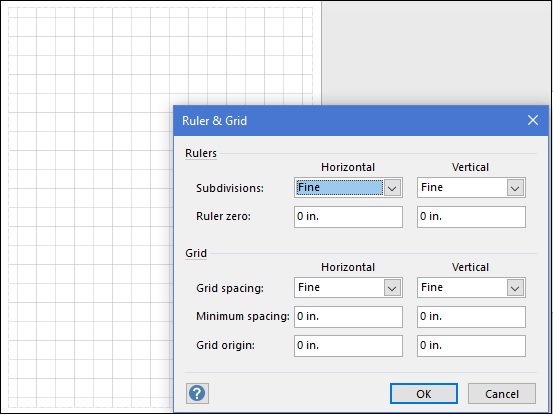
You can also customize the size of each grid by adjusting the spacing between the grids. To do so, click the small downward facing arrow to the bottom-right of the Show section in the View tab.
This opens a Ruler & Grid dialog box where you can adjust parameters such as subdivisions in a grid, the horizontal and vertical spacing, etc.