- Windows 10 - Home
- Windows 10 - Introduction
- Windows 10 – UWP
- Windows 10 – First App
- Windows 10 - Store
- Windows 10 - XAML Controls
- Windows 10 - Data Binding
- Windows 10 - XAML Performance
- Windows 10 - Adaptive Design
- Windows 10 - Adaptive UI
- Windows 10 - Adaptive Code
- Windows 10 - File Management
- Windows 10 - SQLite Database
- Windows 10 – Communication
- Windows 10 - App Localization
- Windows 10 - App Lifecycle
- Windows 10 - Background Execution
- Windows 10 - APP Services
- Windows 10 - Web Platform
- Windows 10 - Connected Experience
- Windows 10 - Navigation
- Windows 10 - Networking
- Windows 10 - Cloud Services
- Windows 10 - Live Tiles
- Windows 10 - Sharing Contract
- Windows 10 - Porting to Windows
Windows 10 Dev - Porting to Windows
In this chapter, we will learn how to port your existing app Windows 8.1 application to the Universal Windows Platform (UWP). You can create a single Windows 10 app package that your customers can install onto all types of devices.
After porting your application to the Windows 10 UWP, your app will benefit from −
- Exciting new hardware
- Great monetization opportunities
- A modern API set,
- Adaptive UI controls,
- Adaptive Design and Code
- A range of input modalities such as mouse, keyboard, touch, and speech.
Porting a Windows 8.x Project to a UWP Project
There are two options to port your existing Windows 8.x application to Universal Windows Platform (UWP).
Option 1 − One is to create a new Windows 10 project in Visual Studio and copy your files into it.
Option 2 − The other option is to edit a copy of your existing project files, including the app package manifest.
Below given are the main steps while using the first option.
Launch Microsoft Visual Studio 2015 and create a new Blank Application (Windows Universal) project with the name UWPBookStore.
Your new project builds an app package (an appx file) that will run on all device families.
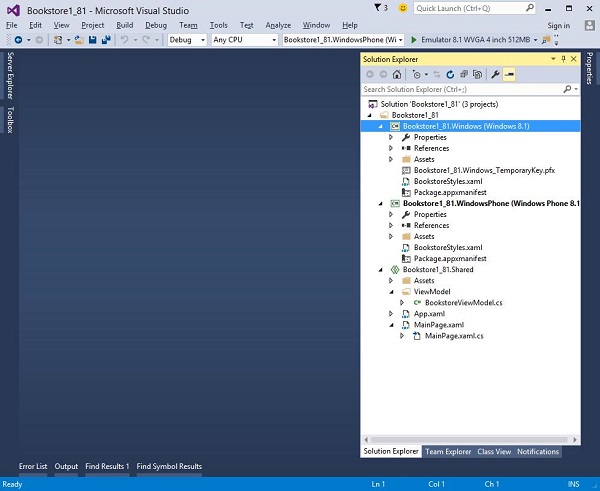
In your Universal 8.1 app project, identify all the source code files and visual asset files that you want to reuse. Shown below is a sample application, which has three projects. One is used for Windows, the second one is for mobile and the third one is the shared project for Windows and mobile.
After running this application on phone, you will see the following window.
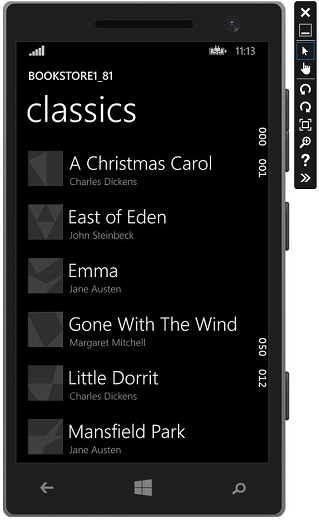
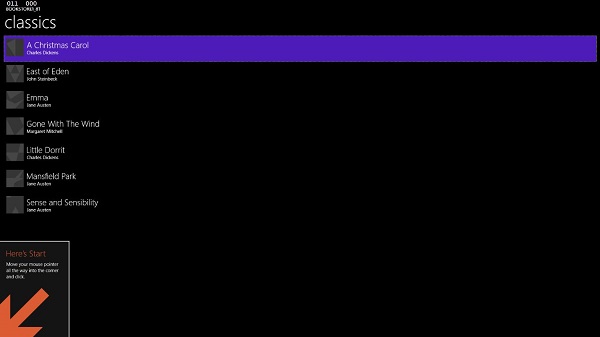
After running the window application, you will see the following application.
- Now, open the newly created UWP project application
From the Shared Project, copy the folder Assets\CoverImages containing the book cover image (.png) files. Also copy the ViewModel folder and the MainPage.xaml and replace the file in the destination.
From the Windows project, copy BookstoreStyles.xaml. All the resource keys in this file will resolve in a Windows 10 app. Some of those in the equivalent WindowsPhone file will not.
In the Solution Explorer, make sure Show All Files is toggled ON.
Select the files that you copied, right-click them, and click Include In Project as shown below.
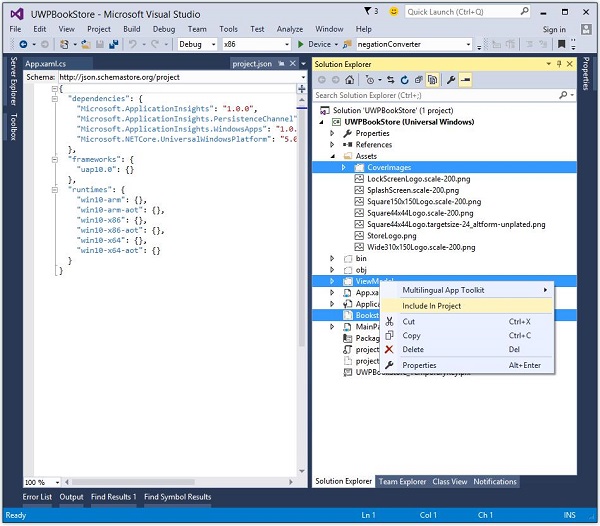
This will automatically include their containing folders. You can then toggle Show All Files OFF if you like.
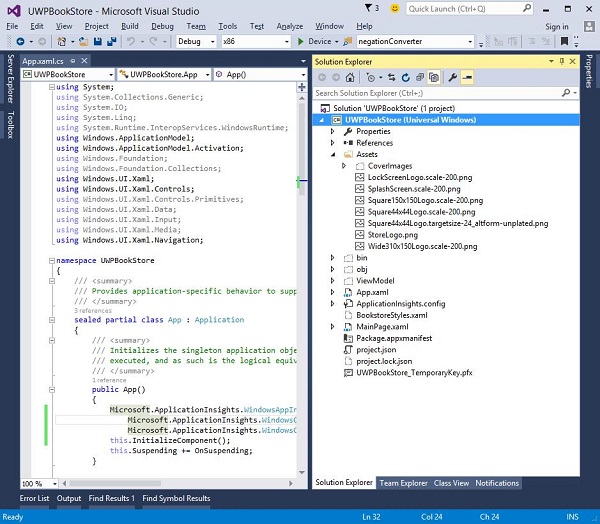
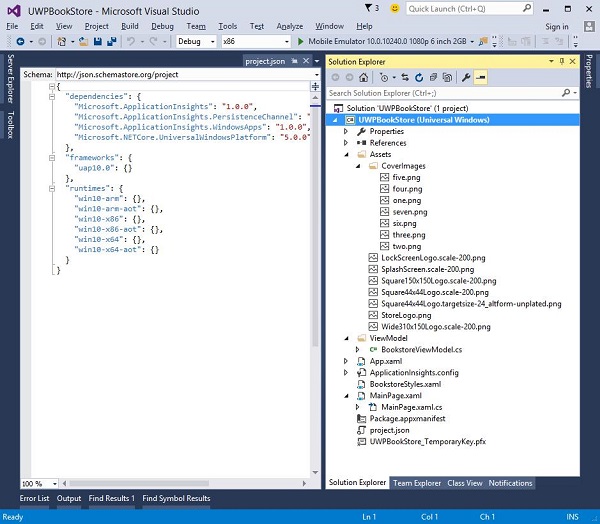
Now your project structure will look like this in Solution Explorer.
Edit the source code and markup files that you just copied and change any references to the Bookstore1_81 namespace to UWPBookStore namespace.
The easiest way is to replace the name space with Replace In Files feature. No code changes are needed in the view model.
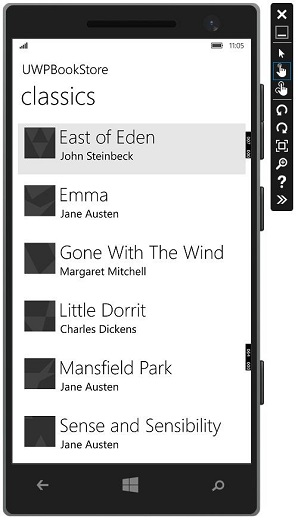
Now, when the above code is executed, you can run it on a local machine as well as on a mobile as shown below.

Now, the second option is to edit a copy of your existing project files, including the app package manifest. The project file and the package.appmanifest file need some modifications when porting from Windows/phone 8.x to Windows 10.
Microsoft has provided UWP project upgrade utility, which is very helpful while porting your existing application. The utility can be downloaded from github.com.
We recommend you to follow the above examples step by step for better understanding.
