- SpecFlow - Home
- SpecFlow - Introduction
- Test Driven Development
- Behaviour Driven Development
- SpecFlow - Visual Studio Installation
- Visual Studio Extension Installation
- SpecFlow - Project Set Up
- Other Project Dependencies
- SpecFlow - Runner Activation
- SpecFlow - HTML Reports
- SpecFlow - Binding Test Steps
- SpecFlow - Creating First Test
- Configure Selenium Webdriver
- SpecFlow - Gherkin
- SpecFlow - Gherkin Keywords
- SpecFlow - Feature File
- SpecFlow - Step Definition File
- SpecFlow - Hooks
- SpecFlow - Background Illustration
- Data Driven Testing with Examples
- Data Driven Testing without Examples
- Table conversion to Data Table
- Table conversion to Dictionary
- Table with CreateInstance
- SpecFlow - Table with CreateSet
- SpecFlow Useful Resources
- SpecFlow - Quick Guide
- SpecFlow - Useful Resources
- SpecFlow - Discussion
SpecFlow - Visual Studio Installation
In this chapter, we shall see the process of installation of Visual Studio and project configuration.
Installation
Navigate to the link − https://www.visualstudio.com/en-us/downloads/download-visual-studio-vs.aspx
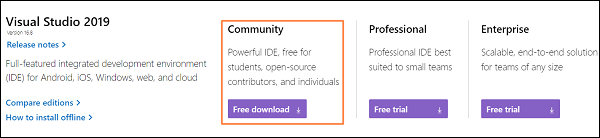
For the Community version of Visual Studio, click on Free download under the Community section.
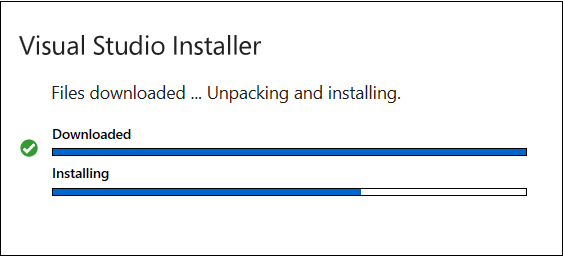
An .exe file gets downloaded to our system. Double-click on it.

Visual Studio Installer pop-up comes up. Click on Continue. Download and installation process begins.
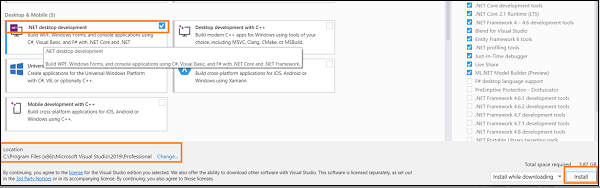
Once installation is done, select the option .NET desktop development. Then click on Install.
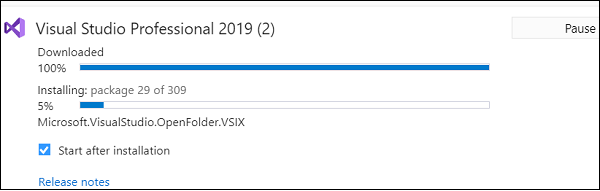
Download and installation of packages get started.
Once done, click on Restart.

From the start menu, type Visual Studio.

Click on Visual Studio, the welcome screen appears.

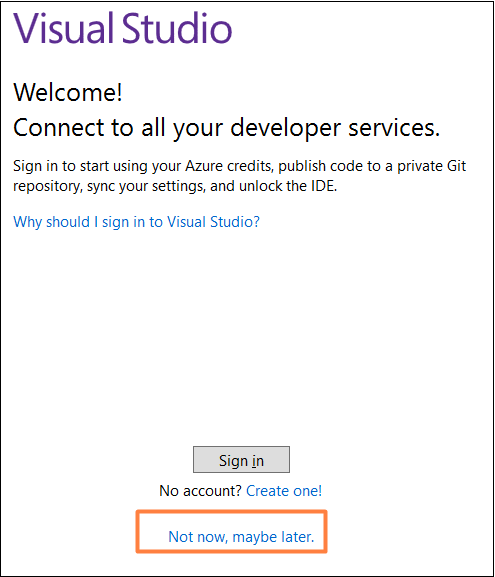
Along with it, Visual Studio pop-up appears. If you do not have an existing
account, click on Not now, may be later link and proceed.
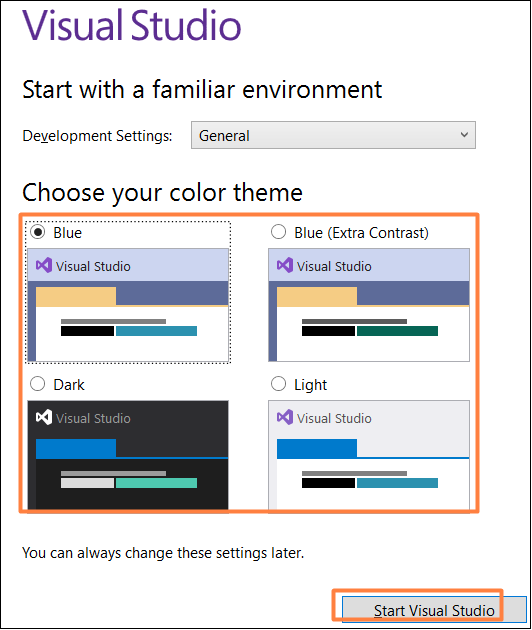
Select a colour for theme and click on Start Visual Studio.
Project Configuration
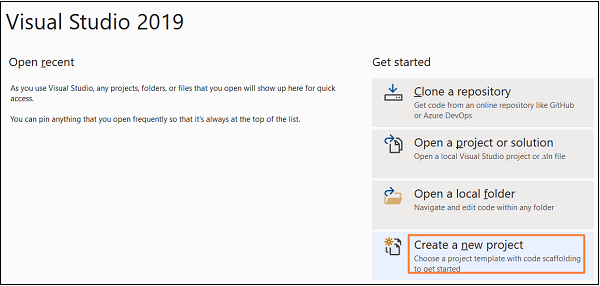
Once the Visual Studio landing page gets opened, click on Create a new project.
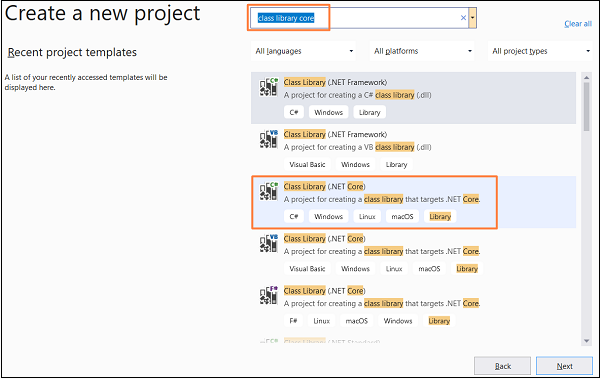
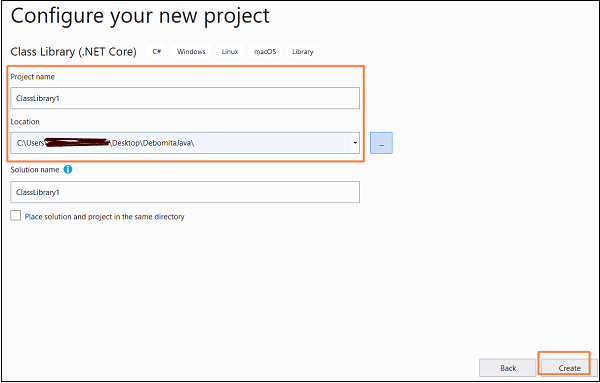
We shall create a new C# class library. Enter class library core in the search box. Choose the option Class Library (.NET Core) and click Next.
Give a project name and location and then click on Create.
Code Implementation for Project
using System;
namespace ClassLibrary2 {
   public class Class1 {
      public int Number1 { get; set; }
      public int Number2 { get; set; }
      public int Subtraction() {
         throw new NotImplementedException();
      }
   }
}
To build this solution, go to the Build menu, then select Build Solution.
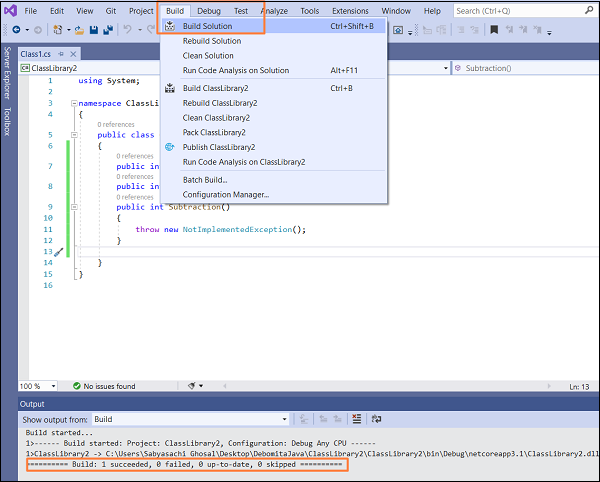
Build success message gets displayed and we have successfully created a project in Visual Studio.
