- SpecFlow - Home
- SpecFlow - Introduction
- Test Driven Development
- Behaviour Driven Development
- SpecFlow - Visual Studio Installation
- Visual Studio Extension Installation
- SpecFlow - Project Set Up
- Other Project Dependencies
- SpecFlow - Runner Activation
- SpecFlow - HTML Reports
- SpecFlow - Binding Test Steps
- SpecFlow - Creating First Test
- Configure Selenium Webdriver
- SpecFlow - Gherkin
- SpecFlow - Gherkin Keywords
- SpecFlow - Feature File
- SpecFlow - Step Definition File
- SpecFlow - Hooks
- SpecFlow - Background Illustration
- Data Driven Testing with Examples
- Data Driven Testing without Examples
- Table conversion to Data Table
- Table conversion to Dictionary
- Table with CreateInstance
- SpecFlow - Table with CreateSet
- SpecFlow Useful Resources
- SpecFlow - Quick Guide
- SpecFlow - Useful Resources
- SpecFlow - Discussion
SpecFlow - Feature File
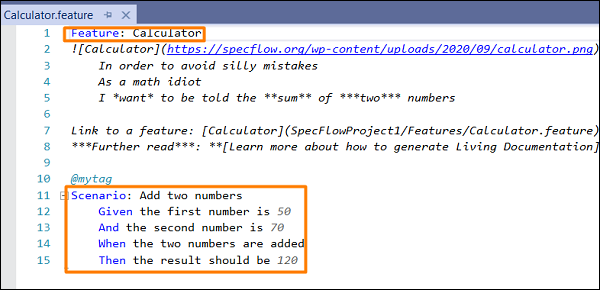
The SpecFlow test execution begins from the Feature File. Here all the Features and their corresponding Scenarios are explained in plain text. It has a dual role of serving as an automation element as well as for documentation. A Feature File consists of one or more Scenarios in form of a list. The extension for a Feature File should always be .feature.
A Feature is added to have an overall description of the features of the applications and to club connected scenarios. This is the most important keyword in a Gherkin document.
A Feature is followed by a colon: symbol and then a small description on the feature. We can add multiple lines for more description. These are not considered by SpecFlow at execution but are added in the html reports.
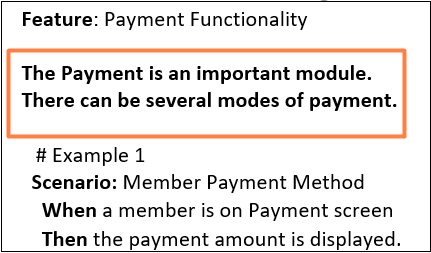
Once the description of a Feature is completed, we should begin a new line with keywords Background, Example, and so on. We can add tags above Feature to club similar features, irrespective of the structure of file or directory.
Feature File Creation
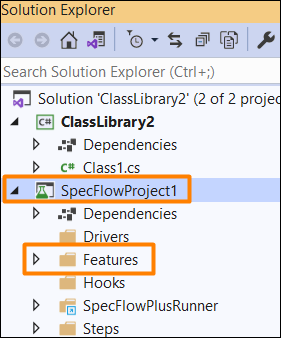
Once a SpecFlow project is created, go to the Solution Explorer, and expand it.
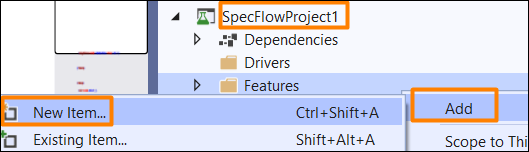
Right-click on Features folder. Click on Add, then select the option New Item.
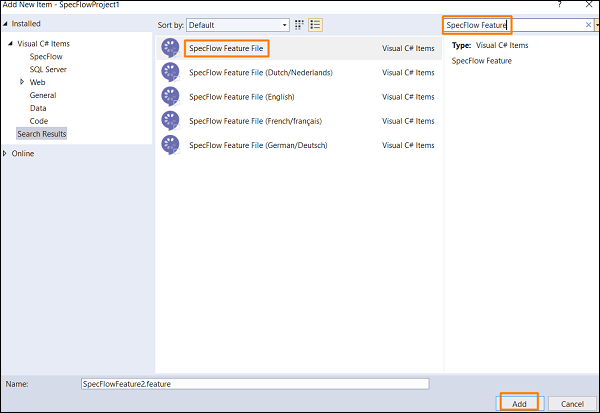
Add New Item pop-up comes up. Type SpecFlow Feature in the search box. Select the option SpecFlow Feature File from the search results. Click on Add and proceed.
The Feature File gets generated with few steps created by SpecFlow by default.
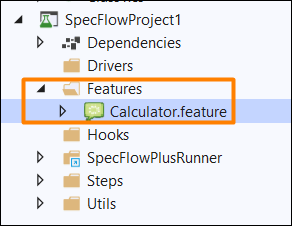
Project Folder after Feature File Creation
Following is the project folder after the feature file is created.
A Feature File is mainly composed of the Gherkin Keywords to take a form of a Feature having one or multiple Scenarios.
