
Article Categories
- All Categories
-
 Data Structure
-
 Networking
-
 RDBMS
RDBMS
-
 Operating System
-
 Java
Java
-
 MS Excel
-
 iOS
iOS
-
 HTML
HTML
-
 CSS
CSS
-
 Android
-
 Python
-
 C Programming
-
 C++
C++
-
 C#
C#
-
 MongoDB
-
 MySQL
MySQL
-
 Javascript
-
 PHP
PHP
-
 Economics & Finance
Serial Plotter in Arduino
The Serial Plotter is available in Arduino Versions 1.6.6 and above. It is a handy tool for visualizing rapid incoming data, say from a sensor. With Serial Monitor, you may not be able to register the changes in the data, especially if the data is changing too quickly. Serial Plotter will visually show you the changes. What's more, the Serial Plotter can also plot multiple values at a time. I think an example will best explain this.
Have a look at the code below. We are generating random numbers, but these could very well be readings from Analog or digital sensors.
Example
void setup() {
Serial.begin(9600);
}
void loop() {
// put your main code here, to run repeatedly:
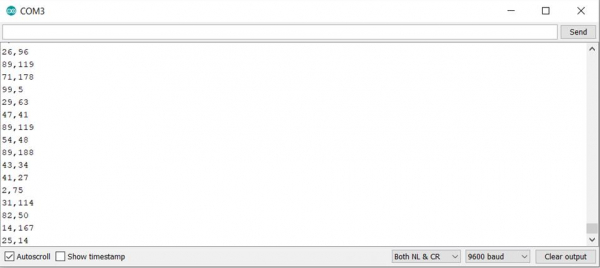
Serial.print(random(100));
Serial.print(",");
Serial.println(random(200));
}
The Serial Monitor output of the above program is very rapidly changing and difficult to interpret −
Here's the Serial Plotter output of the above program −

As you can see, Arduino automatically figured out that two values are being sent, using the comma delimiter, and created two separate line graphs. This keeps on changing real-time and helps you visualize the changing patterns.
Please note that space can also be used as a delimiter instead of a comma. In fact, the really cool thing is that you can also have text labels in your printed output, and the Serial plotter will find the numerical values to plot. For instance, the following code will produce the same output on the Serial Plotter as the one above.
Example
void setup() {
   Serial.begin(9600);
}
void loop() {
   // put your main code here, to run repeatedly:
   Serial.print("R1: ");
   Serial.print(random(100));
   Serial.print(",");
   Serial.print("R2: ");
   Serial.println(random(200));
} 
910 Views
