- SAP Fiori - Home
- SAP Fiori - Introduction
- SAP Fiori - Architecture
- SAP Fiori - NetWeaver Gateway
- SAP Fiori - Installation
- SAP Fiori - Launchpad
- SAP Fiori - OData Services
- SAP Fiori - Transactional Apps
- SAP Fiori - Fact Sheets
- SAP Fiori - Analytical Apps
- SAP Fiori - Theme Designer
- SAP Fiori - Security
- SAP Fiori - Data Flow
- SAP Fiori - WorkFlow
- SAP Fiori - Extension
- SAP Fiori - UI5 Concepts
- SAP Fiori - UI5 Design Patterns
- SAP Fiori - Questions and Answers
- SAP Fiori - Quick Guide
- SAP Fiori - Useful Resources
- SAP Fiori - Discussion
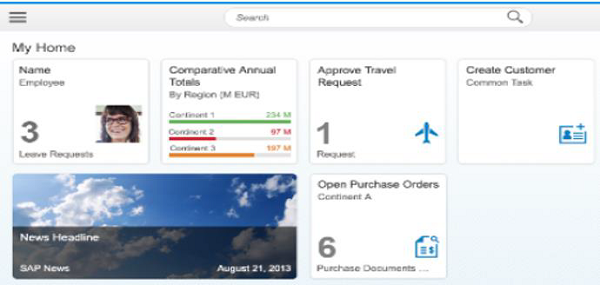
SAP Fiori - Launchpad
SAP Fiori Launchpad is known as the entry point to Fiori apps system on mobile and desktop devices. It contains various tiles in Fiori system. Tiles are square objects that are used to access different Fiori Apps. Access to these tiles are based on the user roles.
SAP Fiori tiles run on multiple device types and provides a single point of access for business applications such as transactional, analytical, factsheet, smart business apps.
SAP Fiori Launchpad - Key Facts
The key points about SAP Fiori Launchpad are given below.
Web-based entry point to use SAP Business applications across platforms and devices.
Delivered as an out-of-the-box thinking to the I HTML client.
High productivity for end users using features like theming, search integration, customization, etc.
Offers single entry points for end users using multiple device types.
How does SAP Fiori Launchpad Work?
When you launch the Fiori Launchpad, it only shows fiorilaunchpad.html as the end of the URL. This is because the fiorilaunchpad.html is the only HTML document, which is loaded to the browser, making it the only SAPUI5 root application.
If you are a customer using Launch page this is different in that the launch page had an index.html for each application. This change provides a more holistic user experience by allowing page navigation & transitions.
Fiori Launchpad Key Benefits
Given below are the key benefits that can be achieved using SAP Fiori Launchpad.
- Ability to define application usage for certain roles or personas
- One Homepage
- Personalization
- Responsiveness
- Single Sign On
- Theming
- Search
- Bookmarks
- Page/navigation transitions
SAP Fiori Launchpad Key Values
Simple − intuitive, easy and coherent user experience.
Role based − simplified role based navigation and business function access.
Contextual − real time, contextual and personalized access.
Responsive − consumption a cross devices, versions and channels with a single user experience.
Multi-platform − planned to be running on multiple platforms ABAP (available today), SAP Portal, SAP HANA Cloud Portal and HANA.
Configuration of Launchpad
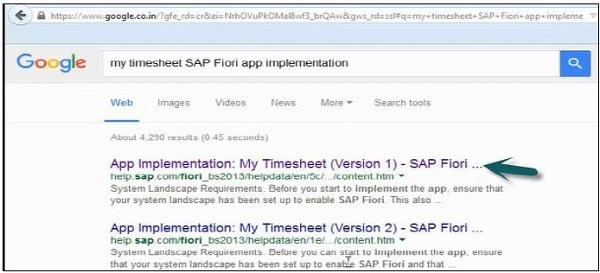
To see the implementation steps and requirement of any of SAP Fiori Apps, go to help.sap.com/Fiori.
To check the URL of SAP Help page, go to Google.com and enter the App name.
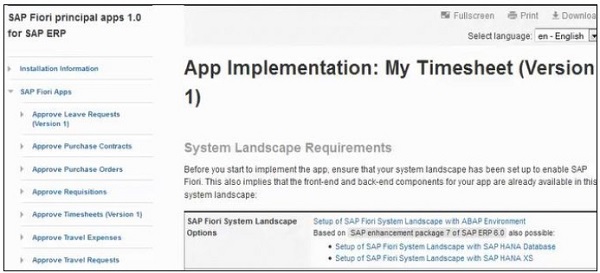
This is the front-end component for My Timesheet apps in Launchpad for activating SAP Fiori UI5 application −

How to check Fiori Apps URL and SAP UI5 Component
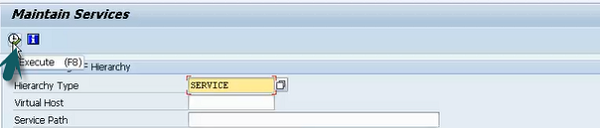
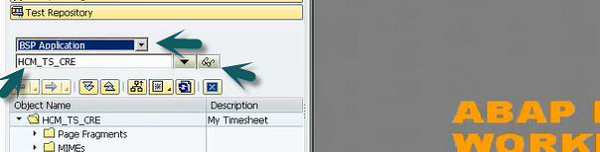
Login to the front-end server using SAP logon and run the T-code: SICF

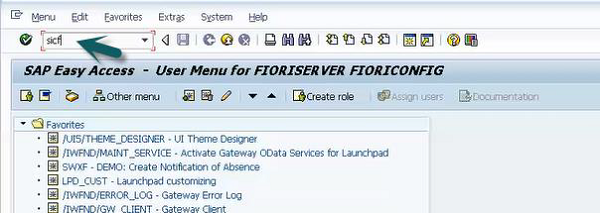
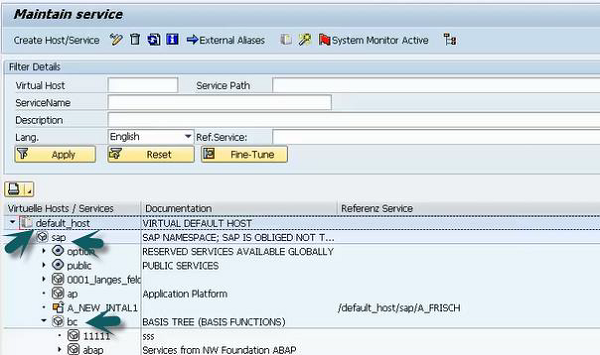
A new window will open. Click Execute and go to the path mentioned below −
Default_host → SAP → bc → ui5_ui5 → sap → search for hcm_ts_cre and double click.

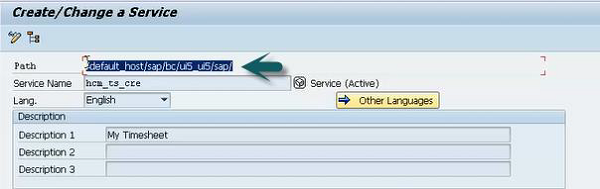
You can see the URL path for My Time Sheet application. Copy this path to the notepad and remove default-host and add service name in the end.

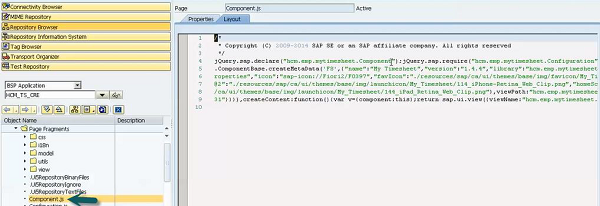
Now run the T-code: SE80
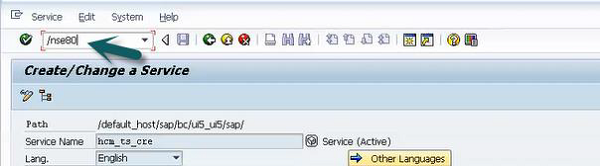
A new window will open. Enter the name of BSP application and UI5 Application name and click on display button as below −
Go to componenet.js and make note of the component name.

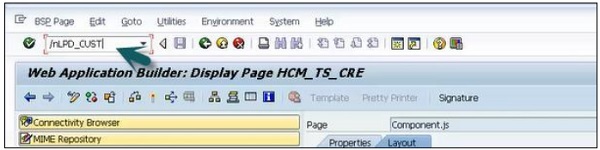
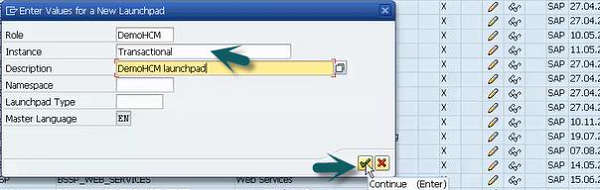
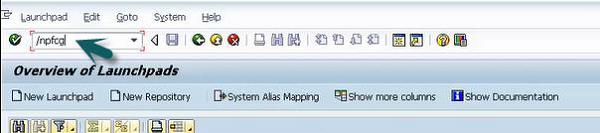
Now, to configure the Launchpad, use T-code: LPD_CUST and go to New Launchpad.
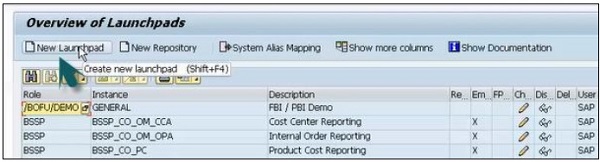
Enter the details for the labels Role, Instance, Description and click on Continue and Yes.
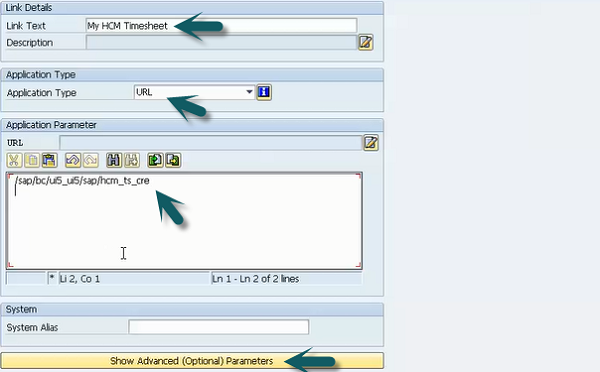
A new window will open. Click on the new Application.

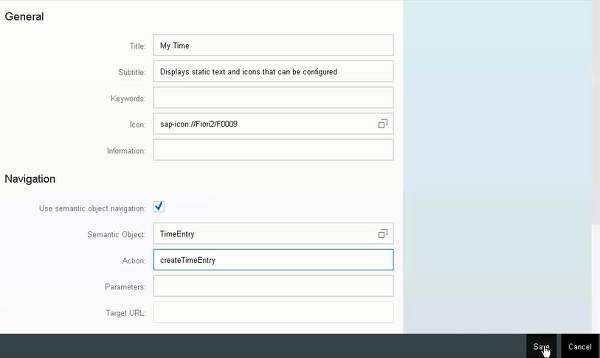
Enter the details; Link Text, Application Type, URL and click Show Advanced Parameters.
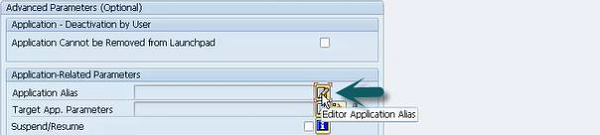
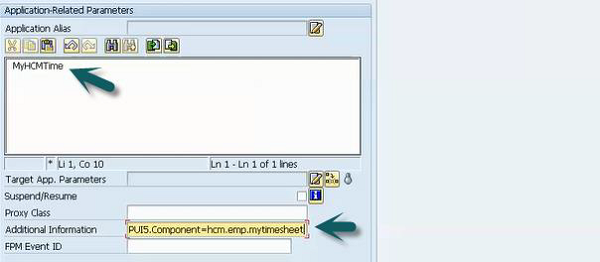
Enter the details, Application Alias and SAP UI5 component name and click the save button on the top.
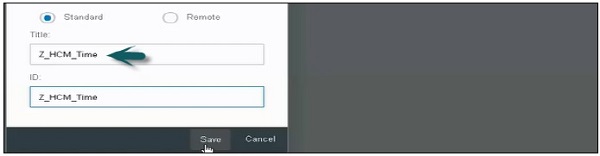
You can create a tile for this by going to the Launchpad designer and to select, create target mapping.
Click the Plus sign and enter the name for the tile and click save.
The next step is to create the target mapping. Go to Target mapping and click Create target mapping.
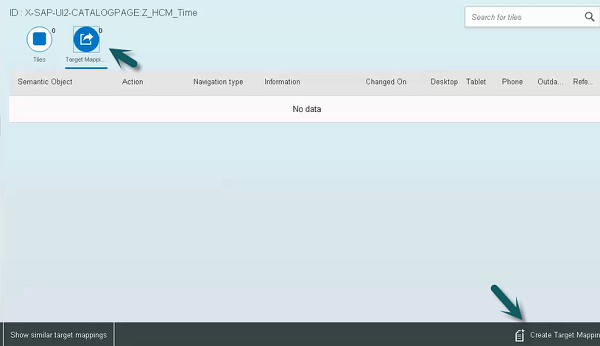
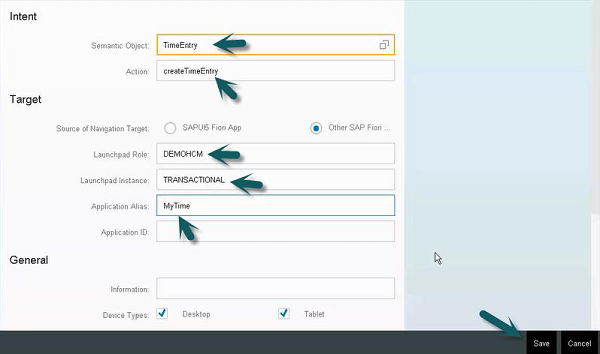
A new window will open. Enter the details as shown in the image below.
Creating Catalogs and Tiles in Launchpad
We have learnt how target mapping is done. The next step is to create a tile.
Go to the tile tab and click the + sign and select the type of tile to be created and enter the details.
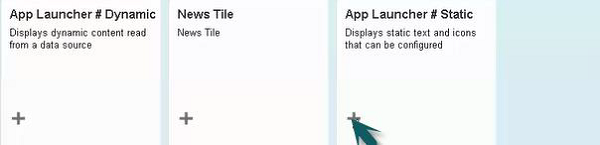
As selected a static tile, to enter the details and click on the save icon.
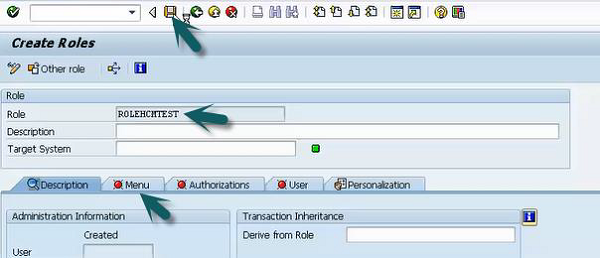
To assign the role to this, go to the front-end system and use the transaction PFCG.
Enter the Role name. Click single role and save. Next, click the Menu tab.

Go to the User tab, enter the user details that you want to use, to access the Launchpad and save.
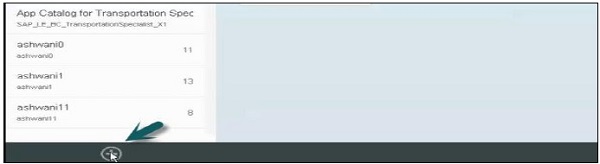
To Add the Catalog to a group in Launchpad, login to Launchpad and select the Tile Catalog.
Select the catalog you have created and click on + sign to add to a group.
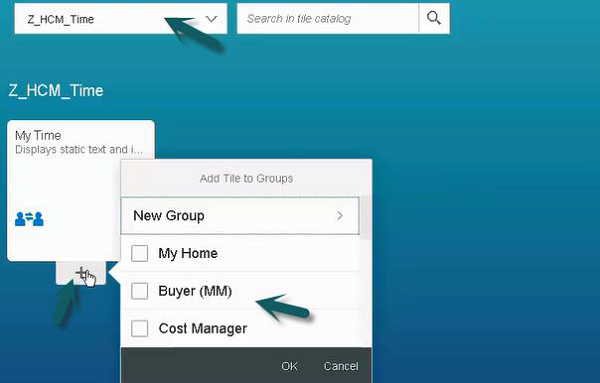
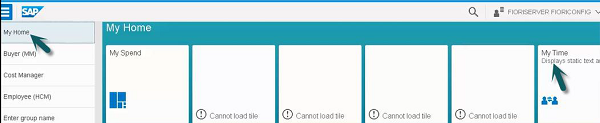
If you have selected My Home as group name, go to back to Launchpad home page and it will show My Time tile there.
This is how we can configure a Launchpad and create a new catalog and tiles in Launchpad designer.
