- Robot Framework - Home
- Robot Framework - Overview
- Environment Setup
- Unix and Linux Installation
- Introduction to Ride
- First Test Case Using Ride
- Writing and Executing Test Cases
- Keyword and Data Driven Test Cases
- Working With Browsers Using Selenium Library
- Working With Textbox
- Working With Radio Button
- Working With Checkbox
- Working With Dropdown
- Working With Keywords
- Working With Variables
- Working With Command Line
- Working With Setup And Teardown
- Working with Built-In Library
- Working With External Database libraries
- Testing Login Page Using Robot Framework
- Robot Framework Useful Resources
- Robot Framework - Quick Guide
- Robot Framework - Useful Resources
- Robot Framework - Discussion
Robot Framework - Working With Dropdown
In this chapter, we will learn how to work with dropdown using Selenium Library.
Project Setup for Dropdown Testing
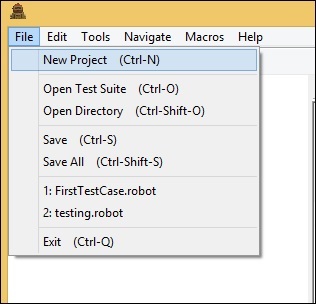
We will first create a project in Ride to work with browsers. Open ride using ride.py from the command line −
Click New Project and give a name to your project.
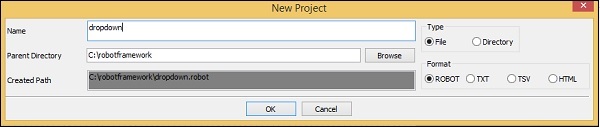
The name given is dropdown. Click OK to save the project.
Right−click on the name of the project created and click New Test Case −
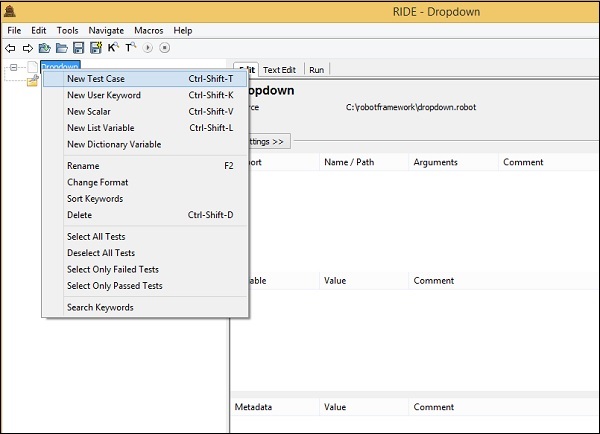

Give name to the test case and click OK to save it.
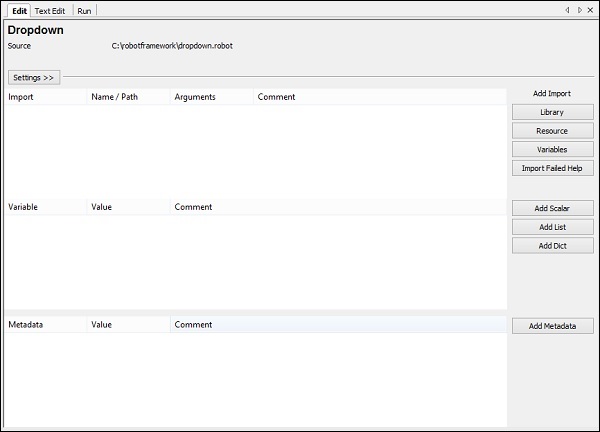
We are done with the project setup. Now, we will write test cases for the dropdown. Since we need Selenium library, we need to import the same in our project.
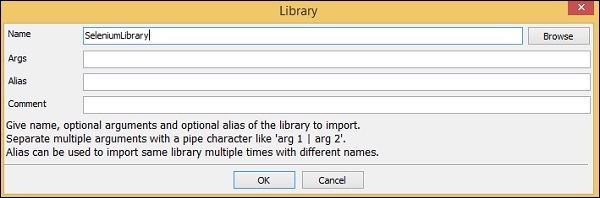
Click on your project on the left side and use Library from Add Import as shown below −
Now, click Library. A screen will appear where you need to enter the library name −
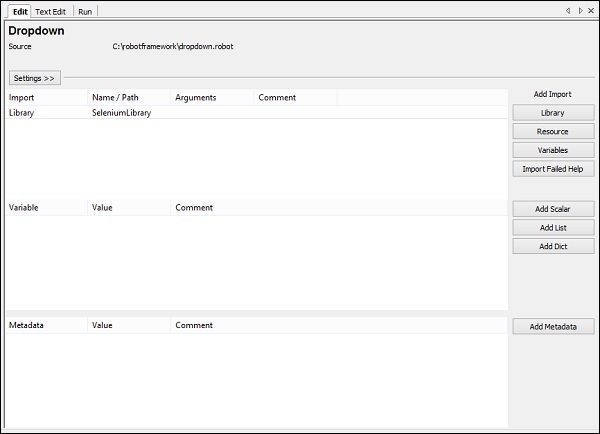
Click OK and the library will be displayed in the settings.
The name given has to match with the name of the folder installed in site-packages.
In case the name does not match, the library name will show in red −
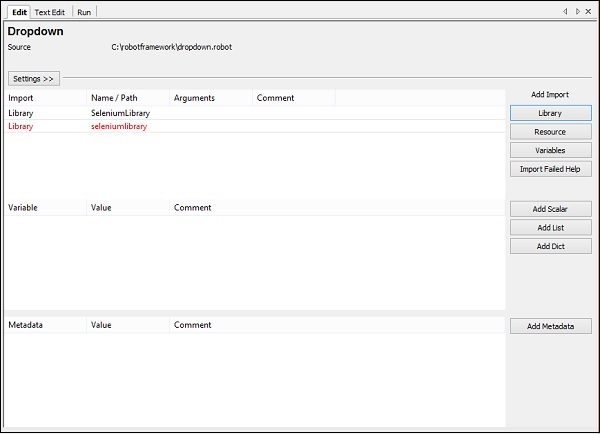
Library import in red is as good as the library does not exists inside python.So now we are done with selenium library import.
Test Case for Dropdown
The test case for dropdown will select the value from the dropdown. To go about working with this, we need the locator (identifier) for that dropdown.
Consider the following html display for dropdown −
<select name = "carbrand">
   <option value = "">Select car brand..</option>
   <option value = "audi">AUDI</option>
   <option value = "bmw">BMW</option>
   <option value = "chevrolet">CHEVROLET</option>
   <option value = "datsun">DATSUN</option>
</select>
For dropdown, name is the locator. In the above example, the name is carbrand. We also need the value so that we can select the same. The values in the above example are audi, bmw, chevrolet and datsun.
Now, we will create a test page with dropdown, open the same in the browser and select the value from the dropdown.
The test case details will be as follows −
Open browser URL − http://localhost/robotframework/dropdown.html in chrome
Enter details of dropdown
Execute the test case
While writing the keyword for test cases in RIDE, press Ctrl + Spacebar. This gives all the details of the command.
For dropdown, we have three ways of doing it −
- Select From List By Index
- Select From List By Label
- Select From List By Value
We will work on an example to show working for all the cases mentioned above.
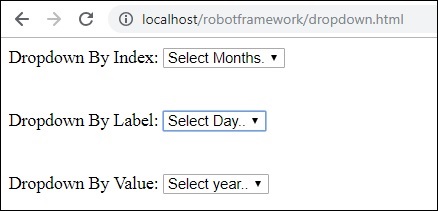
In our test page, we will create 3 dropdowns and will use above test cases to select the dropdown by index, label and value.
dropdown.html
<html>
   <head>
      <title>Dropdown</title>
   </head>
   <body>
      <form name="myform" method="POST">
         <div>
            Dropdown By Index:
            <select name = "months">
               <option value = "">Select Months.</option>
               <option value = "Jan">January</option>
               <option value = "Feb">February</option>
               <option value = "Mar">March</option>
               <option value = "Apr">April</option>
               <option value = "May">May</option>
               <option value = "Jun">June</option>
               <option value = "Jul">July</option>
               <option value = "Aug">August</option>
               <option value = "Sept">September</option>
               <option value = "Oct">October</option>
               <option value = "Nov">November</option>
               <option value = "Dec">December</option>
            </select>
         </div>
         <br/>
         <br/>
         <div>
            Dropdown By Label:
            <select name = "days">
               <option value = "">Select Day..</option>
               <option value = "01">01</option>
               <option value = "02">02</option>
               <option value = "03">03</option>
               <option value = "04">04</option>
               <option value = "05">05</option>
               <option value = "06">06</option>
               <option value = "07">07</option>
               <option value = "08">08</option>
               <option value = "09">09</option>
               <option value = "10">10</option>
               <option value = "11">11</option>
               <option value = "12">12</option>
               <option value = "13">13</option>
               <option value = "14">14</option>
               <option value = "15">15</option>
               <option value = "16">16</option>
               <option value = "17">17</option>
               <option value = "18">18</option>
               <option value = "19">19</option>
               <option value = "20">20</option>
               <option value = "21">21</option>
               <option value = "22">22</option>
               <option value = "23">23</option>
               <option value = "24">24</option>
               <option value = "25">25</option>
               <option value = "26">26</option>
               <option value = "27">27</option>
               <option value = "28">28</option>
               <option value = "29">29</option>
               <option value = "30">30</option>
               <option value = "31">31</option>
            </select>
         </div>
         <br/>
         <br/>
         <div>
            Dropdown By Value:
            <select name = "year">
               <option value = "">Select year..</option>
               <option value = "0">2000</option>
               <option value = "1">2001</option>
               <option value = "2">2002</option>
               <option value = "3">2003</option>
               <option value = "4">2004</option>
               <option value = "5">2005</option>
               <option value = "6">2006</option>
               <option value = "7">2007</option>
               <option value = "8">2008</option>
               <option value = "9">2009</option>
               <option value = "10">2010</option>
               <option value = "11">2011</option>
               <option value = "12">2012</option>
               <option value = "13">2013</option>
               <option value = "14">2014</option>
               <option value = "15">2015</option>
               <option value = "16">2016</option>
               <option value = "17">2017</option>
               <option value = "18">2018</option>
            </select>
         </div>
      </form>
   </body>
</html>
We will add test cases for all 3 dropdown selection in Ride.
For index, we need to pass the locator of that dropdown name or id and the index of the element that needs to be selected.
Select List by Index Example
<select name = "months">
   <option value = "">Select Months.</option> // index 0
   <option value = "Jan">January</option> //index 1
   <option value = "Feb">February</option> // index 2
   <option value = "Mar">March</option> // index 3
   <option value = "Apr">April</option> // index 4
   <option value = "May">May</option> // index 5
   <option value = "Jun">June</option> // index 6
   <option value = "Jul">July</option> // index 7
   <option value = "Aug">August</option> // index 8
   <option value = "Sept">September</option> //index 9
   <option value = "Oct">October</option> //index 10
   <option value = "Nov">November</option> //index 11
   <option value = "Dec">December</option> // index 12
</select>
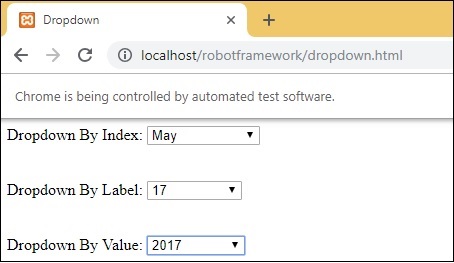
Now, we want to select month as May so the index to be given in the test case is 5.
Label is seen when you open the dropdown on screen.
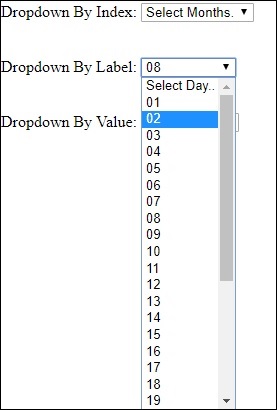
If you want to select a day, you can choose one from the dropdown.
Select From List by Value
Here is the list of the year. The list has values from 0 to 18.
<select name = "year">
   <option value = "">Select year..</option>
   <option value = "0">2000</option>
   <option value = "1">2001</option>
   <option value = "2">2002</option>
   <option value = "3">2003</option>
   <option value = "4">2004</option>
   <option value = "5">2005</option>
   <option value = "6">2006</option>
   <option value = "7">2007</option>
   <option value = "8">2008</option>
   <option value = "9">2009</option>
   <option value = "10">2010</option>
   <option value = "11">2011</option>
   <option value = "12">2012</option>
   <option value = "13">2013</option>
   <option value = "14">2014</option>
   <option value = "15">2015</option>
   <option value = "16">2016</option>
   <option value = "17">2017</option>
   <option value = "18">2018</option>
</select>
If you want to select any year, take the value corresponding to the year and add the same in test case. For example, if you want to select year 2017 the value is 17.
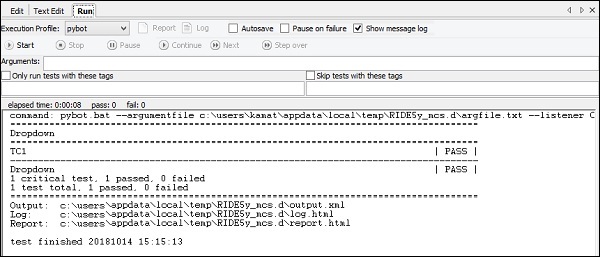
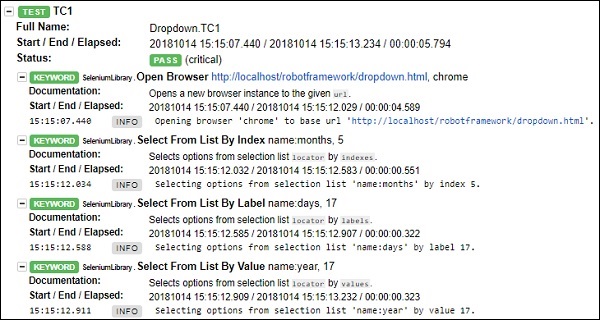
Here is the final list of test cases −

After execution, here is the selection done for dropdowns based on the test case −
Execution Details
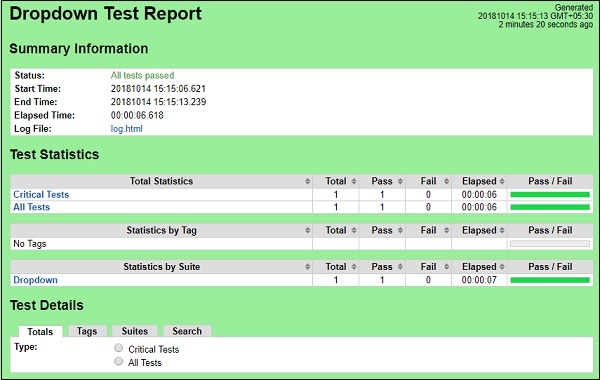
Report Details
Log Details
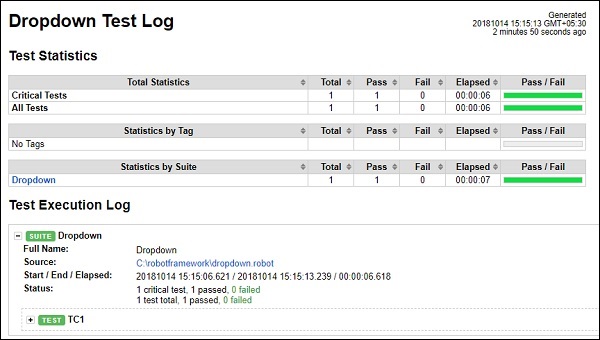
Test case details from log
Conclusion
We have seen how to work with dropdown by value, index and label. We can refer to logs and reports to get the details of the test case executed.
