- Robot Framework - Home
- Robot Framework - Overview
- Environment Setup
- Unix and Linux Installation
- Introduction to Ride
- First Test Case Using Ride
- Writing and Executing Test Cases
- Keyword and Data Driven Test Cases
- Working With Browsers Using Selenium Library
- Working With Textbox
- Working With Radio Button
- Working With Checkbox
- Working With Dropdown
- Working With Keywords
- Working With Variables
- Working With Command Line
- Working With Setup And Teardown
- Working with Built-In Library
- Working With External Database libraries
- Testing Login Page Using Robot Framework
- Robot Framework Useful Resources
- Robot Framework - Quick Guide
- Robot Framework - Useful Resources
- Robot Framework - Discussion
Robot Framework - Unix and Linux Installation
Let us now see a few simple steps to install Python on Unix/Linux machine. Open a Web browser and go to https://www.python.org/downloads/.
- Follow the link to download zipped source code available for Unix/Linux.
- Download and extract files.
- Editing the Modules/Setup file if you want to customize some options.
- run ./configure script
- make
- make install
This installs Python at standard location /usr/local/bin and its libraries at /usr/local/lib/pythonXX where XX is the version of Python.
Setting Path at Unix/Linux
To add the Python directory to the path for a particular session in Unix −
In the csh shell
type setenv PATH "$PATH:/usr/local/bin/python" and press Enter.
In the bash shell (Linux)
type export ATH="$PATH:/usr/local/bin/python" and press Enter.
In the sh or ksh shell
type PATH="$PATH:/usr/local/bin/python" and press Enter.
Note − /usr/local/bin/python is the path of the Python directory
Install PIP
Now, we will check for the next step, which is pip installation for python. PIP is a package manager to install modules for python.
PIP gets installed along with python and you can check the same in command line as follows −
Command
pip --version
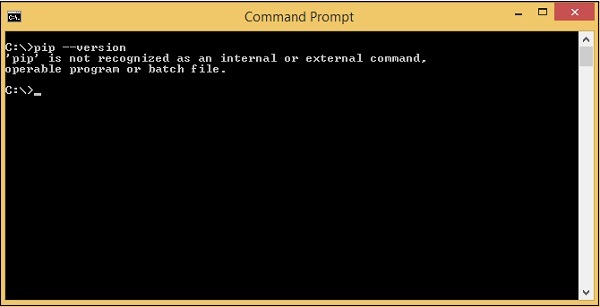
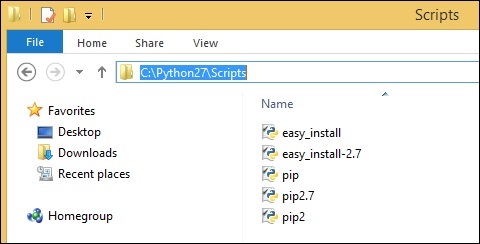
Here we are still not getting the version for pip. We need to add the pip path to Environment variables so that we can use it globally. PIP will be installed in Scripts folder of python as shown below −
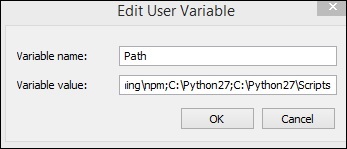
Go back to environment variables and add the path of pip to the variables list. Add C:\Python27\SCripts to environment variables as follows −
Now open your command line and check the version of pip installed −
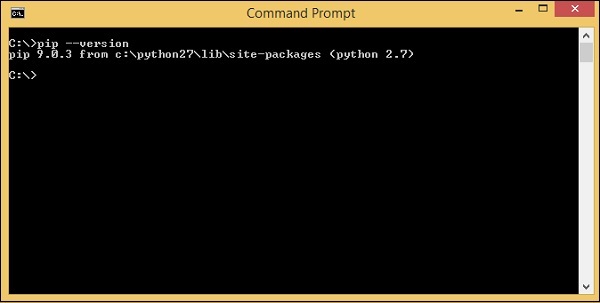
So now, we have python and pip installed.
Install Robot Framework
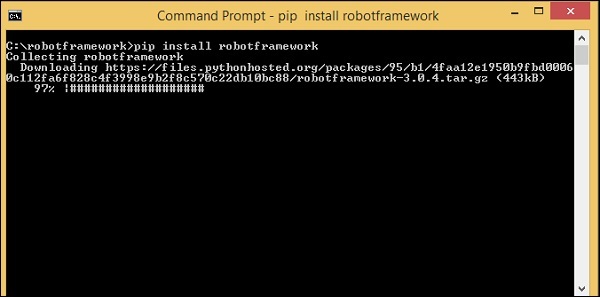
We will now use pip python package manager to install the robot framework and the command for it is as follows −
Command
pip install robotframework
Once the installation is done, you can check the version of robot framework installed as shown below −
Command
robot --version
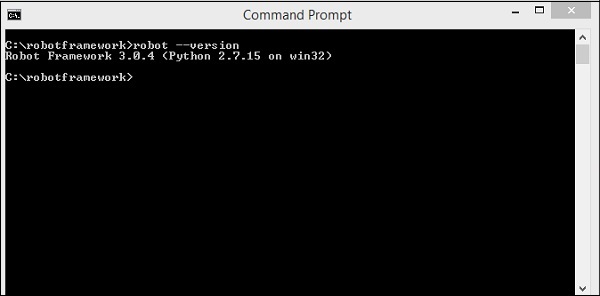
So, we can see Robot Framework 3.0.4 is installed.
Install wxPython
We need wxPython for Robot Framework Ride, which is an IDE for Robot Framework.
For windows to get the required download for wxPython, go to the following URL −
https://sourceforge.net/projects/wxpython/files/wxPython/2.8.12.1/And, download 32 or 64-bit wxpython for windows as per your Windows Operating system.
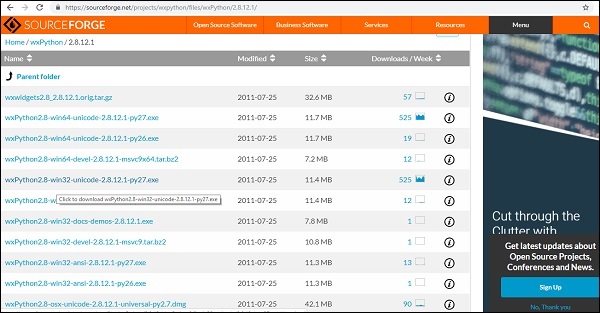
Download the 32-bit wxPython and install the same.
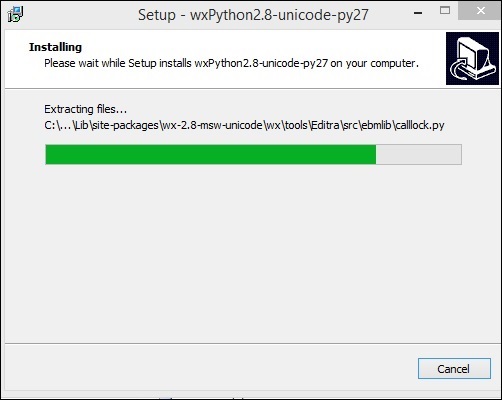
Once the installation is done, it opens the command line and auto runs some commands as shown below −
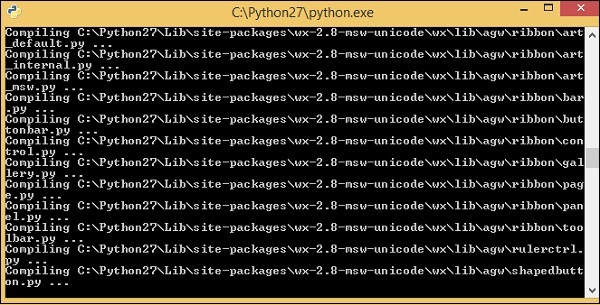
wxPython is now installed.This module is required for the RIDE Ide to be used for Robot Framework which is the next step.
On Linux, you should be able to install wxPython with your package manager. For example, on Debian based systems such as Ubuntu running sudo apt-get install pythonwxgtk2.8 ought to be enough.
On OS X
, you should use wxPython binaries found from the wxPython download page. wxPython2.8 only has 32 bit build available, so Python must be run in 32-bit mode also. This can be done globally by running> defaults write com.apple.versioner.python Prefer-32-Bit -bool yes
or, just for the RIDE execution −
> VERSIONER_PYTHON_PREFER_32_BIT=yes ride.py
Install Ride
Ride is Robot Framework IDE. We can use pip to install it as shown below.
Command
pip install robotframework-ride
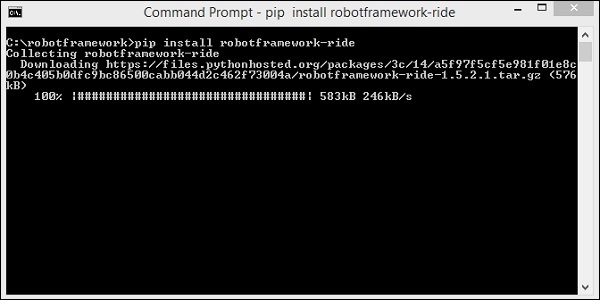
Once the installation is done, open the command prompt and type the following command to open the Ride-IDE.
Command
ride.py
The above command opens the IDE as follows −
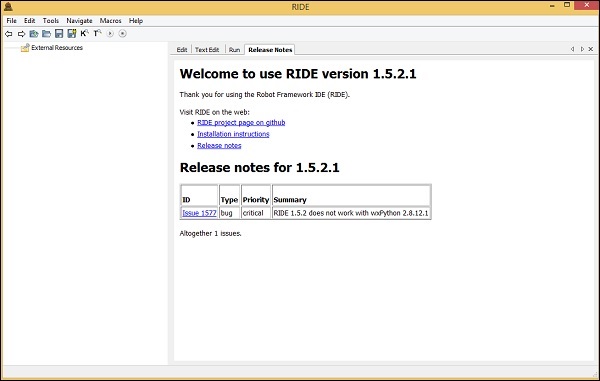
So we are done with the installation of Robot Framework and can get started working with it.
Conclusion
We now know how to install python, pip, robot framework and also get RIDE installed to work with test cases in robot framework.
