- Robot Framework - Home
- Robot Framework - Overview
- Environment Setup
- Unix and Linux Installation
- Introduction to Ride
- First Test Case Using Ride
- Writing and Executing Test Cases
- Keyword and Data Driven Test Cases
- Working With Browsers Using Selenium Library
- Working With Textbox
- Working With Radio Button
- Working With Checkbox
- Working With Dropdown
- Working With Keywords
- Working With Variables
- Working With Command Line
- Working With Setup And Teardown
- Working with Built-In Library
- Working With External Database libraries
- Testing Login Page Using Robot Framework
- Robot Framework Useful Resources
- Robot Framework - Quick Guide
- Robot Framework - Useful Resources
- Robot Framework - Discussion
Working With Command Line
In this chapter, we will learn how to make use of the command line to run test cases.
To begin with, let us open the command prompt and go to the folder where your test cases are saved. We have created test cases and saved in the folder robotframework in C Drive.
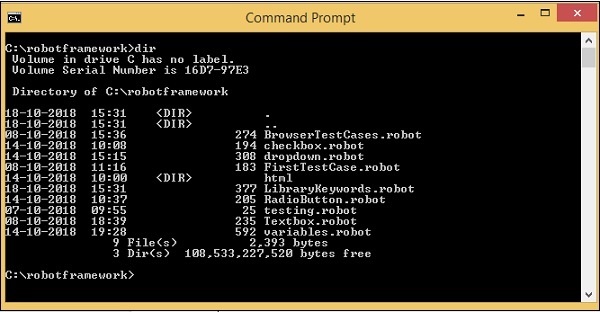
Test cases created so far are available in the folder C:\robotframework.
If you have saved your project as a file, the command is −
robot -T nameoftestcase.robot
If you have saved your project as a directory, the command is −
robot -T projectname testsuite
We will run one of the test created from the folder as shown below −
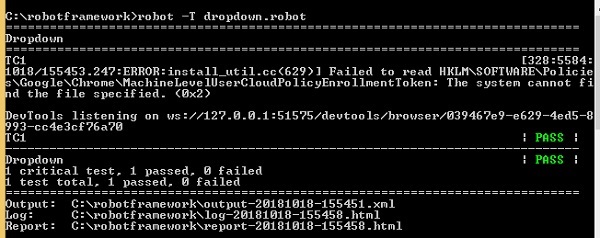
The output, log and report paths are displayed at the end as shown above.
The following screenshot shows the execution details −

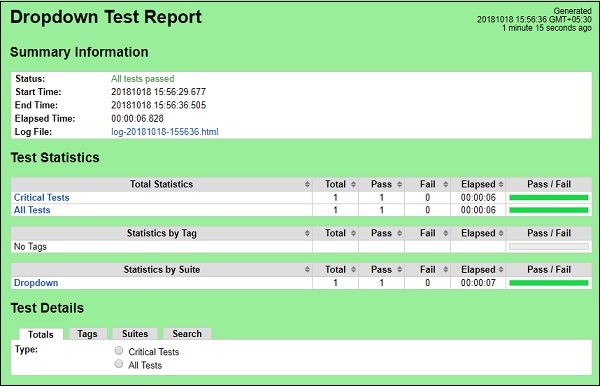
Report
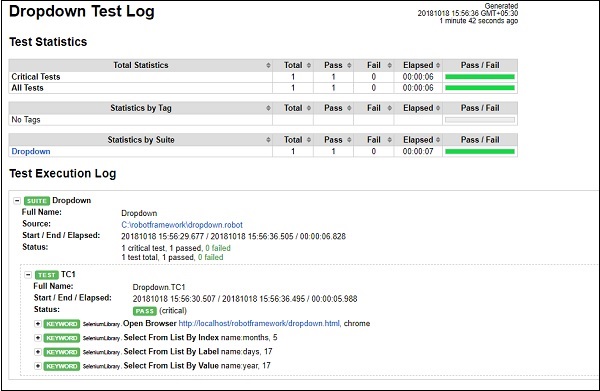
Log
Conclusion
We can use command line to execute robot test cases. The details of the test case pass or fail are displayed in the command line along with log and report URLs.
