- Postman - Home
- Postman - Introduction
- Postman - Environment Setup
- Postman - Environment Variables
- Postman - Authorization
- Postman - Workflows
- Postman - GET Requests
- Postman - POST Requests
- Postman - PUT Requests
- Postman - DELETE Requests
- Postman - Create Tests for CRUD
- Postman - Create Collections
- Postman - Parameterize Requests
- Postman - Collection Runner
- Postman - Assertion
- Postman - Mock Server
- Postman - Cookies
- Postman - Sessions
- Postman - Newman Overview
- Postman - Run Collections using Newman
- Postman - OAuth 2.0 Authorization
- Postman Useful Resources
- Postman - Quick Guide
- Postman - Useful Resources
- Postman - Discussion
Postman - Create Collections
A group of requests that have been saved and organized into folders is known as the Collections. It is similar to a repository. Thus, Collections help to maintain the API tests and also split them easily with teams.
Create a New Collection
Follow the steps given below to create a new collection in Postman −
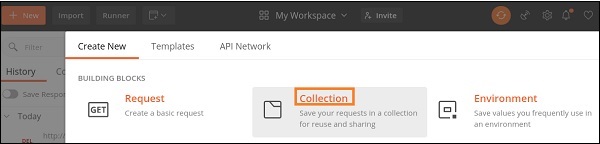
Step 1 − Click on the New icon from the Postman application. The Create New pop-up comes up. Then click on the Collection link.
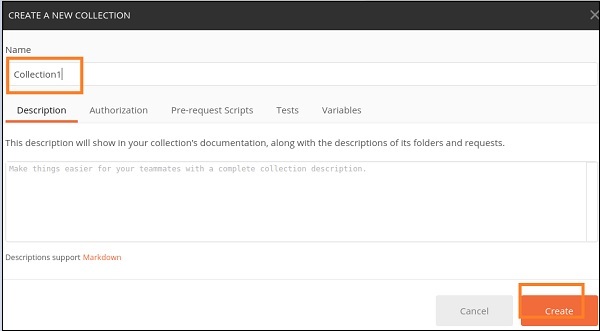
Step 2 − CREATE A NEW COLLECTION pop-up comes up. Enter a Collection Name and click on the Create button.
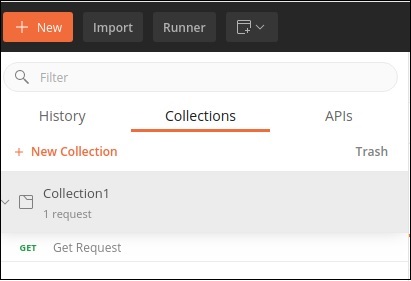
Step 3 − The Collection name and the number of requests it contains are displayed in the sidebar under the Collections tab.
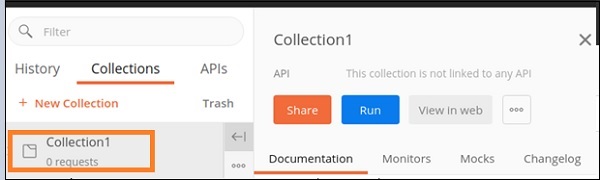
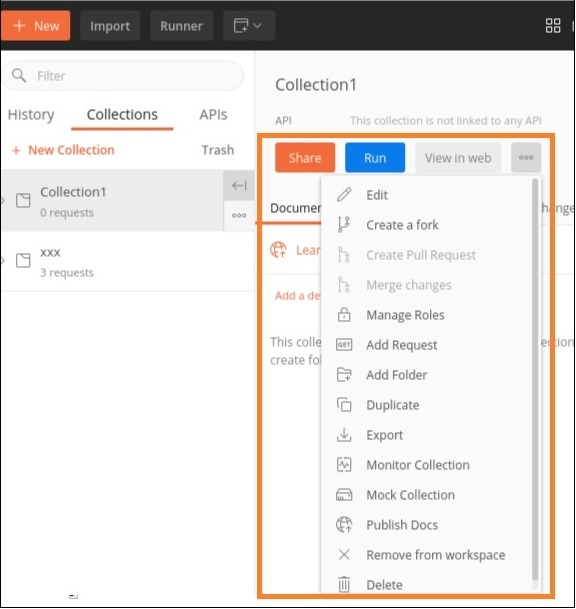
Step 4 − To the right of the Collection name, we have the options like Share, Run and so on available. Click on the three dots to get more options to select.
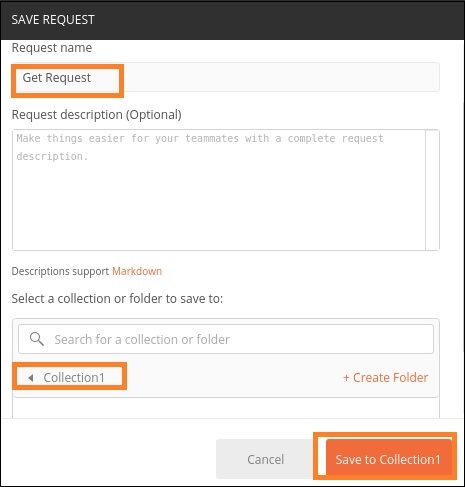
Step 5 − Click on Add Request. The SAVE REQUEST pop−up comes up. Enter Request Name and select the Collection we have created. Then, click on the Save to Collection1 button.
Step 6 − The Collection with its request gets displayed to the side bar under the Collections tab.