- Pinterest Marketing - Home
- Digital Marketing - Introduction
- Pinterest Marketing - Basics
- Pinterest - Account Settings
- Pinterest Marketing - Interface
- Pinterest Marketing - Pinning
- Pinterest - Pinnable Images
- Pinterest Marketing - Rich Pins
- Pinterest Marketing - Promote Pins
- Pinterest Marketing - Promoted Pins
- Pinterest Marketing - Tracking Traffic
- Planning a Campaign
- Pinterest Marketing - Drive Traffic
- Generate Customer Loyality
Pinterest Marketing - Promote Your Pins
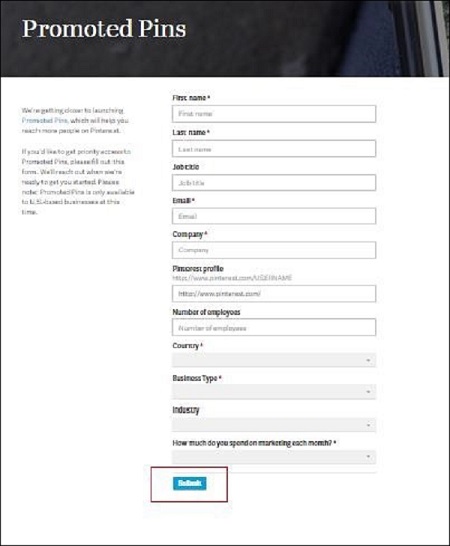
In order to promote your pins on Pinterest, you need to join the waitlist.
Step 1 − Visit the site − https://ads.pinterest.com/. Click on Join wait list.
Step 2 − You are redirected to this page − https://business.pinterest.com/en/promoted-pins-waitlist
Step 3 − Enter the necessary information. Wait for Pinterest verification.
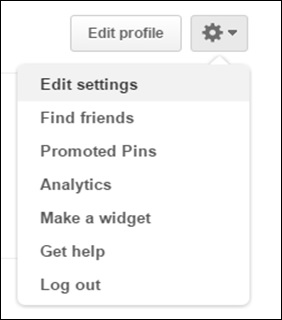
Step 4 − After you receive permission for promotion, go to your Pinterest profile.
Step 5 − Click on Settings button next to the Edit Profile button. See the promoted pins in the drop-down menu.
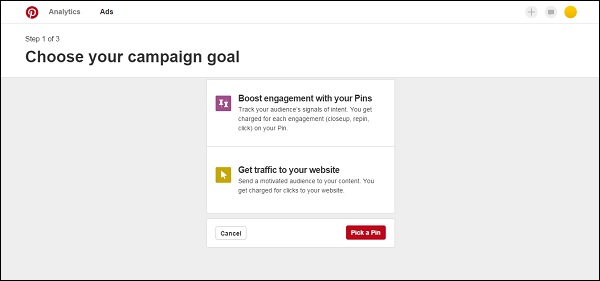
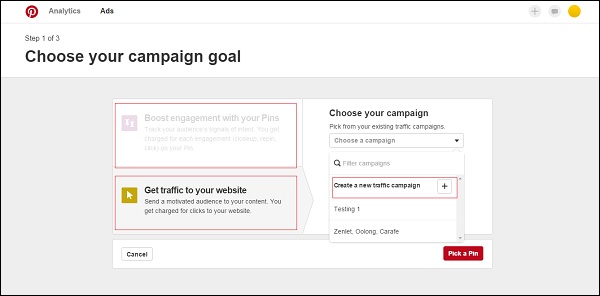
Step 6 − Click on Promote button. Pinterest offers you two choices −
- Boost Engagement
- Get Traffic
Step 7 − Choose "Get Traffic to Your Website" to get maximum benefit from your promoted pin ad campaign.
Step 8 − Select the option Create a new traffic campaign from the dropdown menu.
Step 9 − Enter a name for your campaign. Decide on what date or dates you want your promoted pin to be seen.
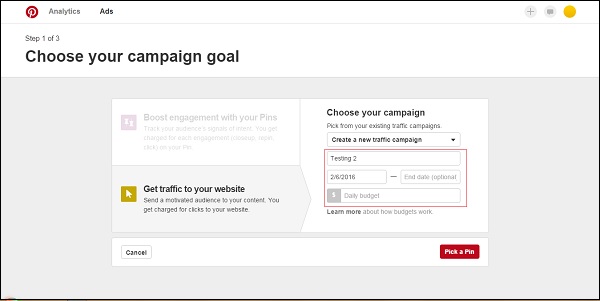
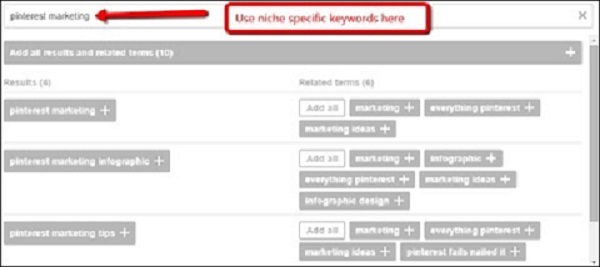
Step 10 − Enter your budget. Click on Pick a Pin. The next step is to use keywords to inform Pinterest where you would like it to be seen.
Step 11 − Determine the Cost Per Click.

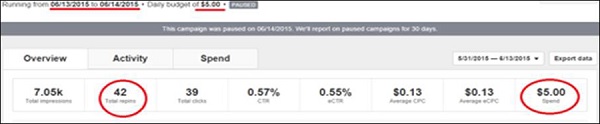
Step 12 − Review the campaign results.