- Kibana - Home
- Kibana - Overview
- Kibana - Environment Setup
- Kibana - Introduction To Elk Stack
- Kibana - Loading Sample Data
- Kibana - Management
- Kibana - Discover
- Kibana - Aggregation And Metrics
- Kibana - Create Visualization
- Kibana - Working With Charts
- Kibana - Working With Graphs
- Kibana - Working With Heat Map
- Working With Coordinate Map
- Kibana - Working With Region Map
- Working With Guage And Goal
- Kibana - Working With Canvas
- Kibana - Create Dashboard
- Kibana - Timelion
- Kibana - Dev Tools
- Kibana - Monitoring
- Creating Reports Using Kibana
- Kibana Useful Resources
- Kibana - Quick Guide
- Kibana - Useful Resources
- Kibana - Discussion
Kibana - Loading Sample Data
We have seen how to upload data from logstash to elasticsearch. We will upload data using logstash and elasticsearch here. But about the data that has date, longitude and latitudefields which we need to use, we will learn in the upcoming chapters. We will also see how to upload data directly in Kibana, if we do not have a CSV file.
In this chapter, we will cover following topics −
- Using Logstash upload data having date, longitude and latitude fields in Elasticsearch
- Using Dev tools to upload bulk data
Using Logstash upload for data having fields in Elasticsearch
We are going to use data in the form of CSV format and the same is taken from Kaggle.com which deals with data that you can use for an analysis.
The data home medical visits to be used here is picked up from site Kaggle.com.
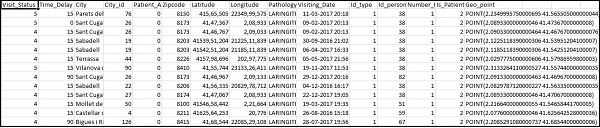
The following are the fields available for the CSV file −
["Visit_Status","Time_Delay","City","City_id","Patient_Age","Zipcode","Latitude","Longitude",
"Pathology","Visiting_Date","Id_type","Id_personal","Number_Home_Visits","Is_Patient_Minor","Geo_point"]
The Home_visits.csv is as follows −
The following is the conf file to be used with logstash −
input {
   file {
      path => "C:/kibanaproject/home_visits.csv"
      start_position => "beginning"
      sincedb_path => "NUL"
   }
}
filter {
   csv {
      separator => ","
      columns =>
      ["Visit_Status","Time_Delay","City","City_id","Patient_Age",
      "Zipcode","Latitude","Longitude","Pathology","Visiting_Date",
      "Id_type","Id_personal","Number_Home_Visits","Is_Patient_Minor","Geo_point"]
   }
   date {
      match => ["Visiting_Date","dd-MM-YYYY HH:mm"]
      target => "Visiting_Date"
   }
   mutate {convert => ["Number_Home_Visits", "integer"]}
   mutate {convert => ["City_id", "integer"]}
   mutate {convert => ["Id_personal", "integer"]}
   mutate {convert => ["Id_type", "integer"]}
   mutate {convert => ["Zipcode", "integer"]}
   mutate {convert => ["Patient_Age", "integer"]}
   mutate {
      convert => { "Longitude" => "float" }
      convert => { "Latitude" => "float" }
   }
   mutate {
      rename => {
         "Longitude" => "[location][lon]"
         "Latitude" => "[location][lat]"
      }
   }
}
output {
   elasticsearch {
      hosts => ["localhost:9200"]
      index => "medicalvisits-%{+dd.MM.YYYY}"
   }
   stdout {codec => json_lines }
}
By default, logstash considers everything to be uploaded in elasticsearch as string. Incase your CSV file has date field you need to do following to get the date format.
For date field −
date {
   match => ["Visiting_Date","dd-MM-YYYY HH:mm"]
   target => "Visiting_Date"
}
In-case of geo location, elasticsearch understands the same as −
"location": {
   "lat":41.565505000000044,
   "lon": 2.2349995750000695
}
So we need to make sure we have Longitude and Latitude in the format elasticsearch needs it. So first we need to convert longitude and latitude to float and later rename it so that it is available as part of location json object with lat and lon. The code for the same is shown here −
mutate {
      convert => { "Longitude" => "float" }
      convert => { "Latitude" => "float" }
   }
mutate {
   rename => {
      "Longitude" => "[location][lon]"
      "Latitude" => "[location][lat]"
   }
}
For converting fields to integers, use the following code −
mutate {convert => ["Number_Home_Visits", "integer"]}
mutate {convert => ["City_id", "integer"]}
mutate {convert => ["Id_personal", "integer"]}
mutate {convert => ["Id_type", "integer"]}
mutate {convert => ["Zipcode", "integer"]}
mutate {convert => ["Patient_Age", "integer"]}
Once the fields are taken care, run the following command to upload the data in elasticsearch −
- Go inside Logstash bin directory and run the following command.
logstash -f logstash_homevisists.conf
- Once done you should see the index mentioned in logstash conf file in elasticsearch as shown below −
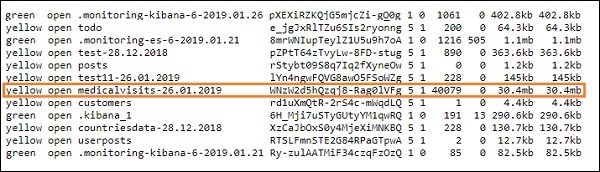
We can now create index pattern on above index uploaded and use it further for creating visualization.
Using Dev Tools to Upload Bulk Data
We are going to use Dev Tools from Kibana UI. Dev Tools is helpful to upload data in Elasticsearch, without using Logstash. We can post, put, delete, search the data we want in Kibana using Dev Tools.
In this section, we will try to load sample data in Kibana itself. We can use it to practice with the sample data and play around with Kibana features to get a good understanding of Kibana.
Let us take the json data from the following url and upload the same in Kibana. Similarly, you can try any sample json data to be loaded inside Kibana.
Before we start to upload the sample data, we need to have the json data with indices to be used in elasticsearch. When we upload it using logstash, logstash takes care to add the indices and the user does not have to bother about the indices which are required by elasticsearch.
Normal Json Data
[
   {"type":"act","line_id":1,"play_name":"Henry IV",

   "speech_number":"","line_number":"","speaker":"","text_entry":"ACT I"},
   {"type":"scene","line_id":2,"play_name":"Henry IV",
   "speech_number":"","line_number":"","speaker":"","text_entry":"SCENE I.London. The palace."},
   {"type":"line","line_id":3,"play_name":"Henry IV",
   "speech_number":"","line_number":"","speaker":"","text_entry":
   "Enter KING HENRY, LORD JOHN OF LANCASTER, the
   EARL of WESTMORELAND, SIR WALTER BLUNT, and others"}
]
The json code to used with Kibana has to be with indexed as follows −
{"index":{"_index":"shakespeare","_id":0}}
{"type":"act","line_id":1,"play_name":"Henry IV",
"speech_number":"","line_number":"","speaker":"","text_entry":"ACT I"}
{"index":{"_index":"shakespeare","_id":1}}
{"type":"scene","line_id":2,"play_name":"Henry IV",
"speech_number":"","line_number":"","speaker":"",
"text_entry":"SCENE I. London. The palace."}
{"index":{"_index":"shakespeare","_id":2}}
{"type":"line","line_id":3,"play_name":"Henry IV",
"speech_number":"","line_number":"","speaker":"","text_entry":
"Enter KING HENRY, LORD JOHN OF LANCASTER, the EARL
of WESTMORELAND, SIR WALTER BLUNT, and others"}
Note that there is an additional data that goes in the jsonfile −{"index":{"_index":"nameofindex","_id":key}}.
To convert any sample json file compatible with elasticsearch, here we have a small code in php which will output the json file given to the format which elasticsearch wants −
PHP Code
<?php
   $myfile = fopen("todo.json", "r") or die("Unable to open file!"); // your json
   file here
   $alldata = fread($myfile,filesize("todo.json"));
   fclose($myfile);
   $farray = json_decode($alldata);
   $afinalarray = [];
   $index_name = "todo";
   $i=0;
   $myfile1 = fopen("todonewfile.json", "w") or die("Unable to open file!"); //
   writes a new file to be used in kibana dev tool
   foreach ($farray as $a => $value) {
      $_index = json_decode('{"index": {"_index": "'.$index_name.'", "_id": "'.$i.'"}}');
      fwrite($myfile1, json_encode($_index));
      fwrite($myfile1, "\n");
      fwrite($myfile1, json_encode($value));
      fwrite($myfile1, "\n");
      $i++;
   }
?>
We have taken the todo json file from https://jsonplaceholder.typicode.com/todos and use php code to convert to the format we need to upload in Kibana.
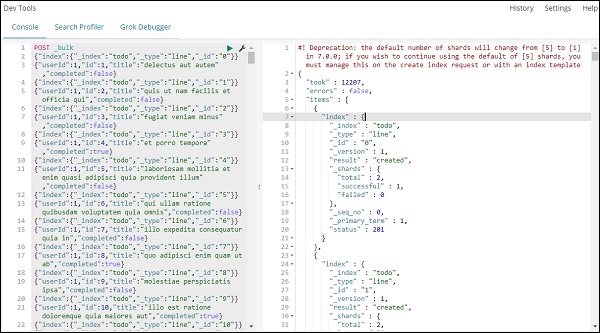
To load the sample data, open the dev tools tab as shown below −
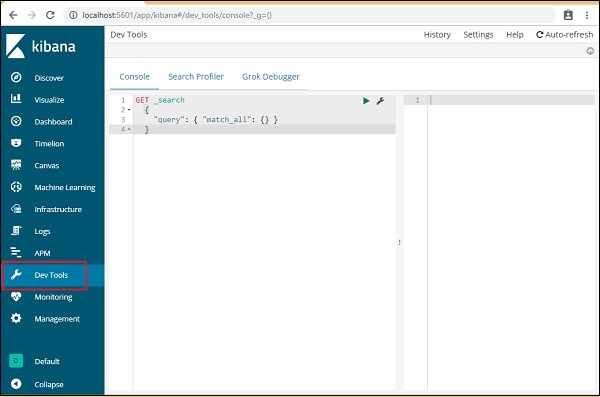
We are now going to use the console as shown above. We will take the json data which we got after running it through php code.
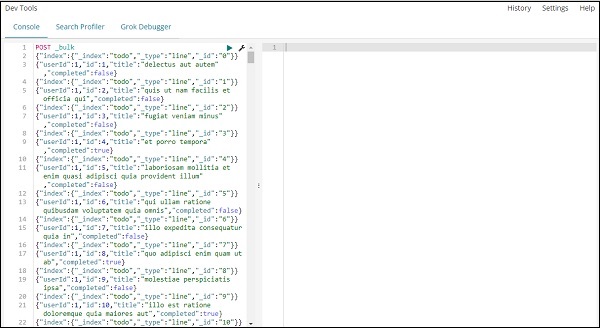
The command to be used in dev tools to upload the json data is −
POST _bulk
Note that the name of the index we are creating is todo.
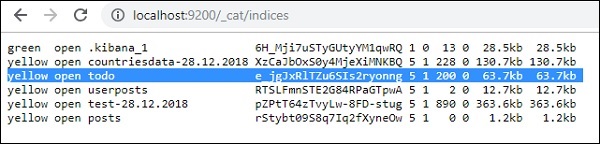
Once you click the green button the data is uploaded, you can check if the index is created or not in elasticsearch as follows −
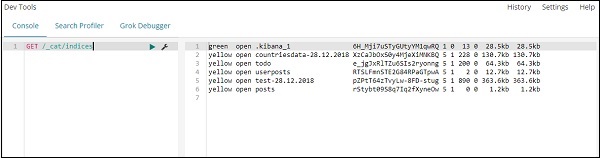
You can check the same in dev tools itself as follows −
Command −
GET /_cat/indices
If you want to search something in your index:todo , you can do that as shown below −
Command in dev tool
GET /todo/_search
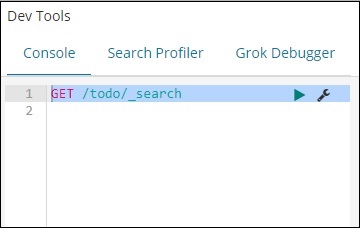
The output of the above search is as shown below −
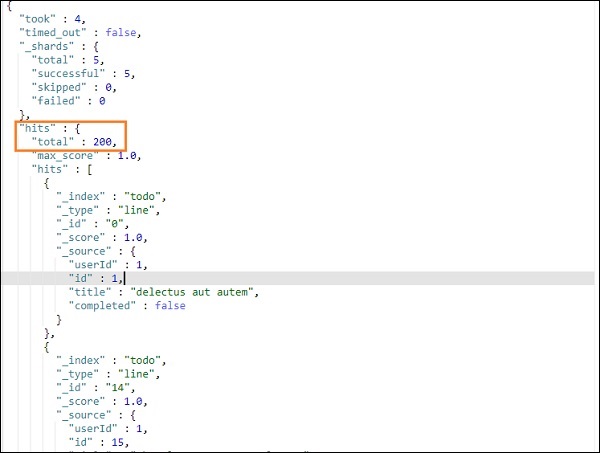
It gives all the records present in the todoindex. The total records we are getting is 200.
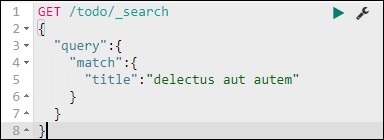
Search for a Record in todo Index
We can do that using the following command −
GET /todo/_search
{
   "query":{
      "match":{
         "title":"delectusautautem"
      }
   }
}
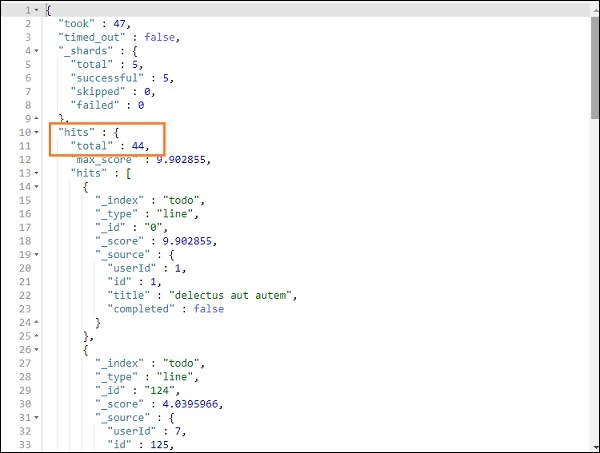
We are able to fetch the records which match with the title we have given.
