- Intellij Idea - Home
- Intellij Idea - Introduction
- Installation and Configuration
- Intellij Idea − Getting Familiar
- Create First Java Project
- Intellij Idea − Deep Dive
- Intellij Idea − Deep Dive into Editor
- Intellij Idea − Code Refactoring
- Intellij Idea − Running Projects
- Intellij Idea − Build Tools
- Intellij Idea − Unit Testing
- Intellij Idea − Debugging
- Intellij Idea − Profiling
- Intellij Idea − Version Control
- Intellij Idea − Databases
- Migrating from NetBeans
- Intellij Idea − Migrating from Eclipse
Intellij Idea - Version Control
IntelliJ supports various version control systems like Git, Subversion, Mercurial, CVS, GitHub and TFS. You can perform version control related action from the IDE itself.
In this chapter, we will discuss Git and Subversion (hereafter referred to as SVN). We assume that the reader is familiar with Git and SVN tool and its terminology.
Git
In this section, we will learn how to work with Git.
Clone
To clone an existing Git repository −
Navigate to File->New->Project from Version Control->Git.
Enter the repository URL, Parent directory and Directory name.
Click on the clone button to continue.
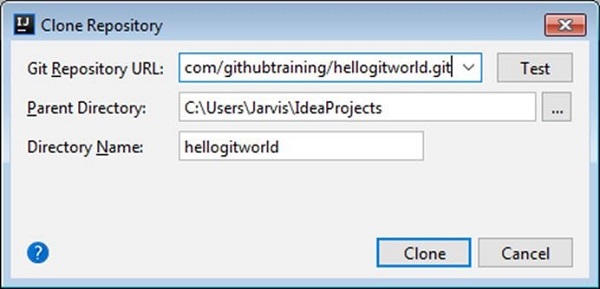
Upon successful running of the above steps, the repository will get cloned.
Track changes
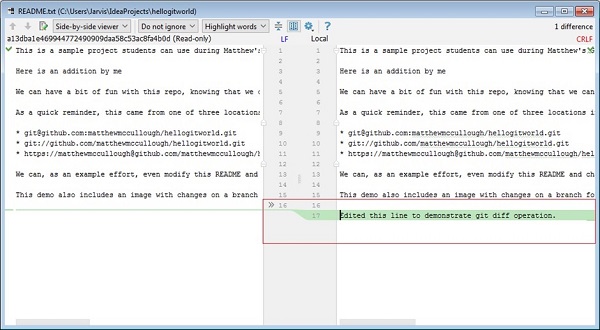
Git will track the changes that you make in repository. Let us modify any file from the repository and compare it with the repository.
Navigate to VCS → Git → Compare with Latest Repository Version.
The above step will open the diff window.
You can see there is a new line on the right side with green background colour.
Git shows it in green as we have added new contents. If we remove any contents then itll be shown in red colour
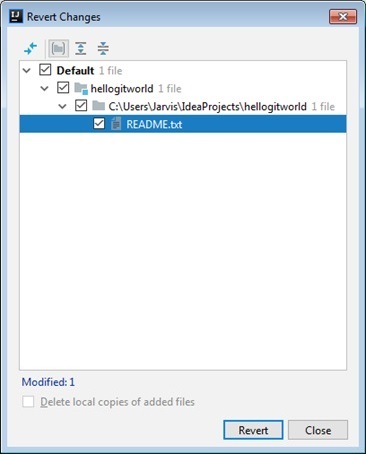
Revert local changes
Follow these steps to discard the local changes −
Navigate to the VCS → Git → Revert option.
It will ask for confirmation and remove your changes.
Add file to repository
To add file to repository navigate to VCS → Git → Add option. This action is similar to the git add action.
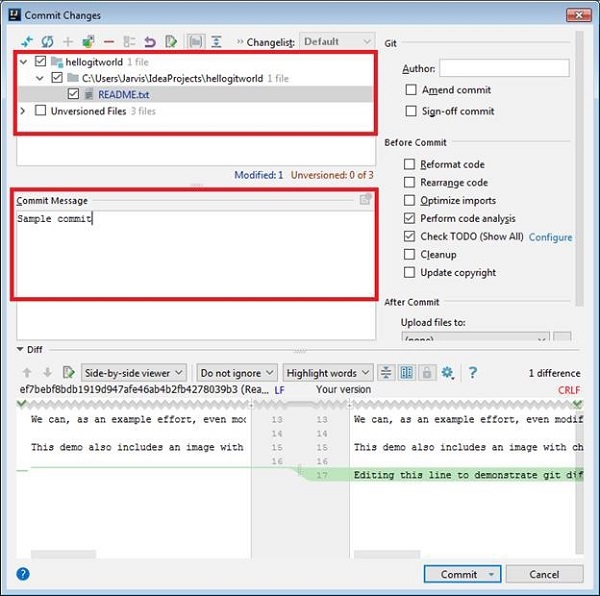
Commit changes
The Commit operation will create local commit. It is similar to the git commit action. To perform commit −
Navigate to the VCS → Git → Commit File option.
Select files to be committed.
Enter commit message and click on Commit button.
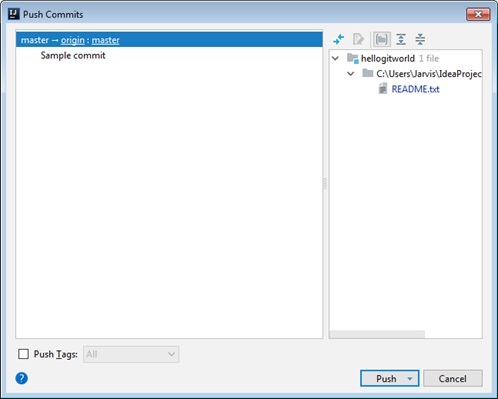
Push changes to the remote repository
The Push action will send local changes to the remote repository. To push changes −
Navigate to the VCS → Git → Push option.
A window will appear. Here, you can see the comitts to be pushed.
Verify commit and click on the Push button to publish your changes.
View history or logs
To show history, navigate to the VCS → Git → Show history option. This action is similar to the git log command. It will show history as follows −

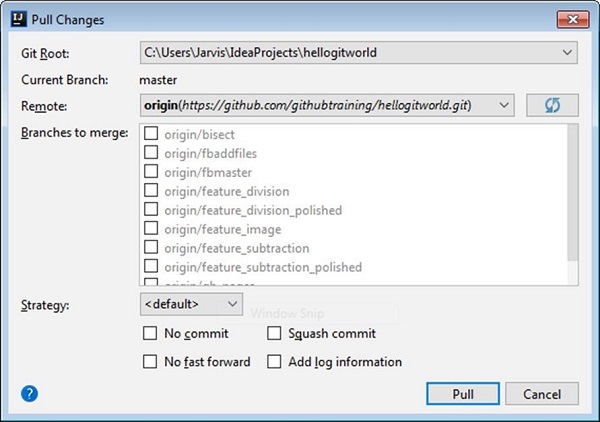
Get updates
Follow these steps to fetch updates from the repository −
Navigate to the VCS → Git → Pull option.
Select the option according to your requirements.
Click on the Pull button.
Add existing project to Git
To add existing project under Git −
Navigate to VCS → Import into Version Control → Create Git repository.
Select project by browsing directory.
Click on the OK button.

Subversion
In this section, we will understand how Subversion works in IntelliJ. Let us consider a few important actions to understand this.
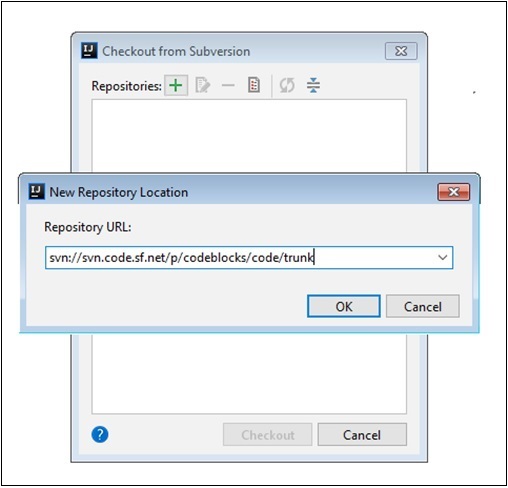
Checkout
To checkout SVN repository −
Navigate to File → New → Project from Version Control → Subversion.
Enter repository URL.
Click on the OK button.
Track changes
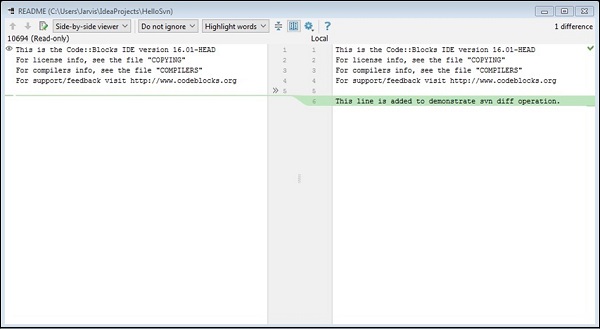
SVN will track changes you made in the repository. Let us modify any file from repository and compare it with repository −
Navigate to VCS->Subversion->Compare with Latest Repository Version
You can see there is new line on right side with green background colour.
SVN shows it in with green background to indicated the addition of new content. If we remove any content then it will be shown in red colour.
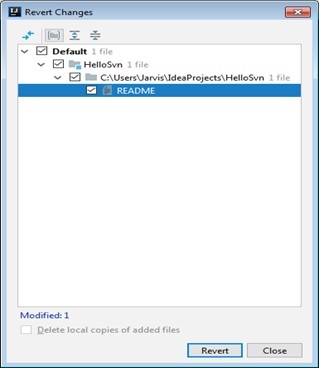
Revert local changes
Follow these steps to revert the local changes you have made −
Navigate to the VCS → Subversion → Revert option.
It will ask for confirmation and remove your changes.
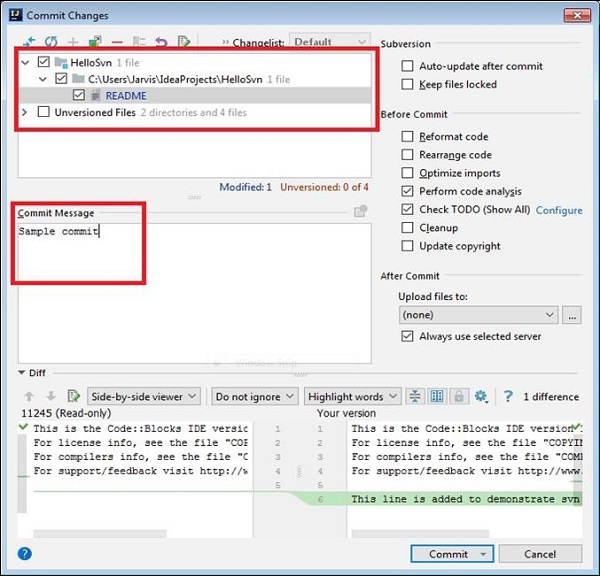
Commit changes to remote repository
Follow these steps to commit changes in the remote repository −
Navigate to VCS → Subversion → Commit Files option.
A new window will appear. Here, you can see the files to be committed to remote respository.
Verify the files and click on the Commit button to publish your changes.
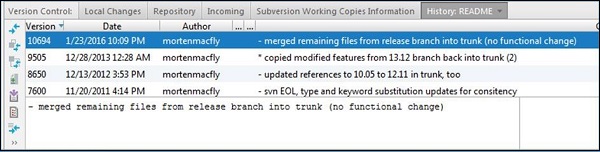
View history or logs
To show history, navigate to the VCS → Subverion → Show history option. This option is similar to the svn log command. It will show history as follows −
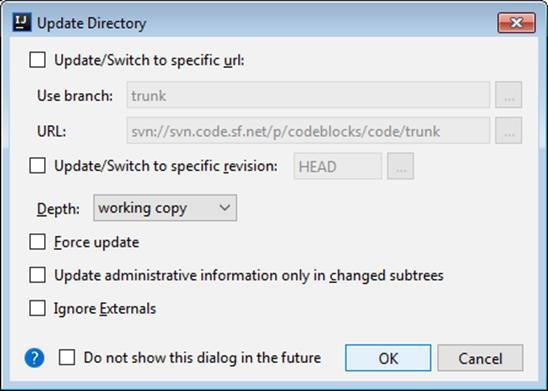
Update operation
To fetch latest changes navigate to VCS → Subversion → Update File/Update Folder option.
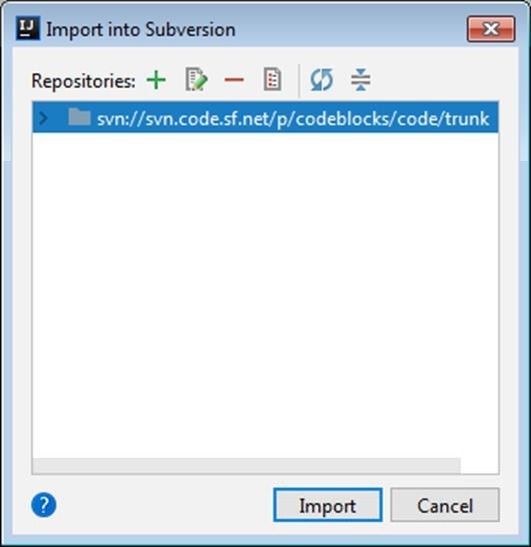
Add existing project to Subversion
Follow these steps to add existing project under SVN −
Navigate to VCS → Import into Version Control → Import into Subverion.
Enter the repository URL and click on the Import button −